Is your computer slowing you down?
If so, it may be costing you money.
In the last decade, I’ve been working exclusively from a laptop. It was the only option, since I was traveling a lot. However, at home – where I spend most of my time these days – that setup makes very little sense.
The laptop’s screen is too damn small, so I have to scroll, zoom, and manage windows more than I should. The keyboard is average at best, so I make too many typing errors. And because the CPU isn’t fast enough to handle everything I throw at it, it gets really frustrating sometimes.
In short: I could use a new machine.
So I had this idea:
Why not build myself the best computer for working from home? The reasoning was simple: every small increase in productivity would directly result in higher revenue. Every 1% bump in work output would be worth a fortune over the long run. This alone justifies the cost.
I concluded it would be foolish not to do it.
So I set out on a quest, and learned more than I ever wanted to learn about keyboard switches, the human eye lens, and VRM phases.
Well, here’s the result.
Update: Ever since the original computer I had built, I have built another computer for my home. I use it as an alternative machine to work from in case the first one breaks (so that I can keep working while the other one is getting fixed). I also sync the folders across the two computers, for emergency backup. I also placed the second one near the living room, so that I can work in front of the ocean whenever I feel like :)
Best Productivity Machine
My personal computer-uses are basic. I edit big text files, I research with a trillion open browser tabs, and I work on my websites. Sometimes I’ll edit an image. But even if you’re a heavy user (like a programmer or a video editor), this guide will still point you to the right direction.
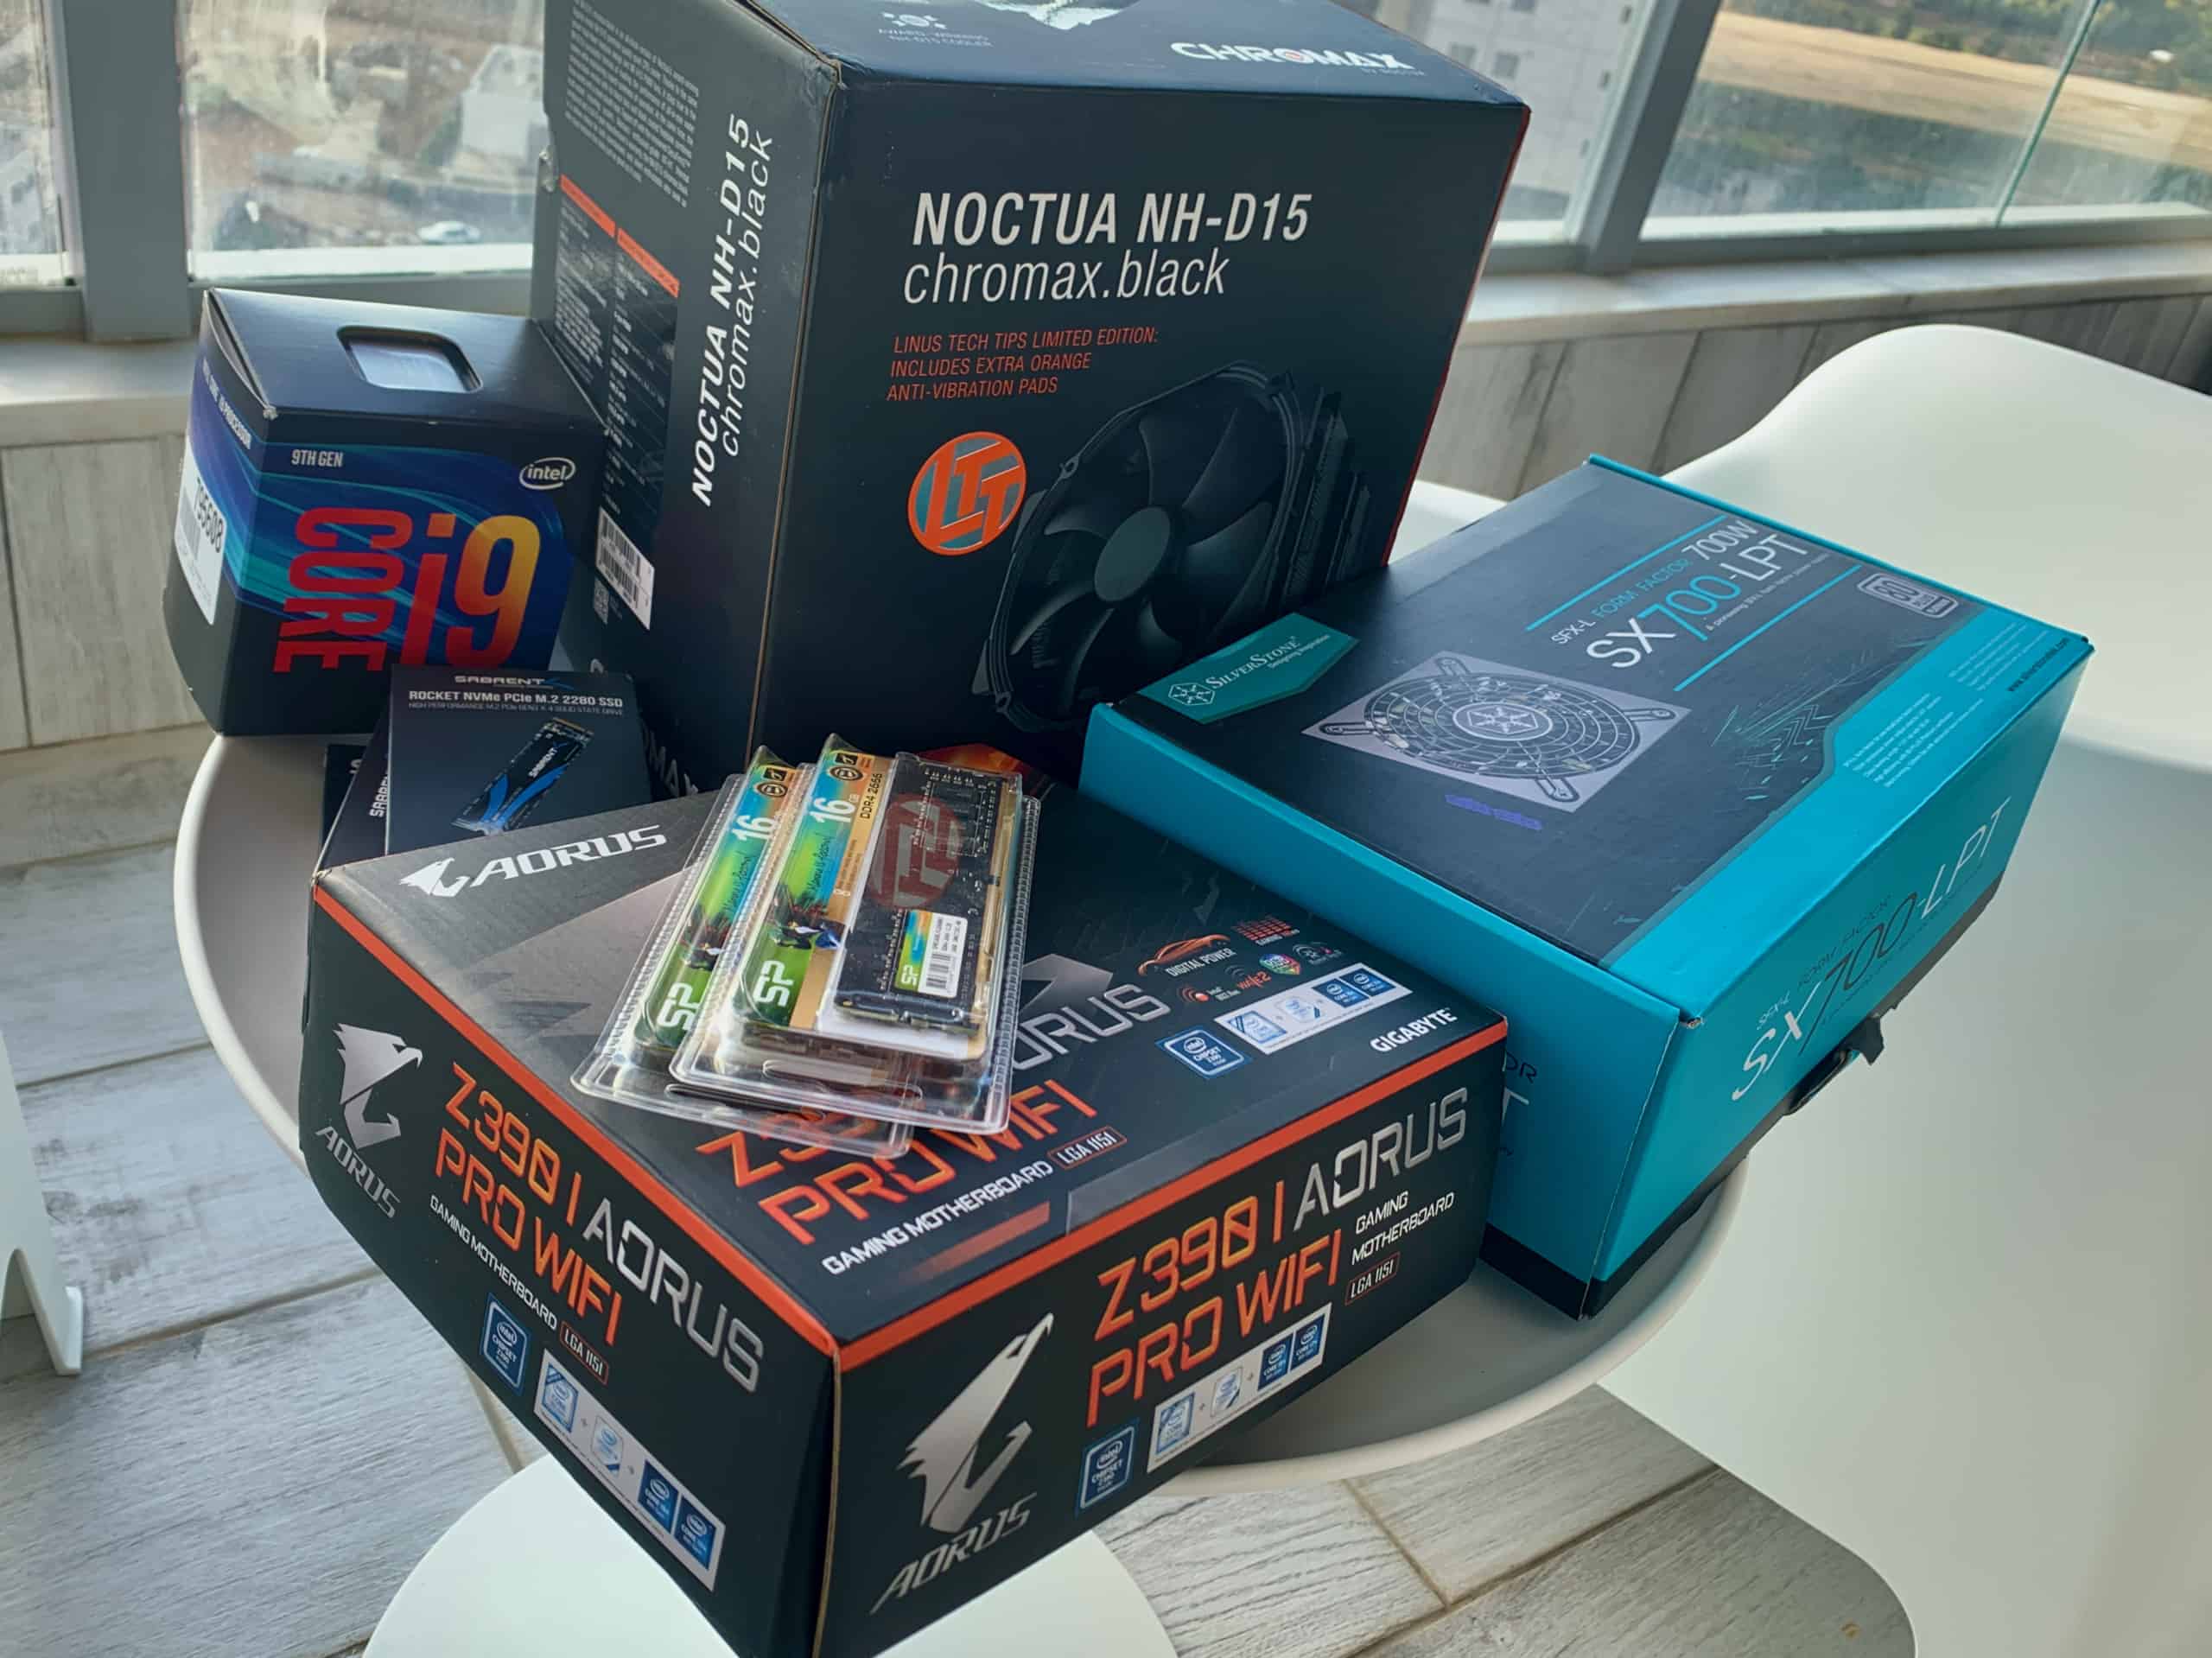
To build this computer, you’ll have to buy each component separately. This is for the original computer:
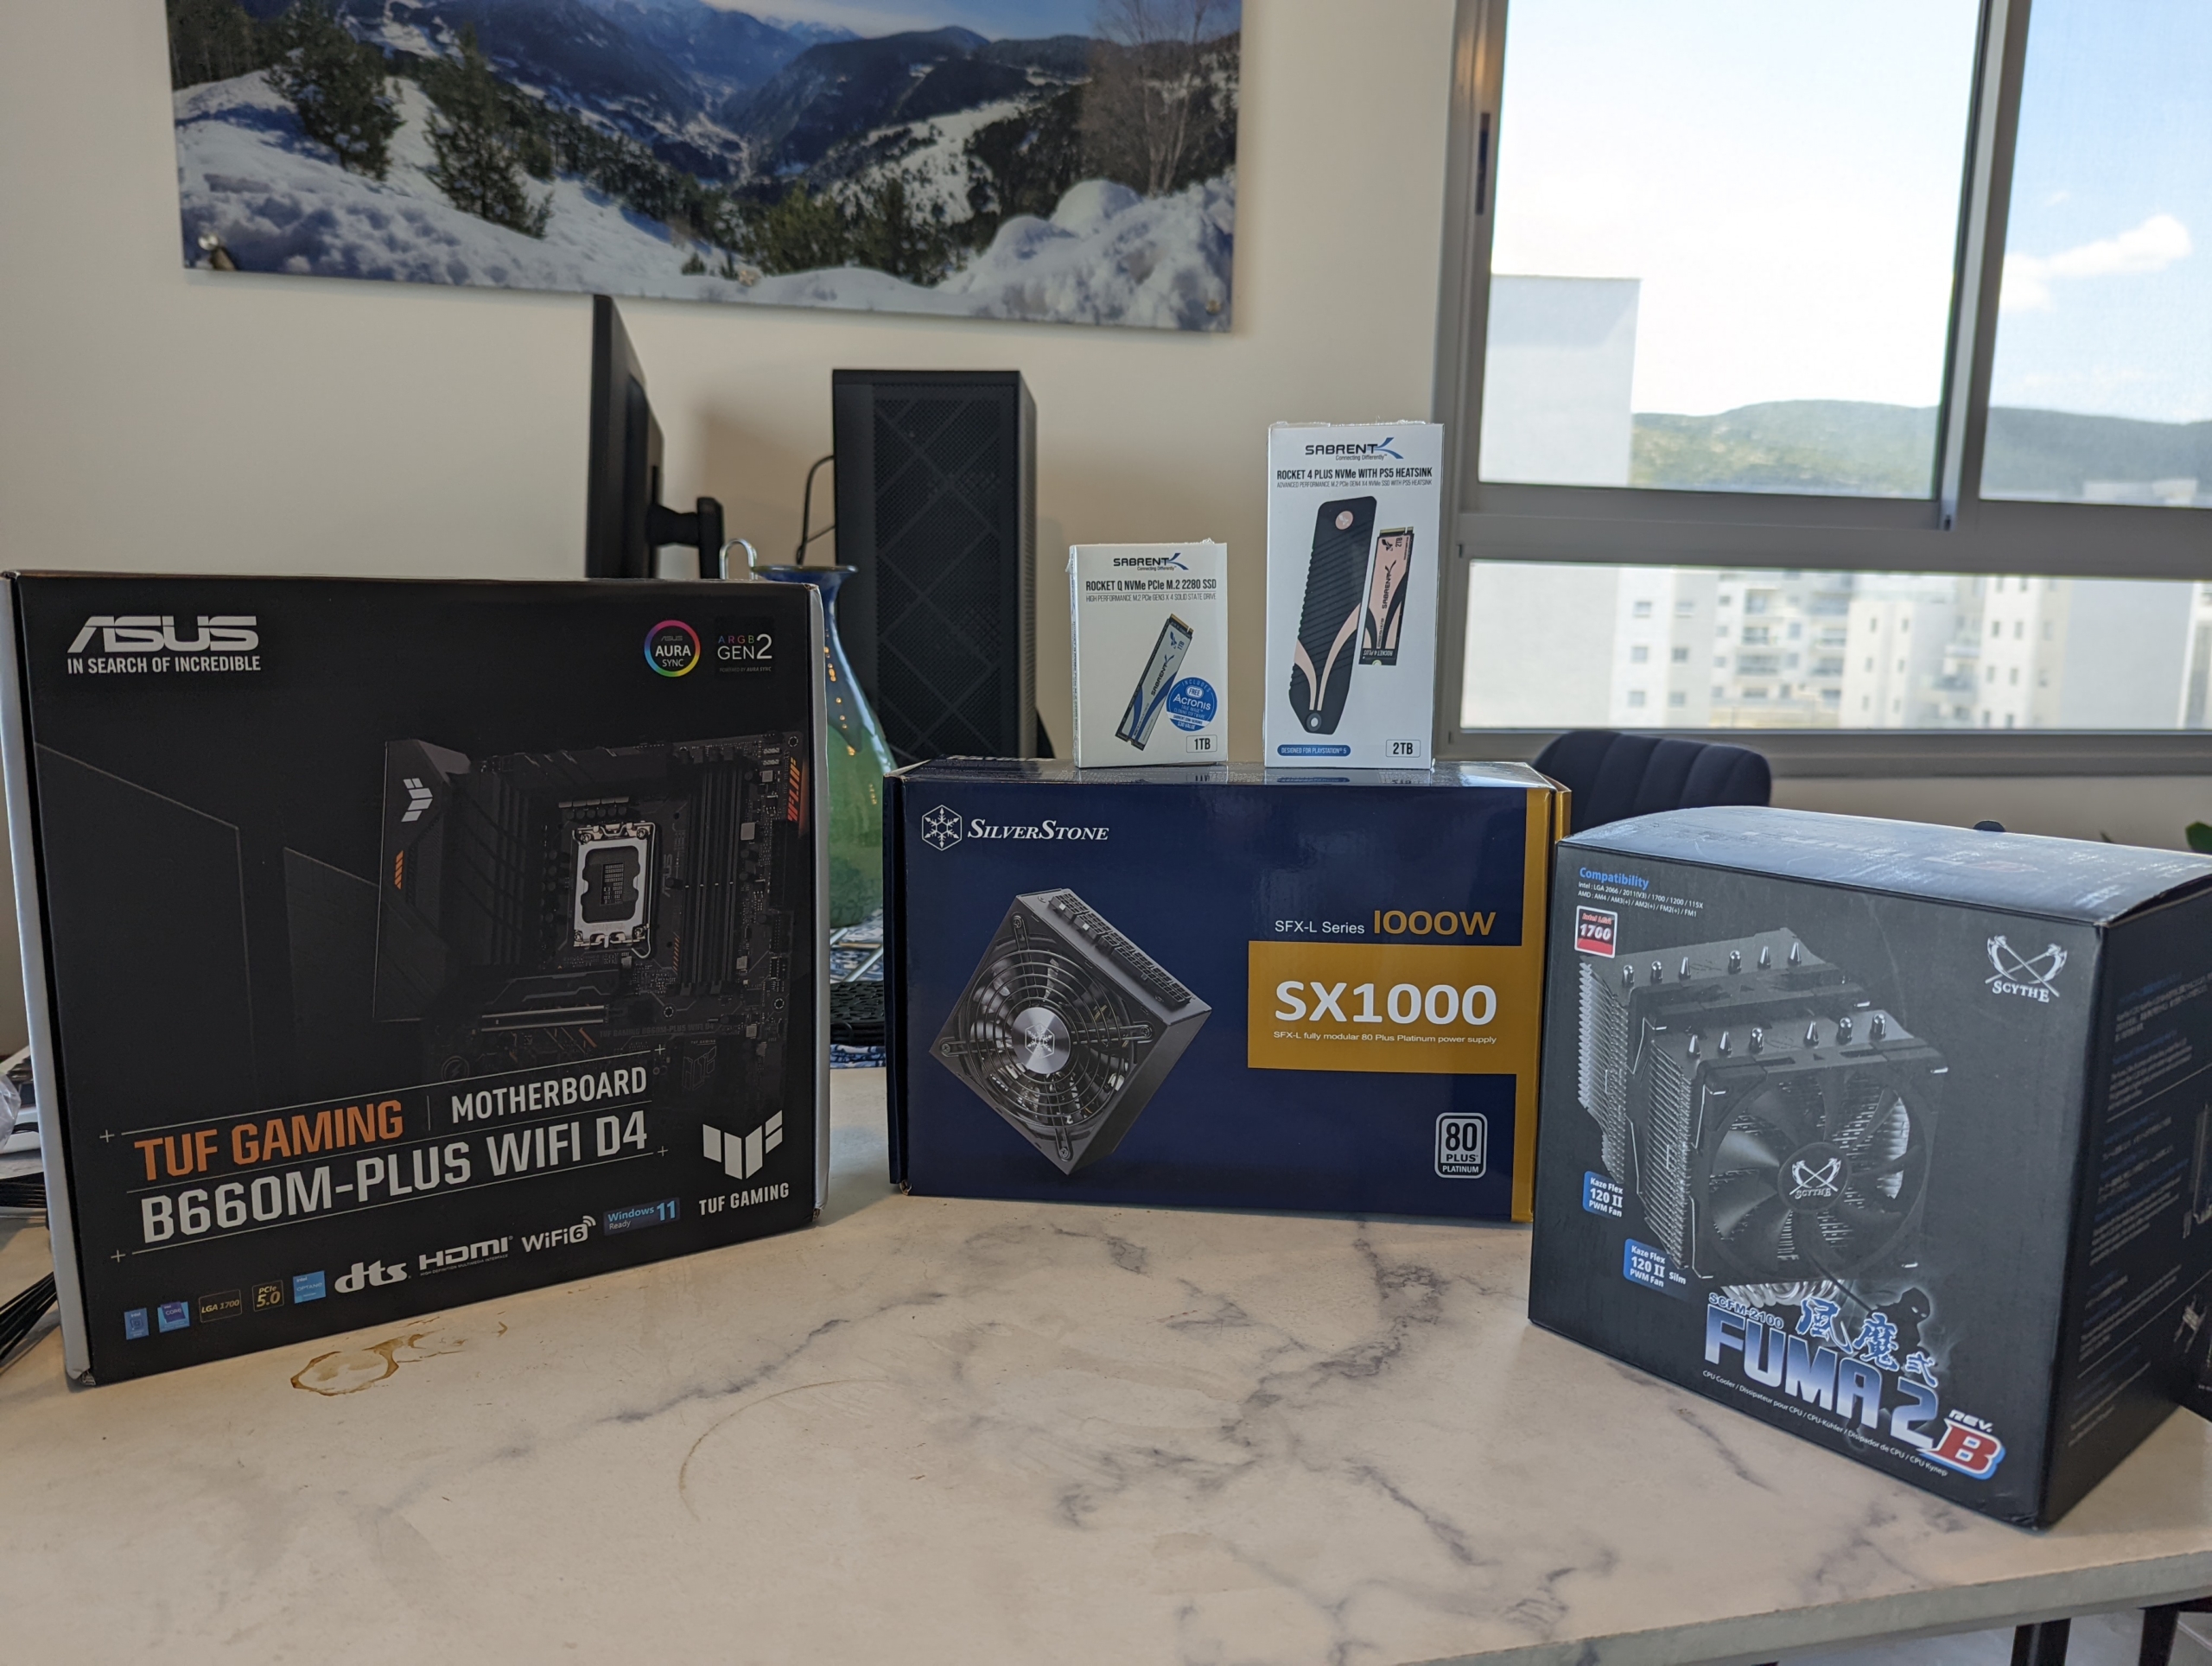
And then for the newer, alternative one:
You’ll then have to assemble it. If you don’t know how, pay a PC shop to do it. By the end, you’ll have yourself a killer productivity machine.
No more time wasting. Let’s begin.
The Monitor(s)
For productivity purposes, the monitor is the most important – and overlooked – component. To understand why, just take a look at Pfeiffer’s research, The 30-inch Apple Cinema HD Display Productivity Benchmark: Measuring the impact of screen size on real-world productivity.
Larger screen real estate will increase productivity, even in every-day tasks. As the paper says, “We instinctively feel more at ease with more screen space, just as we prefer to have a larger work table rather than a small one that forces us to move things around constantly.”
The Pfeiffer research tested tasks like formatting spreadsheets, editing text, manipulating images, and work involving two separate programs running simultaneously. Here are the major findings:
- Computer displays can contribute significantly to productivity, efficiency, and overall throughput. High-resolution displays can result in measurable productivity gains.
- There were productivity gains not only in digital imaging or design applications, but also in office apps like Word and Excel, as well as in the general personal productivity of the computing environment.
- With a larger display area you are likely to develop new productivity strategies that make best use of that display, in ways that you can’t easily imagine when working on a smaller display.
- Those small productivity gains, on frequently repeated operations, can result in a significant return on investment (ROI) over time.
When I work on my laptop, I lose a lot of time through my interactions with it. Constantly shuffling windows or zooming in and out – with a large display (in both size and resolution), you eliminate that hassle.
With a big, high-resolution monitor, you’ll be faster simply because you can see more information. If you write, you will see more of the text. If you edit an image on Photoshop, you will see more of the image. If you work on multiple documents or applications, you will be able to view them side by side. This provides a much smoother workflow.
Screen real estate is measured in resolution (pixels). But you need the right size to make use of that resolution. For example, I used to have a 27″ iMac with a massive 5K (5120 x 2880) resolution. But because with 5K the text looks tiny on a 27″, Mac OS scales the resolution to 2560×1440. In such a case, I’m no better off than simply using a 2560×1440 monitor.
My point: you need the right resolution and size.
Pixels per inch (PPI) will give you an indication of how big the text and other elements would be on a monitor. The lower the PPI, the larger it would be and the farther away you’d have to sit. The higher the PPI, the smaller (and sharper) things would look. At the normal desk distance, 90-110 PPI is a good range for readable text. For example, both a 21.5″ FHD and a 43″ 4K give you 103 PPI. Text would appear identical on both.
You can check the PPI of each resolution / screen size here.
As for me, I considered different setups, even vertical ones, an idea I got from software developers. Monitor aspect ratios are built to fit the format of movies or games, but vertical space is a lot more important for textual work. It allows for many more lines on the screen, it feels more natural to scroll, and because of the height, it’s more ergonomic for the neck:
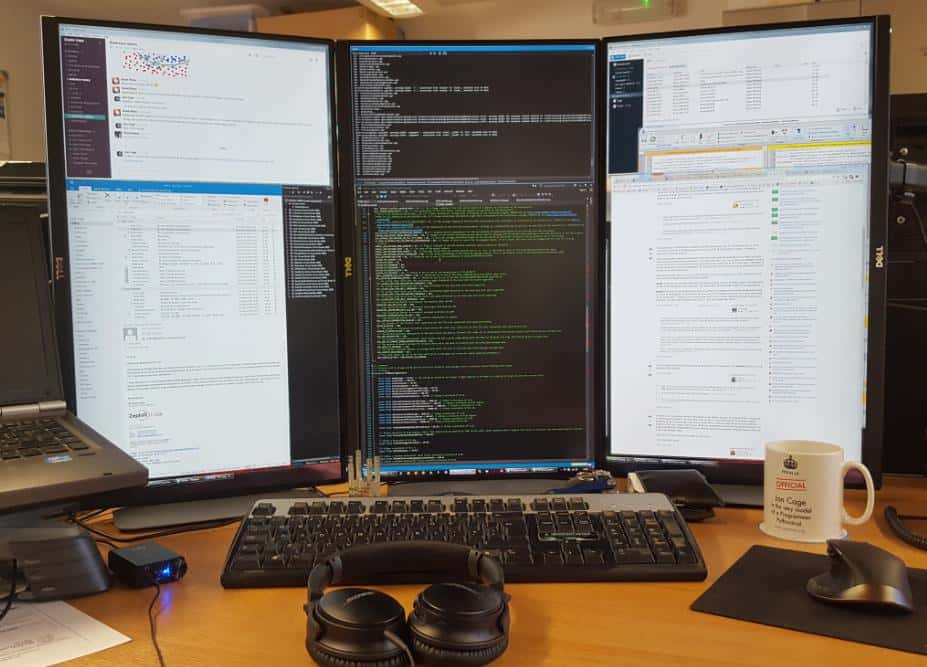
Alternatively, of course, you could just use one big monitor with a massive resolution (4K), and split your screen to achieve the same effect. 4K gives you even more vertical pixels (2160) than a ‘flipped’ FHD (1920).
Back to the setups I considered.
You would get into the 90-110 PPI range with any of these configurations:
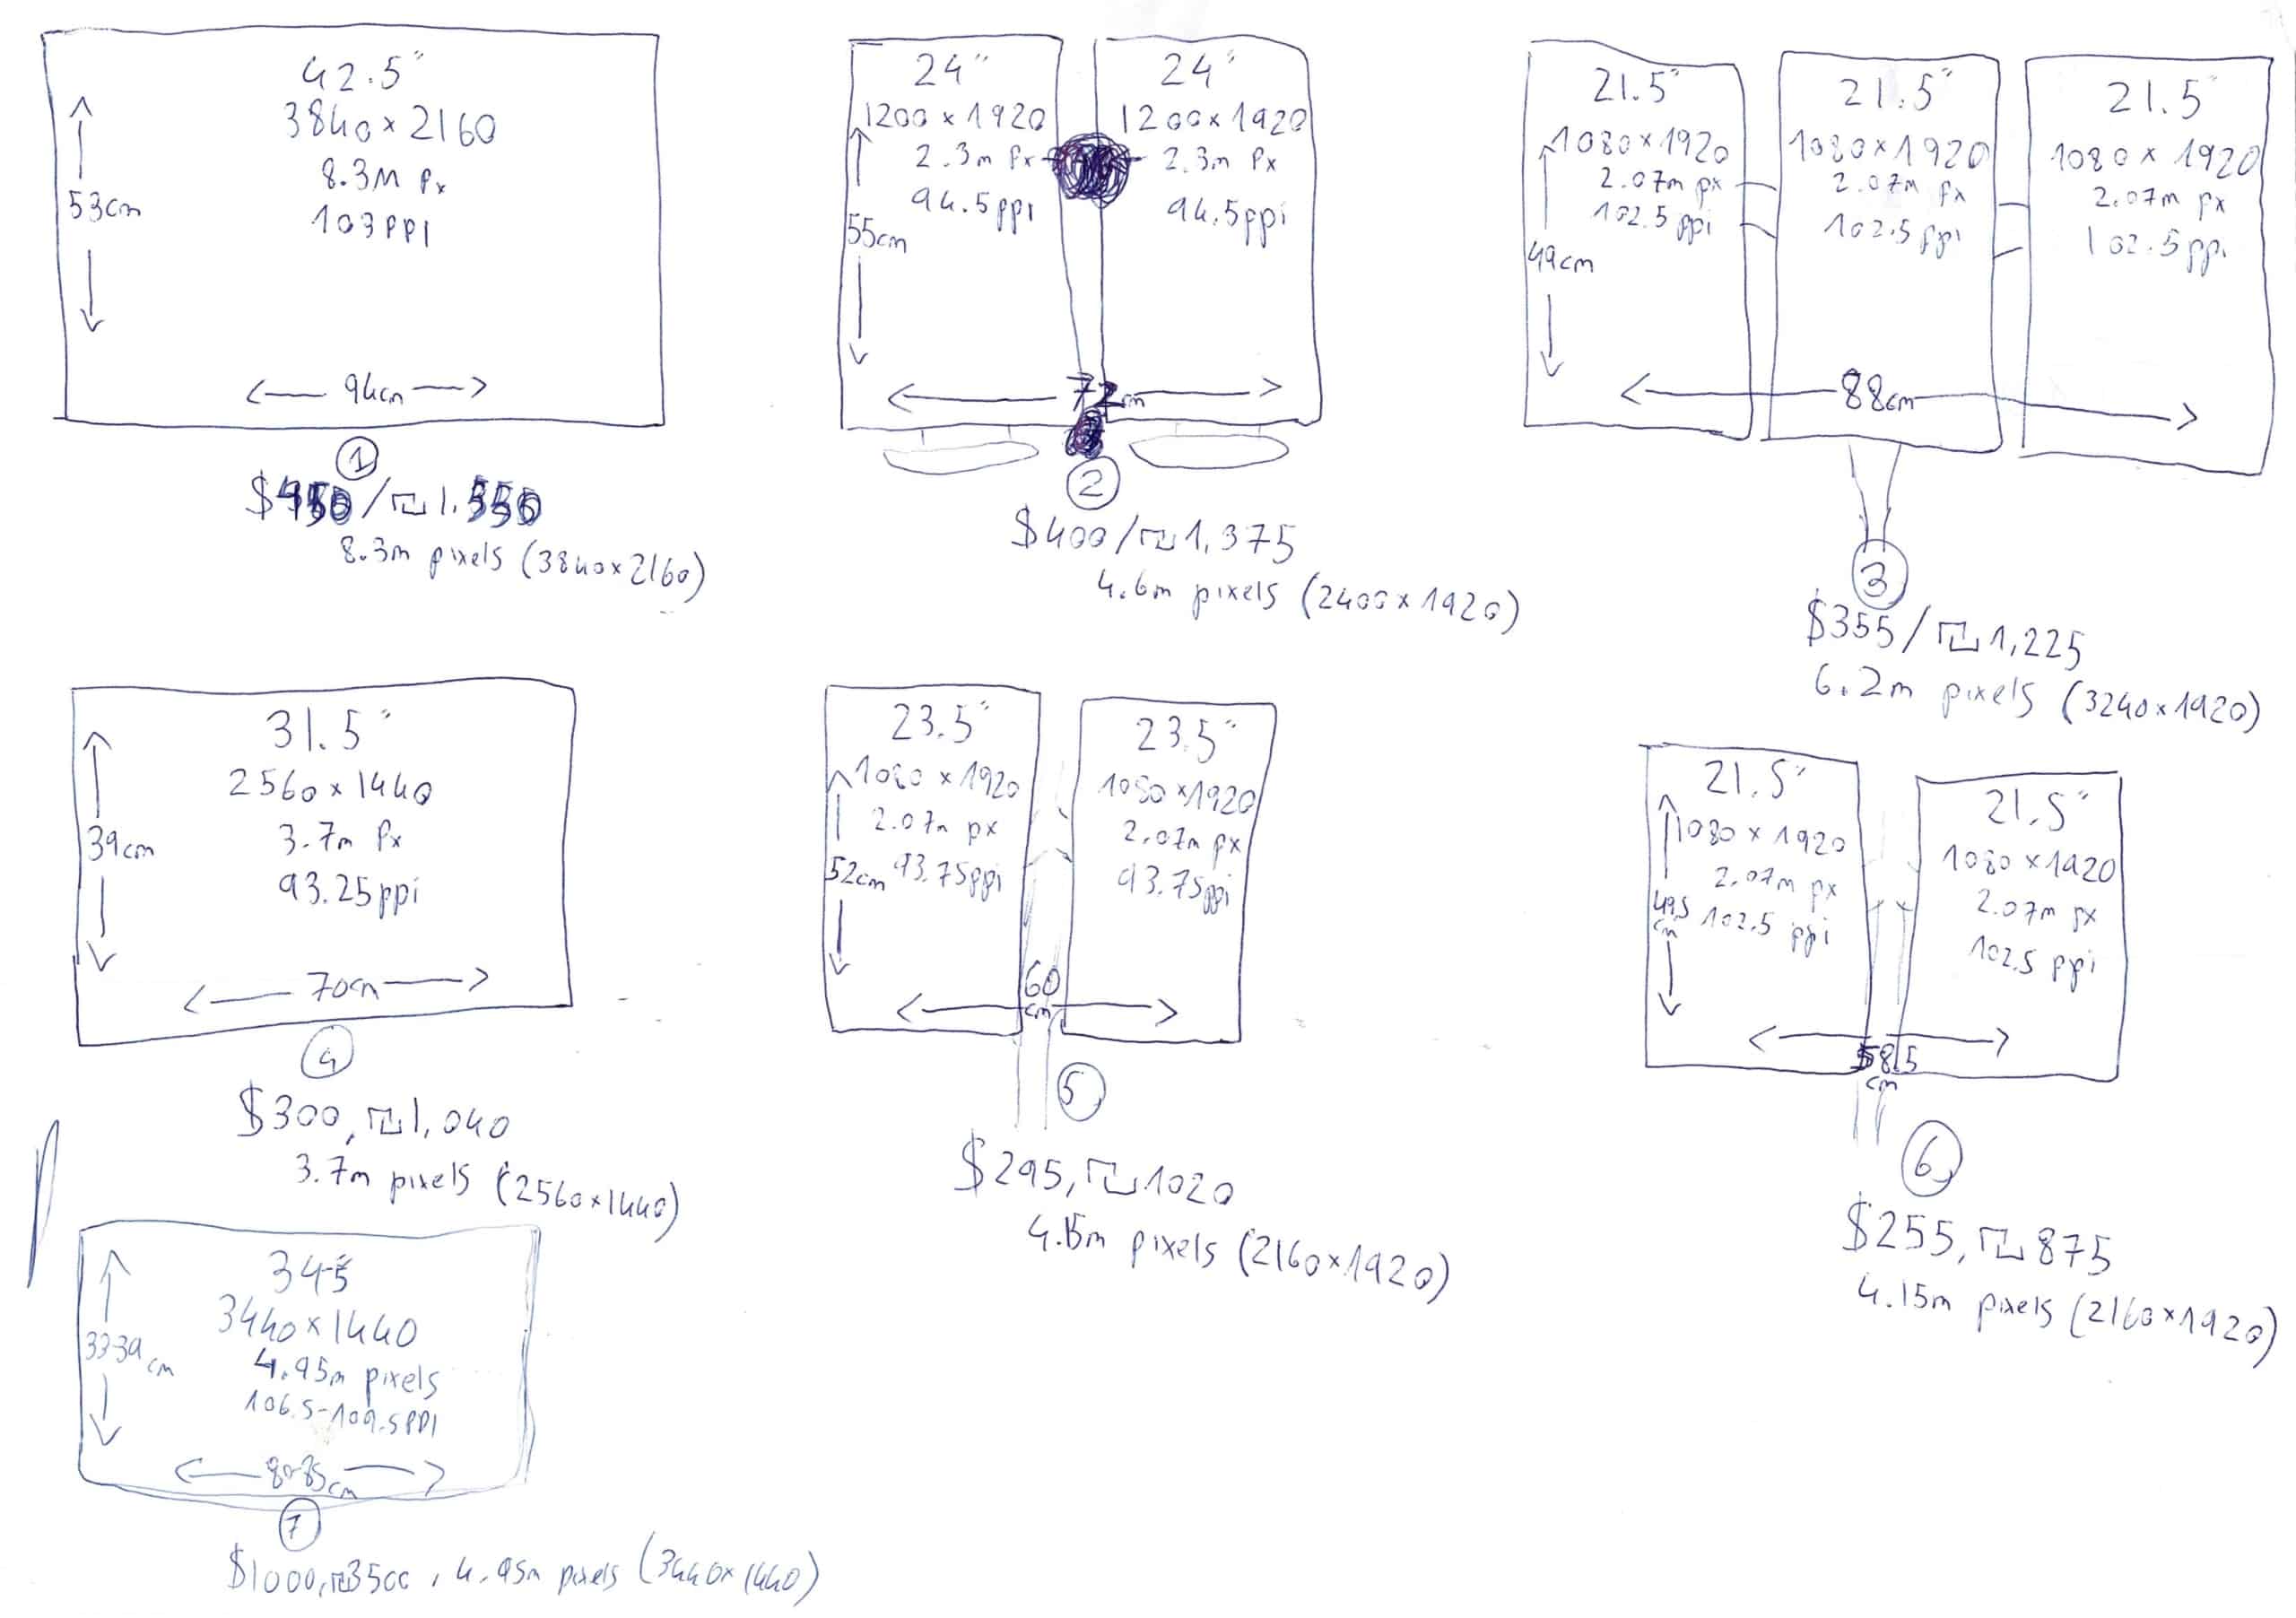
To make life easier, here are the specifications for each:
#1: 42.5″ TV – 3840×2160 (8.3m pixels at 103PPI) – 94x53cm
#2: Dual 24″ – 1200×1920 (4.6m pixels at 94.5PPI) – 72x55cm
#3: Triple 21.5″ – 1080×1920 (6.2m pixels at 102.5PPI) – 88x49cm
#4: 31.5″ – 2560×1440 (3.7m pixels at 93.25PPI) – 70x39cm
#5: Dual 23.5″ – 1080×1920 (4.15m pixels at 93.75PPI) – 60x52cm
#6: Dual 21.5″ – 1080×1920 (4.15m pixels at 102.5PPI) – 59x49cm
#7: 34″ or 35″ – 3440×1440 (4.95m px at 106.5-109.5PPI) – 80-85×33-39cm
As you can see, pixels per dollar, a 42.5″ 4K TV makes the most sense. Split the screen into four equal parts and you essentially get four FHD (1920×1080) monitors combined – without the ugly physical bezels.
TVs these days are close siblings of PC monitors. The panels themselves are similar. It’s just that TVs come with a bunch of image processing stuff and “Smart” features, which you can cancel (to increase the response time of the TV, so that it’d be comfortable to use as a PC monitor).
For a TV to function well as a PC monitor, you need these:
- 4K at 60hz refresh rate. This is normal these days, most TVs have it. Anything less (like 30hz) will result in simple tasks, like moving the mouse cursor, to feel slow and sluggish. It’s really bad, I tested it.
- Low input lag. Most TVs today have an acceptable input lag, especially if you put them on “Game Mode”. This cancels all image processing effects, to increase response time in games.
- 4:4:4 chroma. Movies from Blu-ray and 4K Blu-ray are encoded in 4:2:0 and upscaled to 4:2:2, then sent to the TV, which maps it. This saves on disc space, and provides nearly equivalent fidelity at 4:4:4. The drawback to 4:2:0 encoding (which most videos use, including YouTube) is lower clarity on high-frequency textures like colored text, which would look blurry (text is small and often just 1-2 pixels wide). PC outputs 4:4:4 natively. It does not use chroma subsampling as it is a source, so it doesn’t need the compression. In short, for your TV to function well as a PC monitor, it has to support 4:4:4.
Luckily for you, most TVs today come with low input lag, 4K at 60hz, and chroma 4:4:4 support. If you’re unsure, check Rting’s reviews (they also review TVs as PC monitors). You can trust their recommendations.
What type of panel should you aim for?
Generally you’ll be looking at IPS or VA. IPS gives wider viewing angles, but the problem is light leakage resulting in low contrast ratio (brightest white vs darkest black). The best IPS panels today produce ~1500:1 contrast ratio. MacBook’s next gen IPS can do 1800:1. That’s very high for an IPS. However, it’s abysmal compared to VA panels.
VA-panel PC monitors generally produce ~3000:1, while VA-panel TVs produce between 4000:1 to 7000:1. Some people will prefer VA for reading because of the stronger contrast delivering an ‘inkier’ and deeper look to text. The drawback to VA? Very narrow viewing angles, so you have to be in the sweet spot position for everything to look good.
If you want to splurge, OLED has the best viewing angles (wider than IPS) and also the darkest blacks. It is an emissive display, which means it has infinite:1 contrast ratio. This gives the image depth. Professional movie studio content is often color graded on OLEDs.
Hisense’s LMCL will change everything. Its ~125000:1 contrast ratio is practically as good as OLED, but it can get much brighter. LMCL is not out yet except for professionals, $45K for a 32″ and it blows away everything on the market. You can almost use these outdoors! If you need something of that caliber, perhaps you should wait for LMCL. If not, and you do a lot of color-accurate work, get a VA or OLED.
Speaking of color-accurate work, if you’re a professional who’s serious about it, buy a colorimeter – like i1Display Pro, i1 Studio or ColorMunki Display, to calibrate the color accuracy of the TV you buy.
Now, here’s where things get interesting.
Instead of buying a 42.5″ 4K TV, which would be perfect from a normal desk distance (103 PPI), I chose to go with a gigantic 70″ 4K TV. It gives 63 PPI, which means text is cartoonishly large and way too pixelated…
…from a normal desk distance.
What do I mean?
Having such a low PPI means text is really big up-close. But once you step back and get some distance, or move the monitor instead, text becomes as readable and sharp as it would be on a 43″ at a desk distance.
So why spend the extra money on the larger TV?
Preventing fatigue.
As soon as your eyes focus on objects at greater than 1-1.5 meters, the lens is at configuration for infinity focus, which means the ciliary muscles (which contract the lens for near focus) are completely at rest. It’s when our eyes attempt to keep things in focus under the strains of up-close work, where we get fatigued and tired.
As far as I can tell, tp4tissue from geekhack.org is the first to discuss the combination of factors like eye vergence and focal distance. Big screens were not affordable not too long ago, but now we have TVs ;)
How come you’ve never heard about it? Office setups. The primary use of day-long computing is done at work, and offices wouldn’t be able to space efficiently if everyone needed 1.5 meters clear distance to screen.
But, at your home, better configurations can be achieved.
If you’re a professional who’s doing a lot of coloring work, for instance, the top option today (absent big curved panels, which reduce contrast drift, stochastic eye movement, and focus changes) is the 77″ OLEDs. You can’t use them in a bright office though, as their safe brightness is low (an OLED issue that LMCL is coming to solve), unless you’re ok with burn-ins from static screen elements. Another good option is large VA TVs, but careful of dynamic backlights (like Samsung tends to have), which would mean serious Photoshop or video color grading is out of the question. Generally speaking, Sony and Panasonic respect color the most.
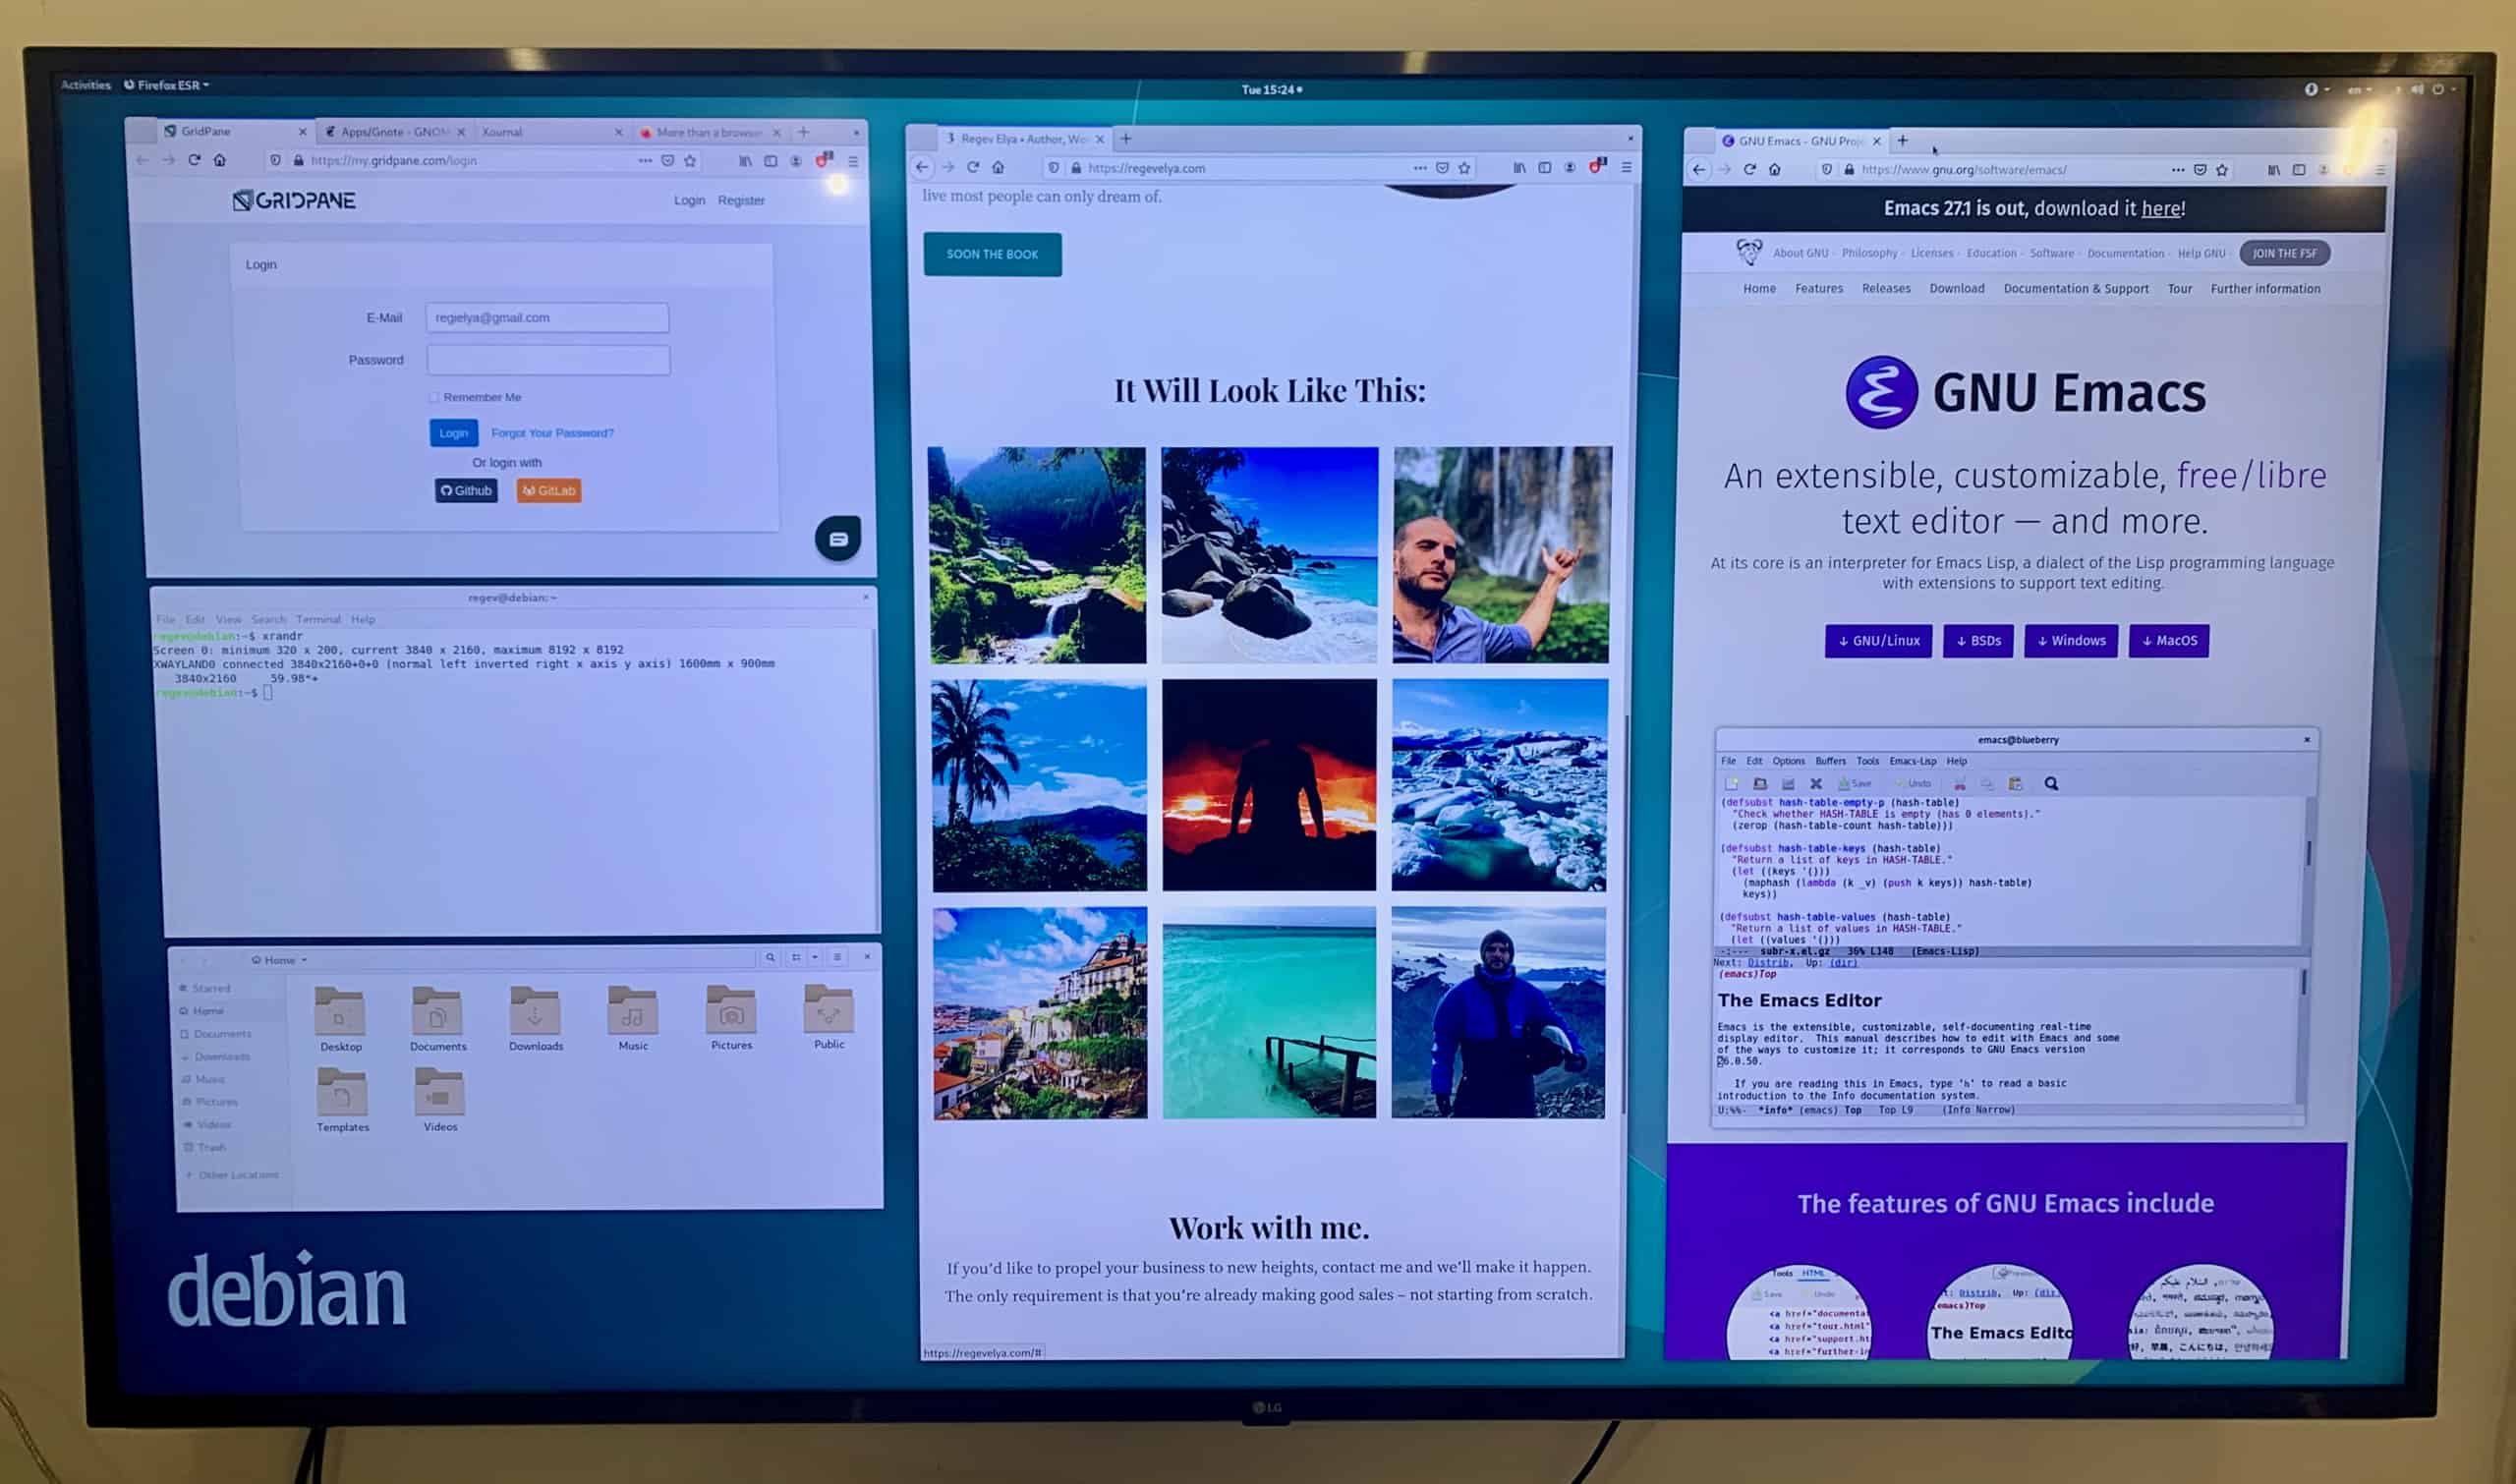
As for me, I bought an LG 70″ IPS. It allows me to work from 1.5 meters away, it has what I need (low input lag, chroma 4:4:4, 4k@60hz). I did sacrifice color depth to get the better viewing angles, but that’s alright – I don’t do color-sensitive work. If you do, get an OLED, or a VA-panel TV.
All in all, I highly recommend a large 4K TV as your monitor:
Update:
I’ve since switched to a 2560×1440 (2K), 32″. 4K was just too much space for my uses – mostly two documents side by side. 2560×1440 is awesome, because in Linux or Windows, when you drag a window to the side of the screen, it automatically fills that side all the way to the center. So with a 2K monitor, you essentially get two 1280×1440 monitors side by side. It’s perfect horizontally, because a web page is rarely wider than 1280 pixels, and it’s perfect vertically, because 1440 is just great, and the setup is a lot better than having two FHD monitors limited by 1080 vertical pixels.
I picked the AOC Q3279VWFD8, because it had an IPS panel, 10bit color depth (well, 8bit+FRC, which is similar), 75hz refresh rate, and amazing reviews. I would prefer to have a much larger screen, so that I could sit farther away from it to avoid eye fatigue, but I couldn’t find any.
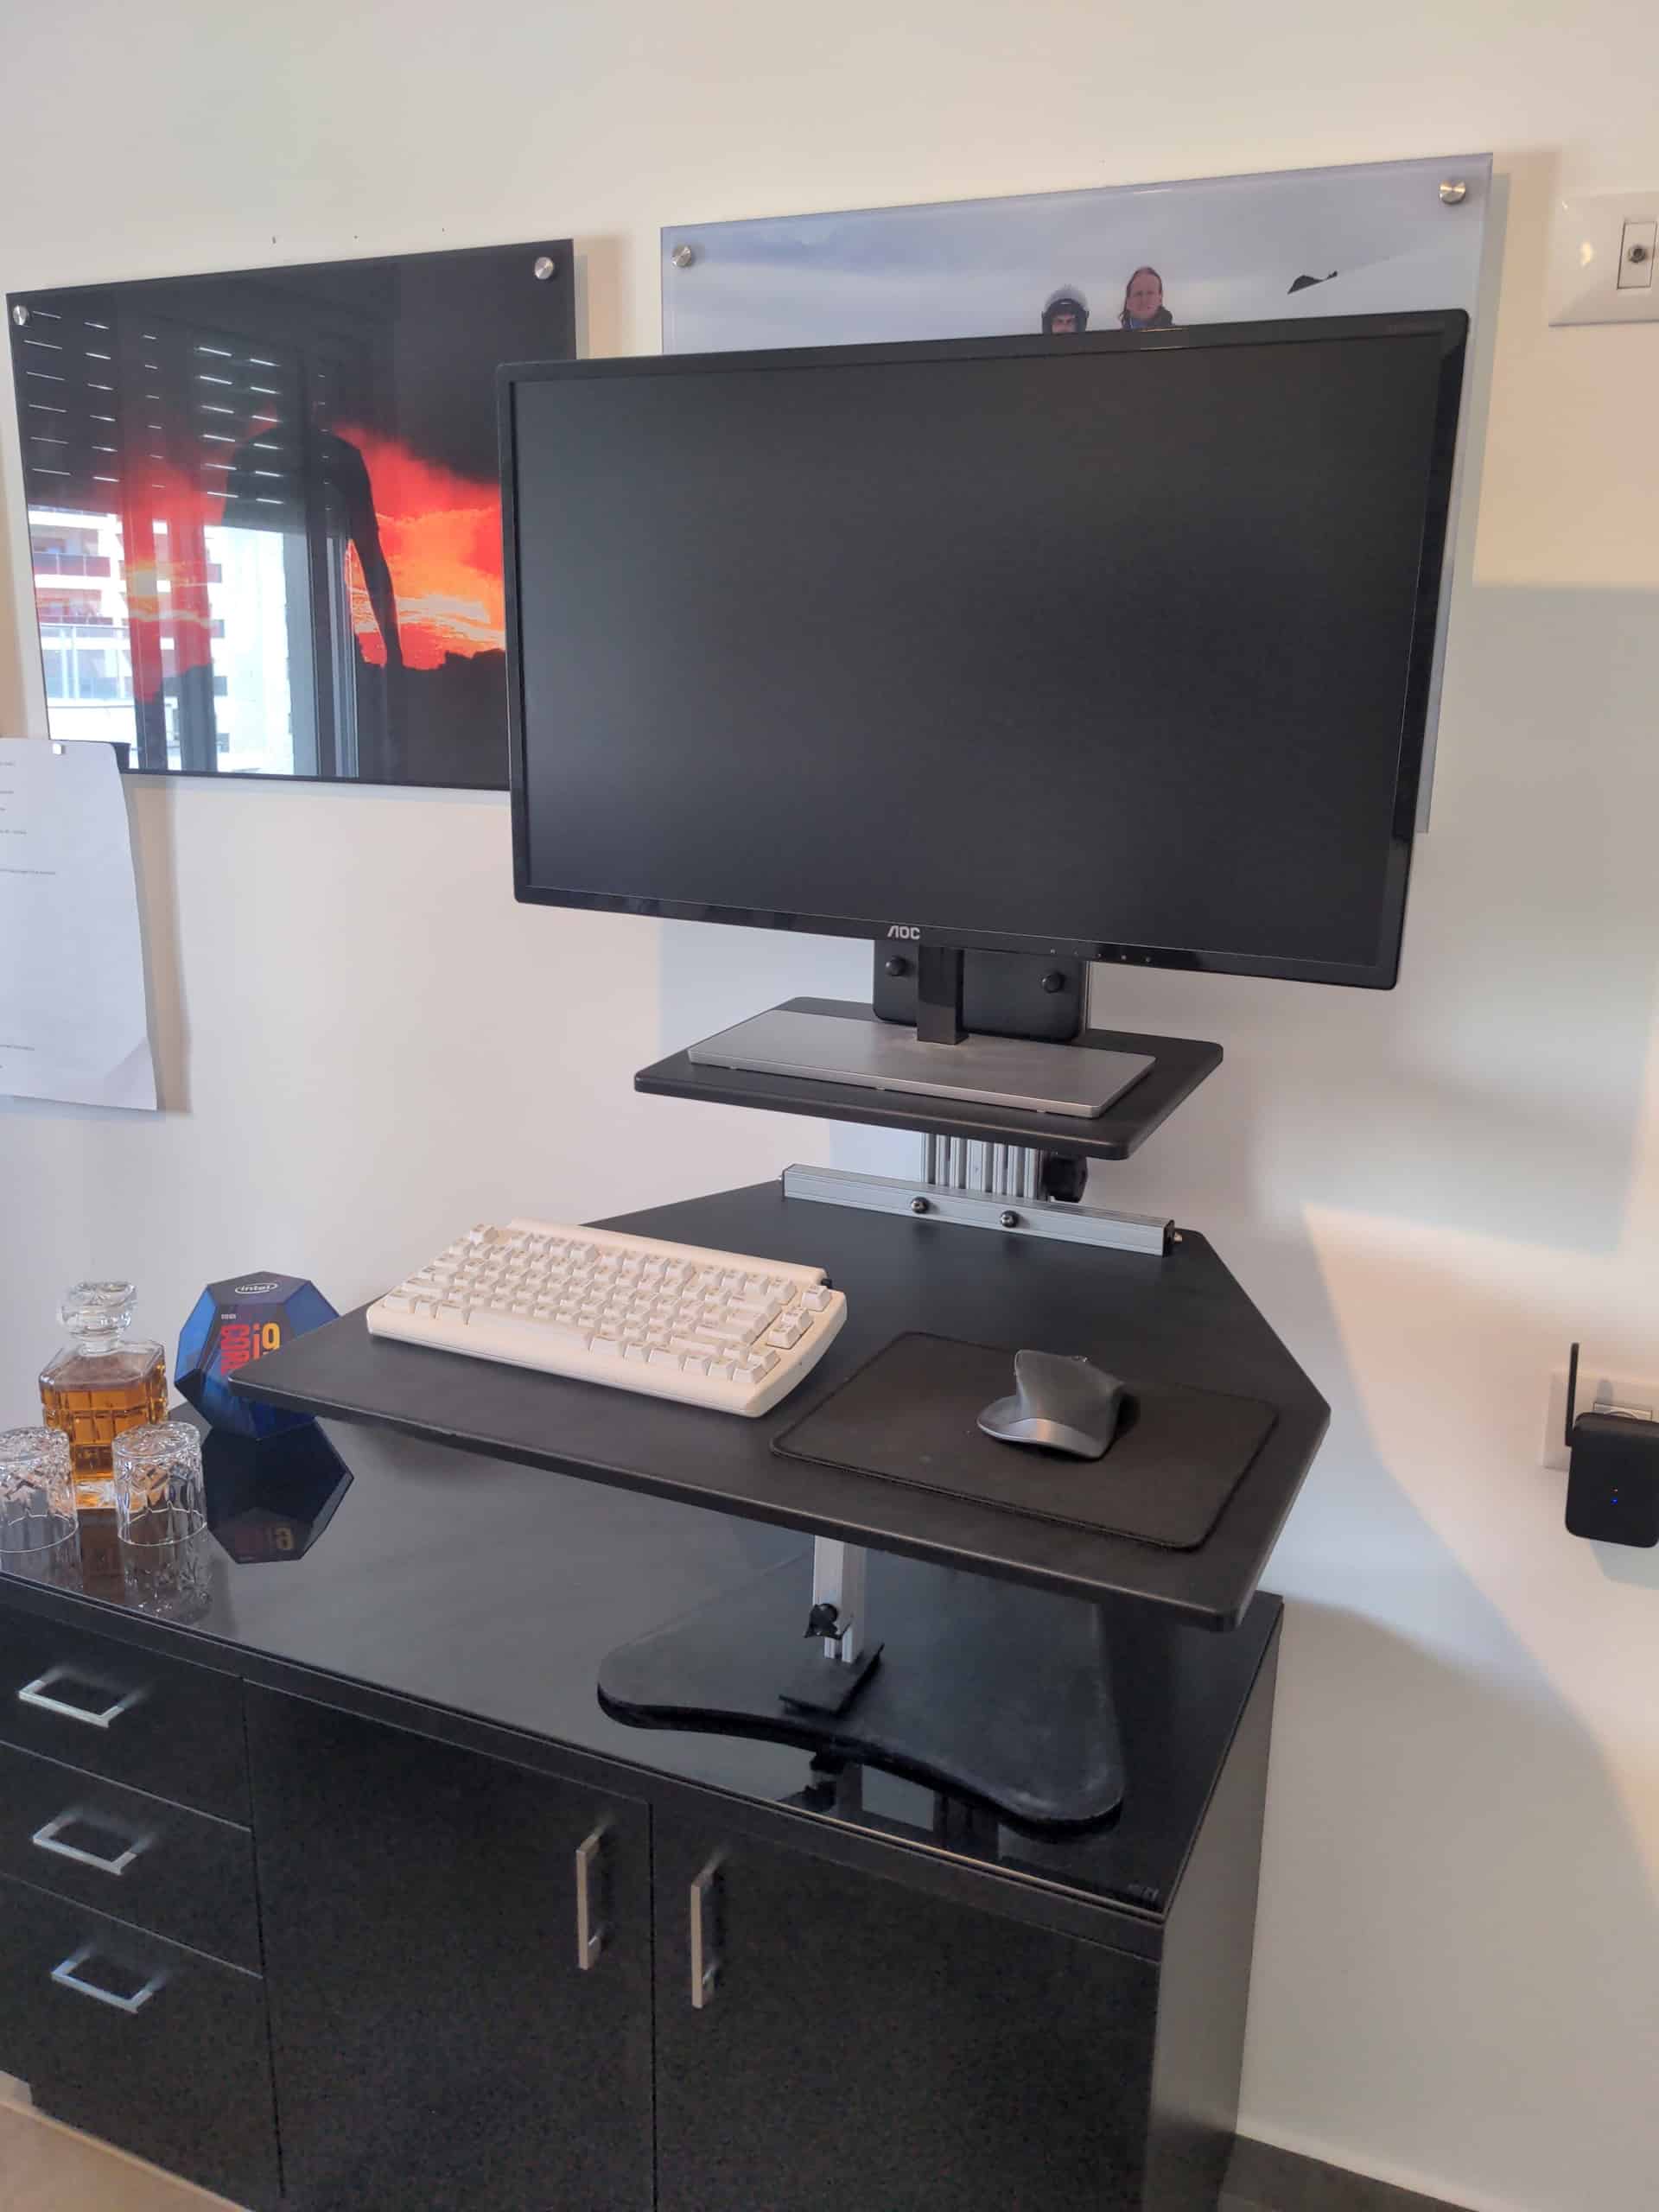
This is how it looks on my Ergo Kangaroo desktop:
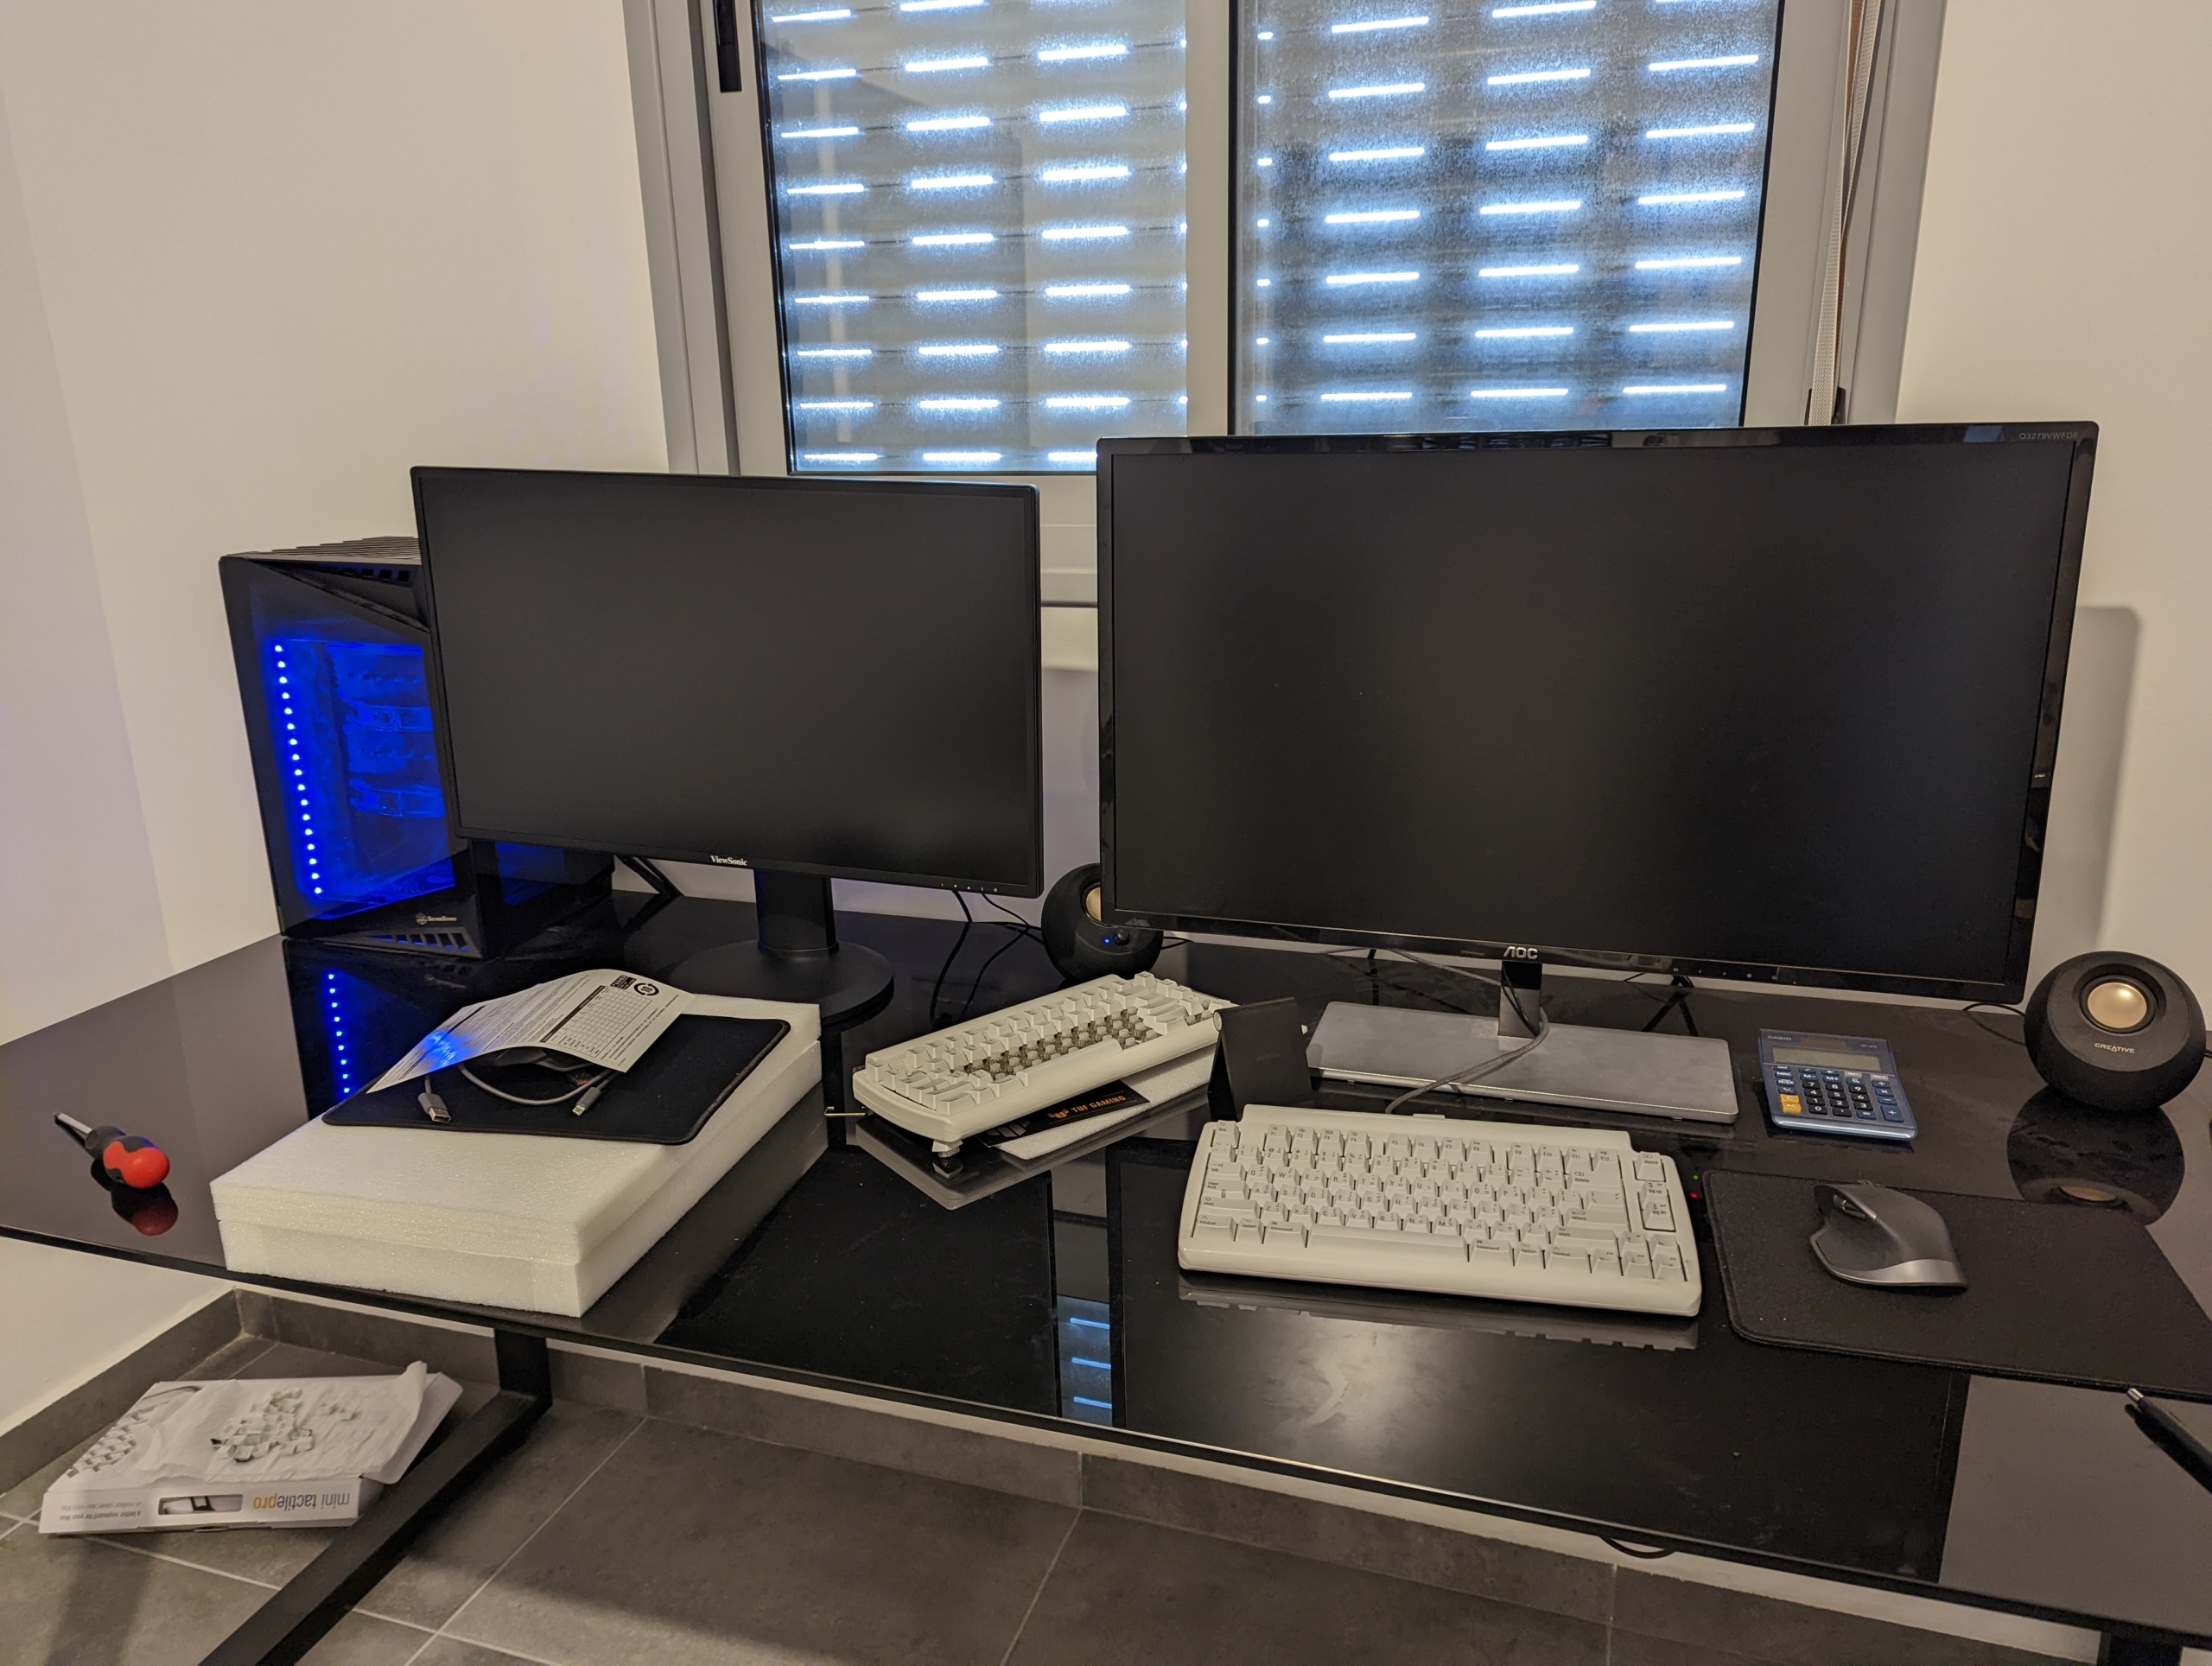
For my second computer, I picked another 2K resolution screen, but this time a 27″ – the ViewSonic VG2719-2K. I picked 27″ because I’m limited on space. If it were 32″, I’d have to stand further away from it, and I don’t have the space for that distance where I placed the computer. Here’s how the 27″ monitor looks like compared to the 32″ AOC:
Keyboard
For someone who types for a living, a good keyboard is crucial. When I say a good keyboard, I mean a keyboard that would allow me to squeeze as many words per minute (WPM) as possible. If you can increase your WPM from, say, 70, to 140, you’re now two times more productive.
For that, I turned to the Scrivener community (Scrivener is the Photoshop of writers) and asked for their opinions. I got an enormous amount of responses, with recommendations like Das Keyboard, Filco Majestouch, Anne Pro 2, Keychron K2, Leopold, Matias, HHKB, Realforce, Azio, Keyboardio Atreus, and many more, including the ancient IBM Model M keyboard or the rather odd OLKB Planck keyboard:
Here are things to consider:
- Keyboards are a unique, personal component. Like a guitar, they are a device you’re likely to keep with you for as long as it lasts. Once you get used to a keyboard, you don’t want to replace it. Therefore, invest in one with a solid build quality that’ll serve you for years.
- Aim for clicky, mechanical switches. Their feedback will help you feel the keyboard better and avoid time-consuming typing errors. MX Cherry, Matias, Gateron and Topre switches all have their fans. Someone told me I should also try out Outemu Blue. Try out different switch tester kits on Amazon and see which one you like best.
- Did you ever think of using DVORAK instead of QWERTY? Once learned, DVORAK should make you type faster:
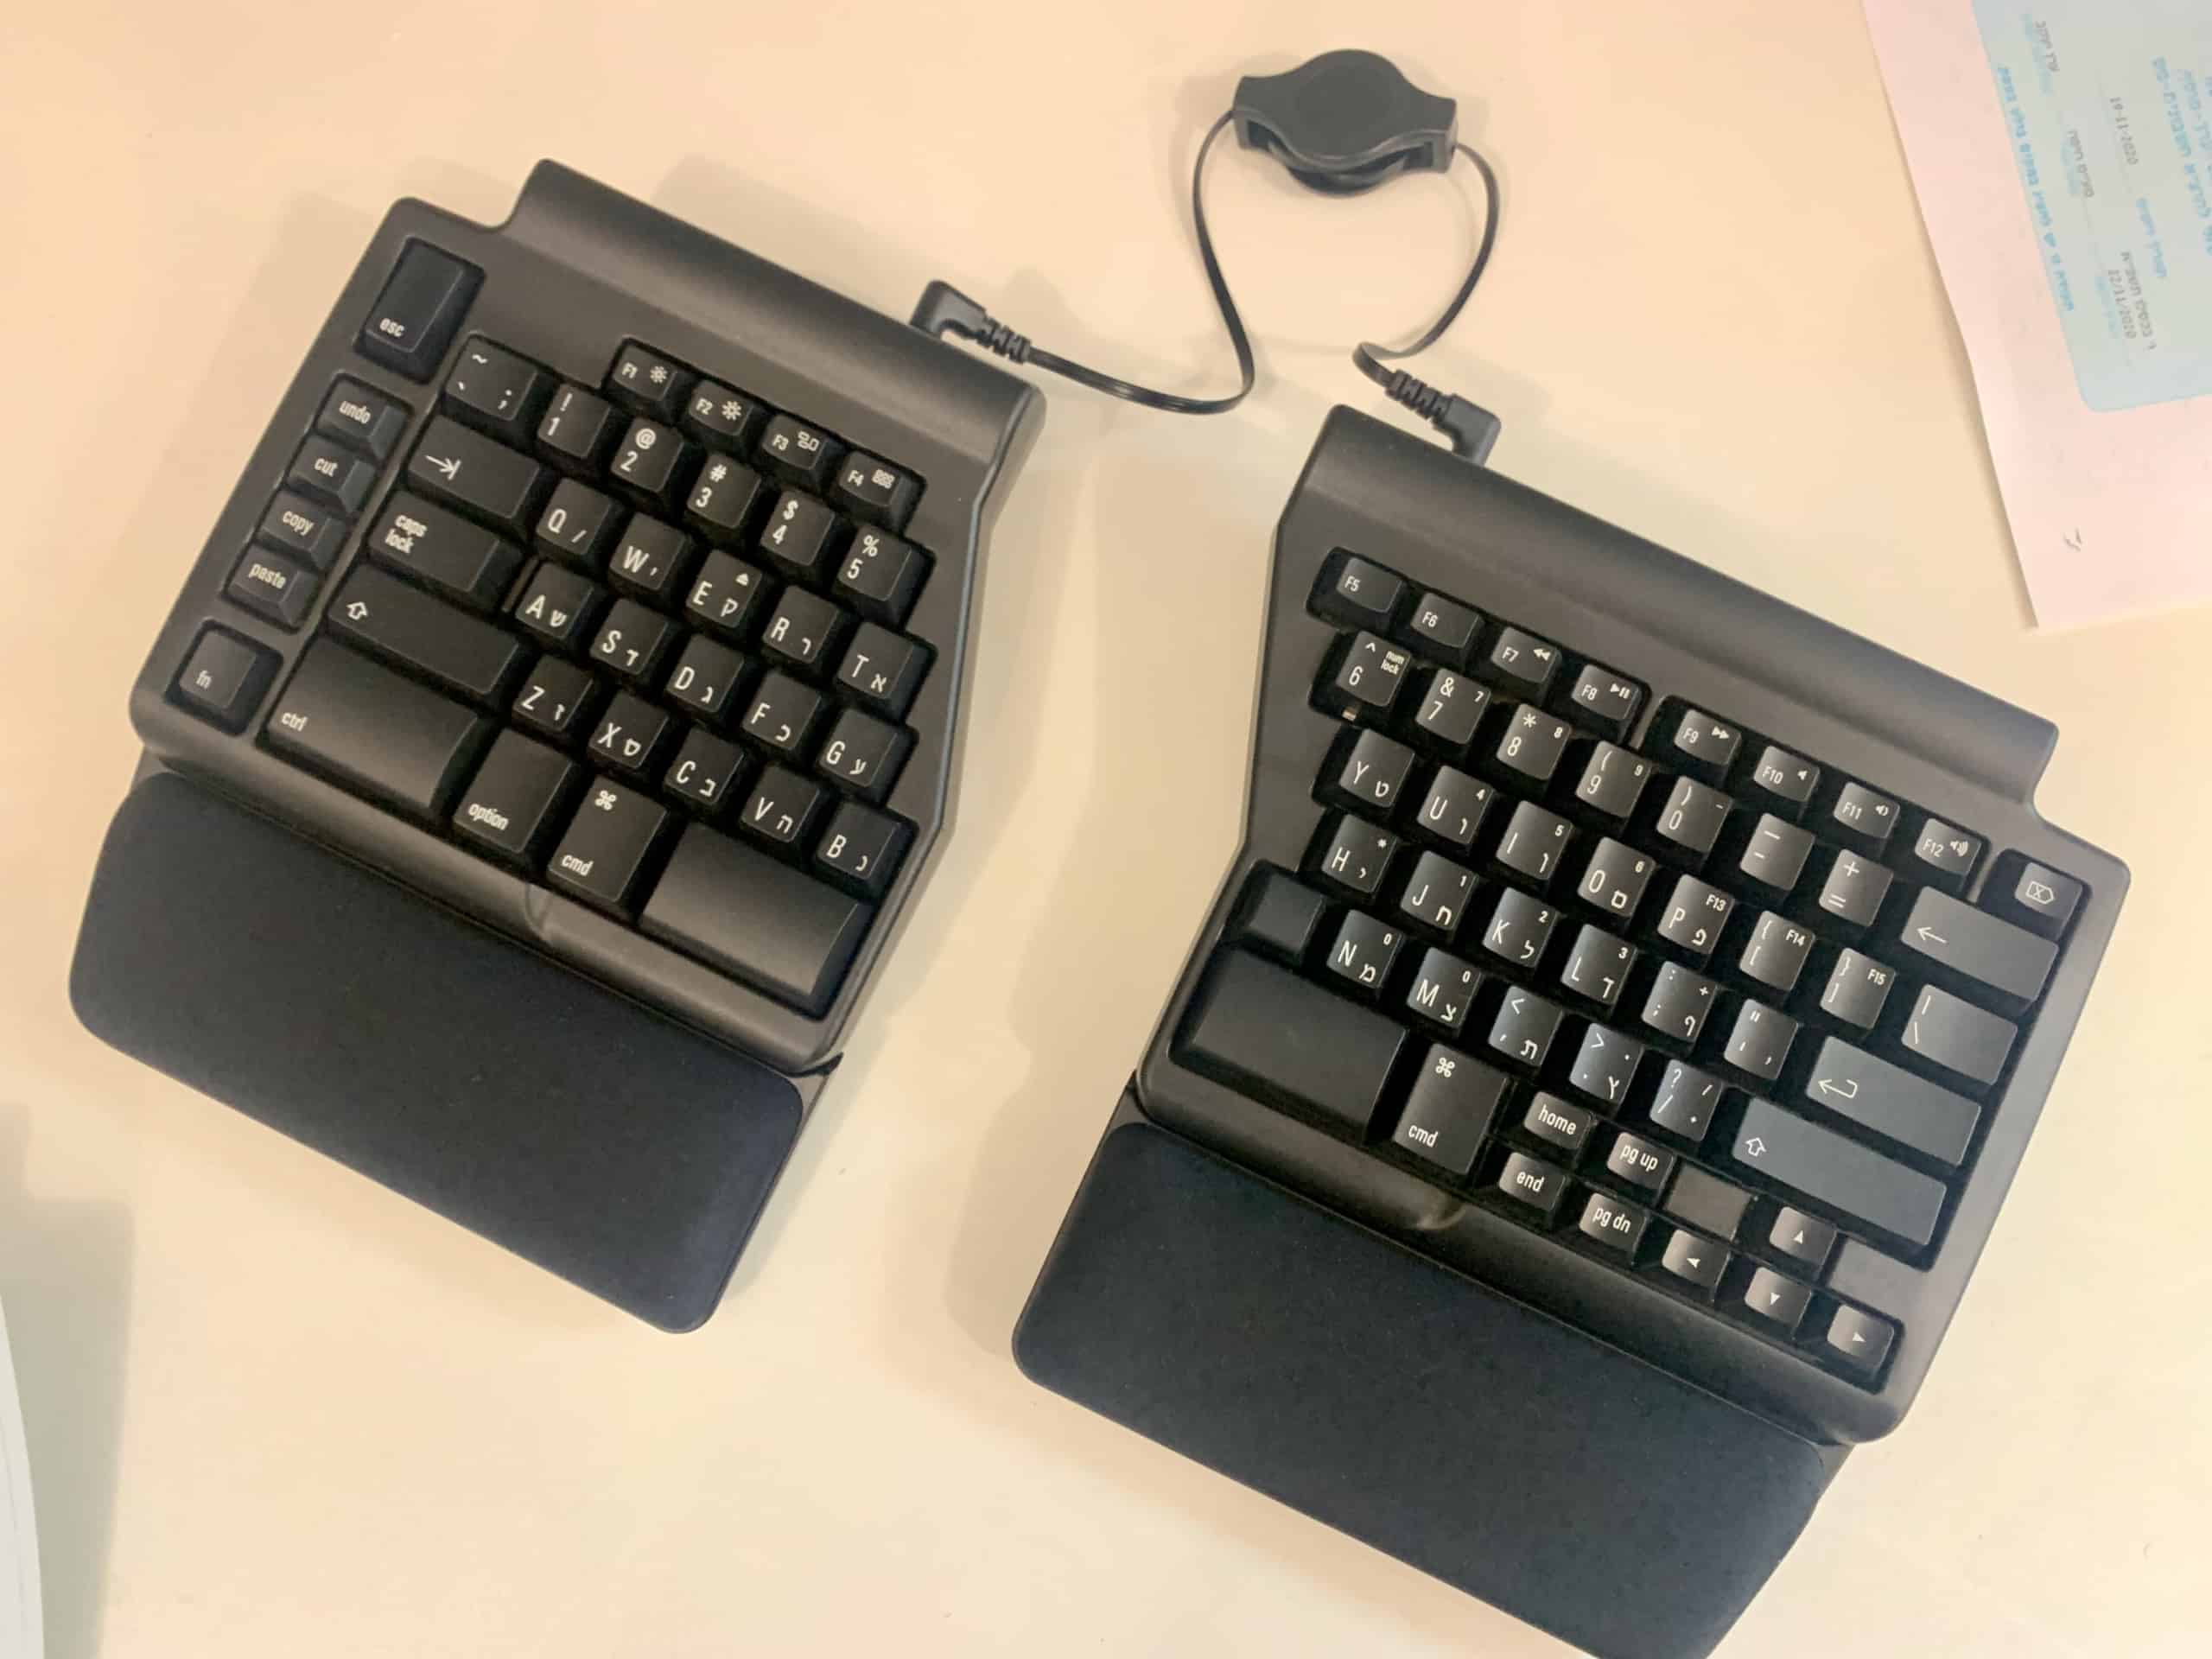
I went and tried two keyboards: Matias Programmable Ergo Pro, and Matias Mini Tactile Pro. I heard raving opinions about Matias switches, which I was considering versus MX Cherry Blue (here’s how they compare). I also liked that Matias keyboards don’t have that ugly RGB lighting crap that many mechanical keyboards come with.
Both keyboards are tenkeyless (meaning, a full sized layout, only without the Numpad), which I prefer. I never use the Numpad.
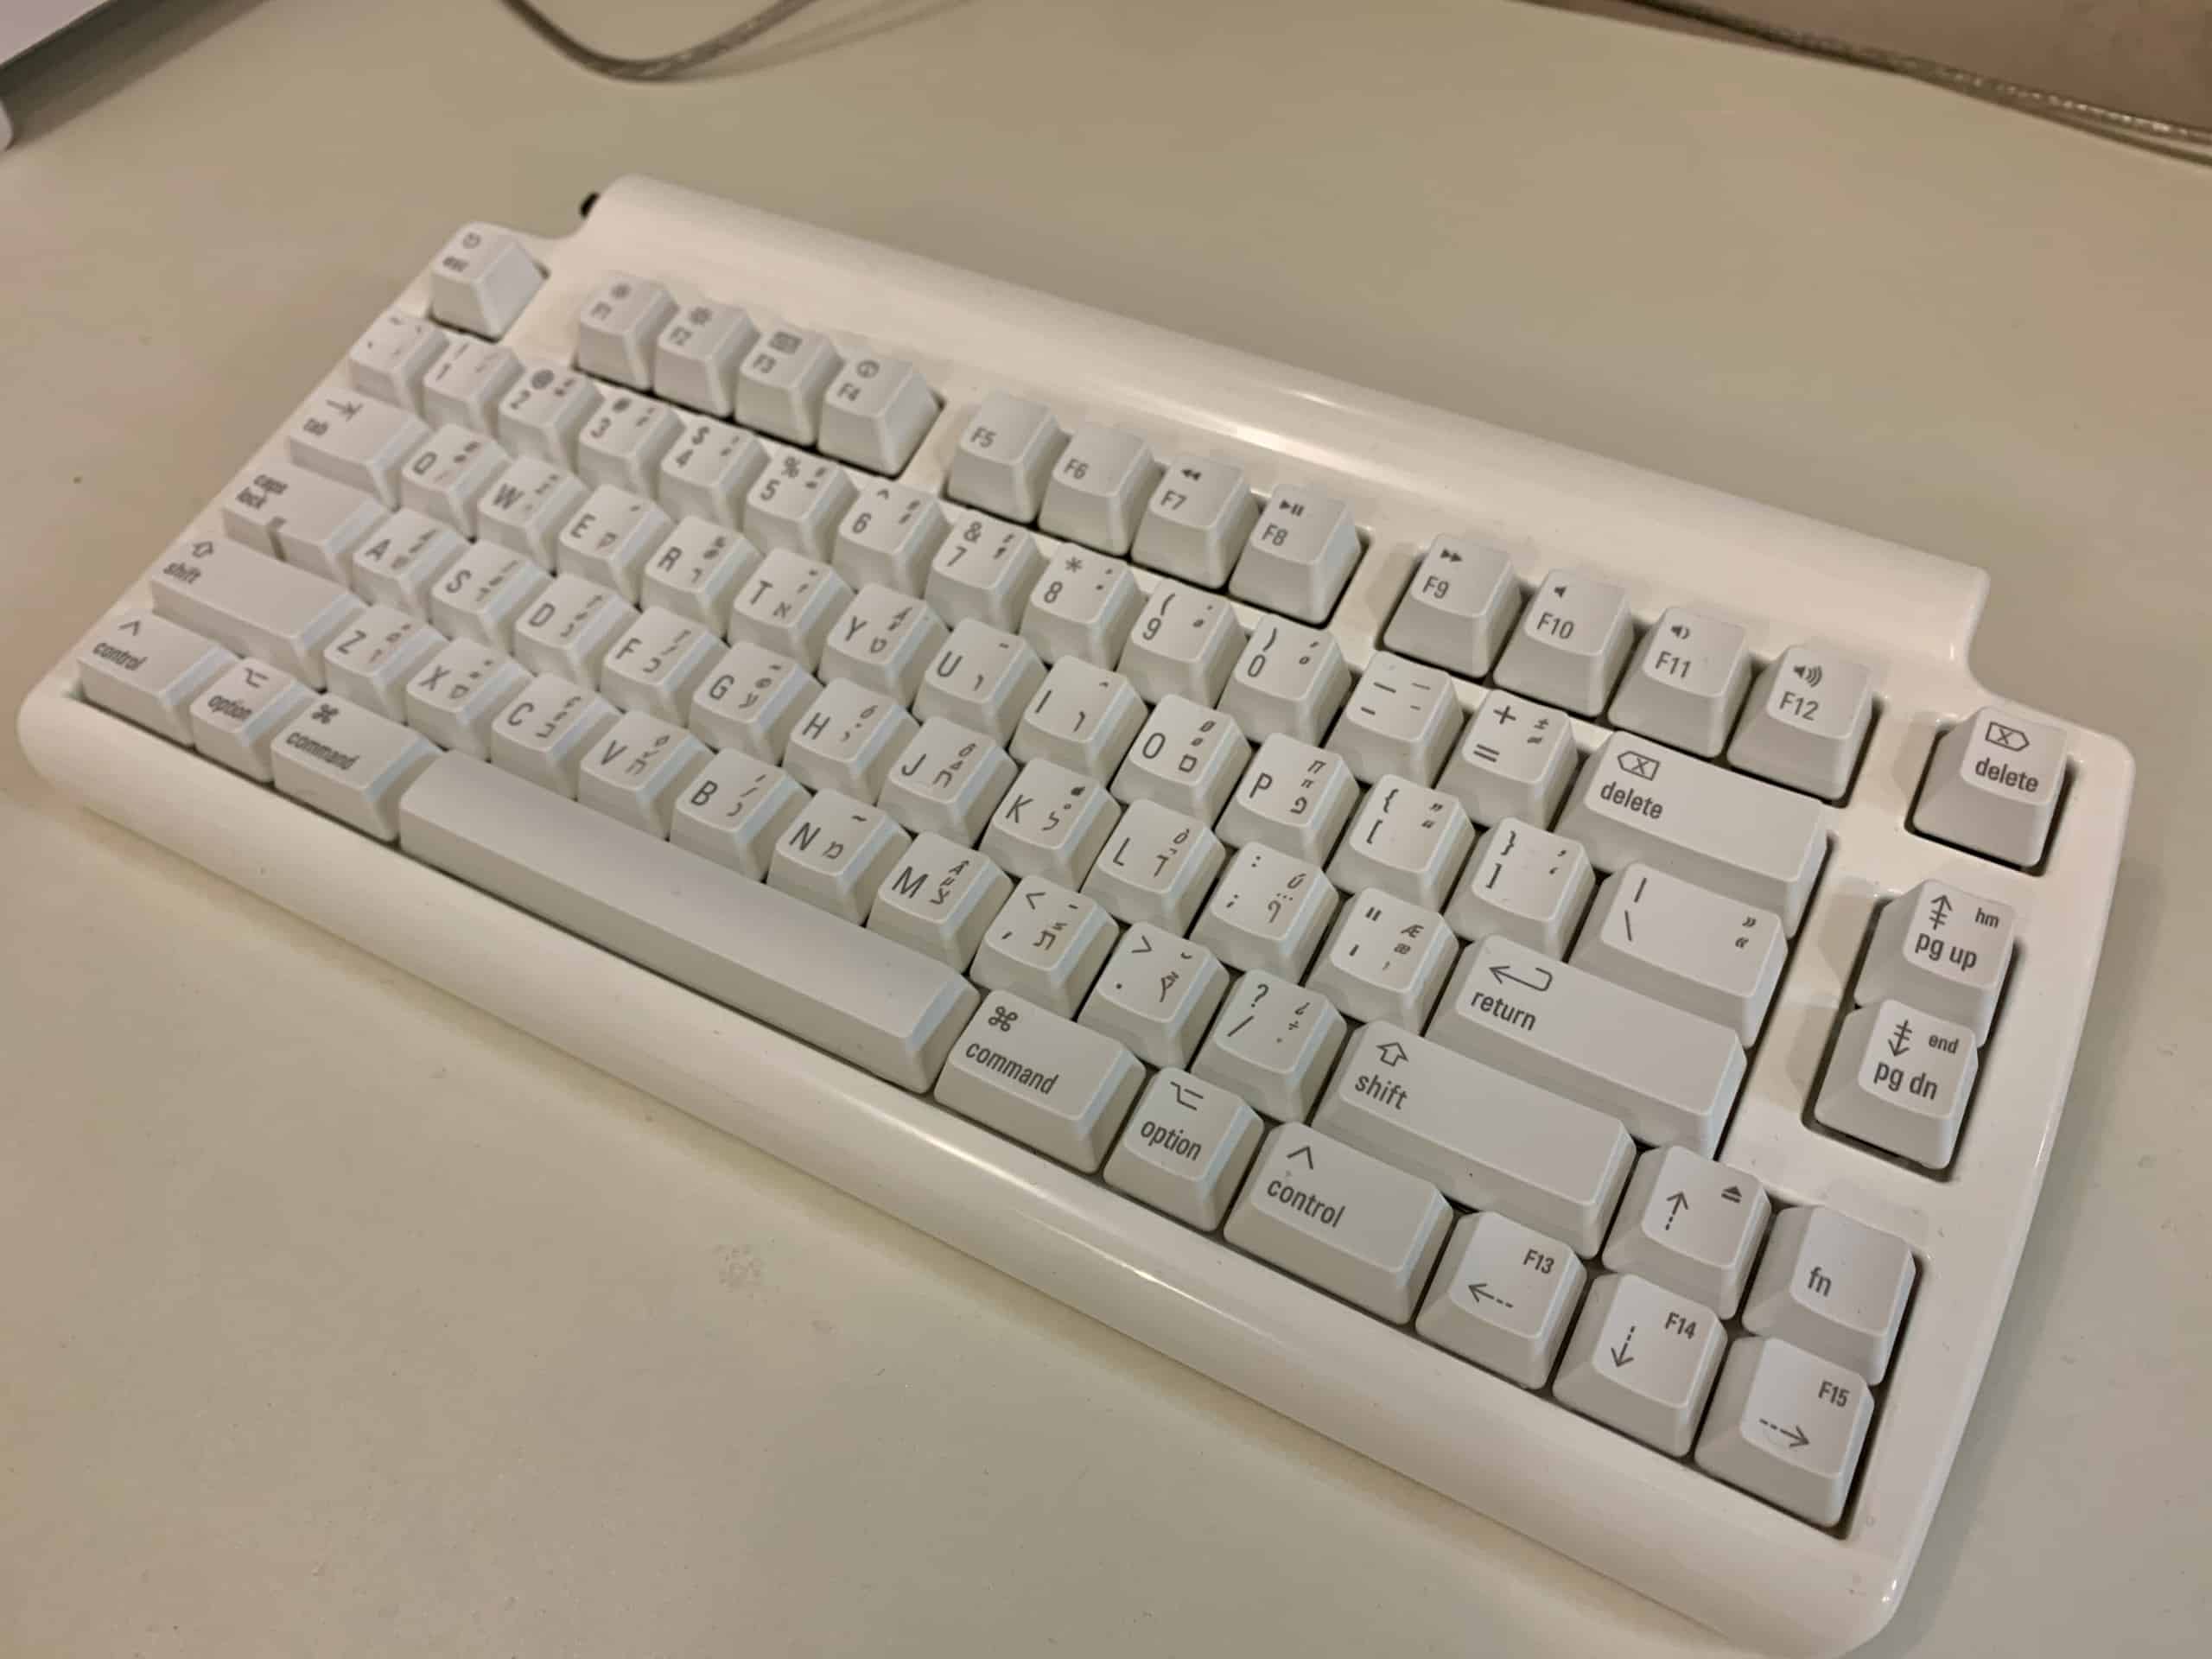
After using both for a while, I can say this:
The Ergo Pro is more ergonomic – those gel support pads feel absolutely amazing to rest your palms on. It’s also programmable. Create macro keys and trigger any keyboard shortcut or string of text with just a single keystroke! This is awesome, because if there’s anything you keep typing every day (up to 60 words), you can now do it in one key press.
However, the Mini Tactile Pro uses the Matias Click switches, while the Ergo Pro uses the Matias Quiet Click switches. They are identical in peak force (60±5 gf) and travel distance (3.5mm), but the Quiet is sound-dampened. I find the feedback of the louder switches way better.
All in all, the Mini Tactile Pro is without a doubt the best, most addictive keyboard I’ve ever typed on. It’s the one I ended up keeping.
For the second computer, I chose the Bluetooth sister-keyboard of the Mini Tactile Pro, which is Matias’ Laptop Pro. It does use the switches of the Ergo Pro, but I needed something wireless. I like its black casing a lot, the Bluetooth functionality is robust, and the battery life is out of this world. In fact, I haven’t charged it yet after a couple months of use. Here’s how the Laptop Pro looks like next to the Mini Tactile Pro:
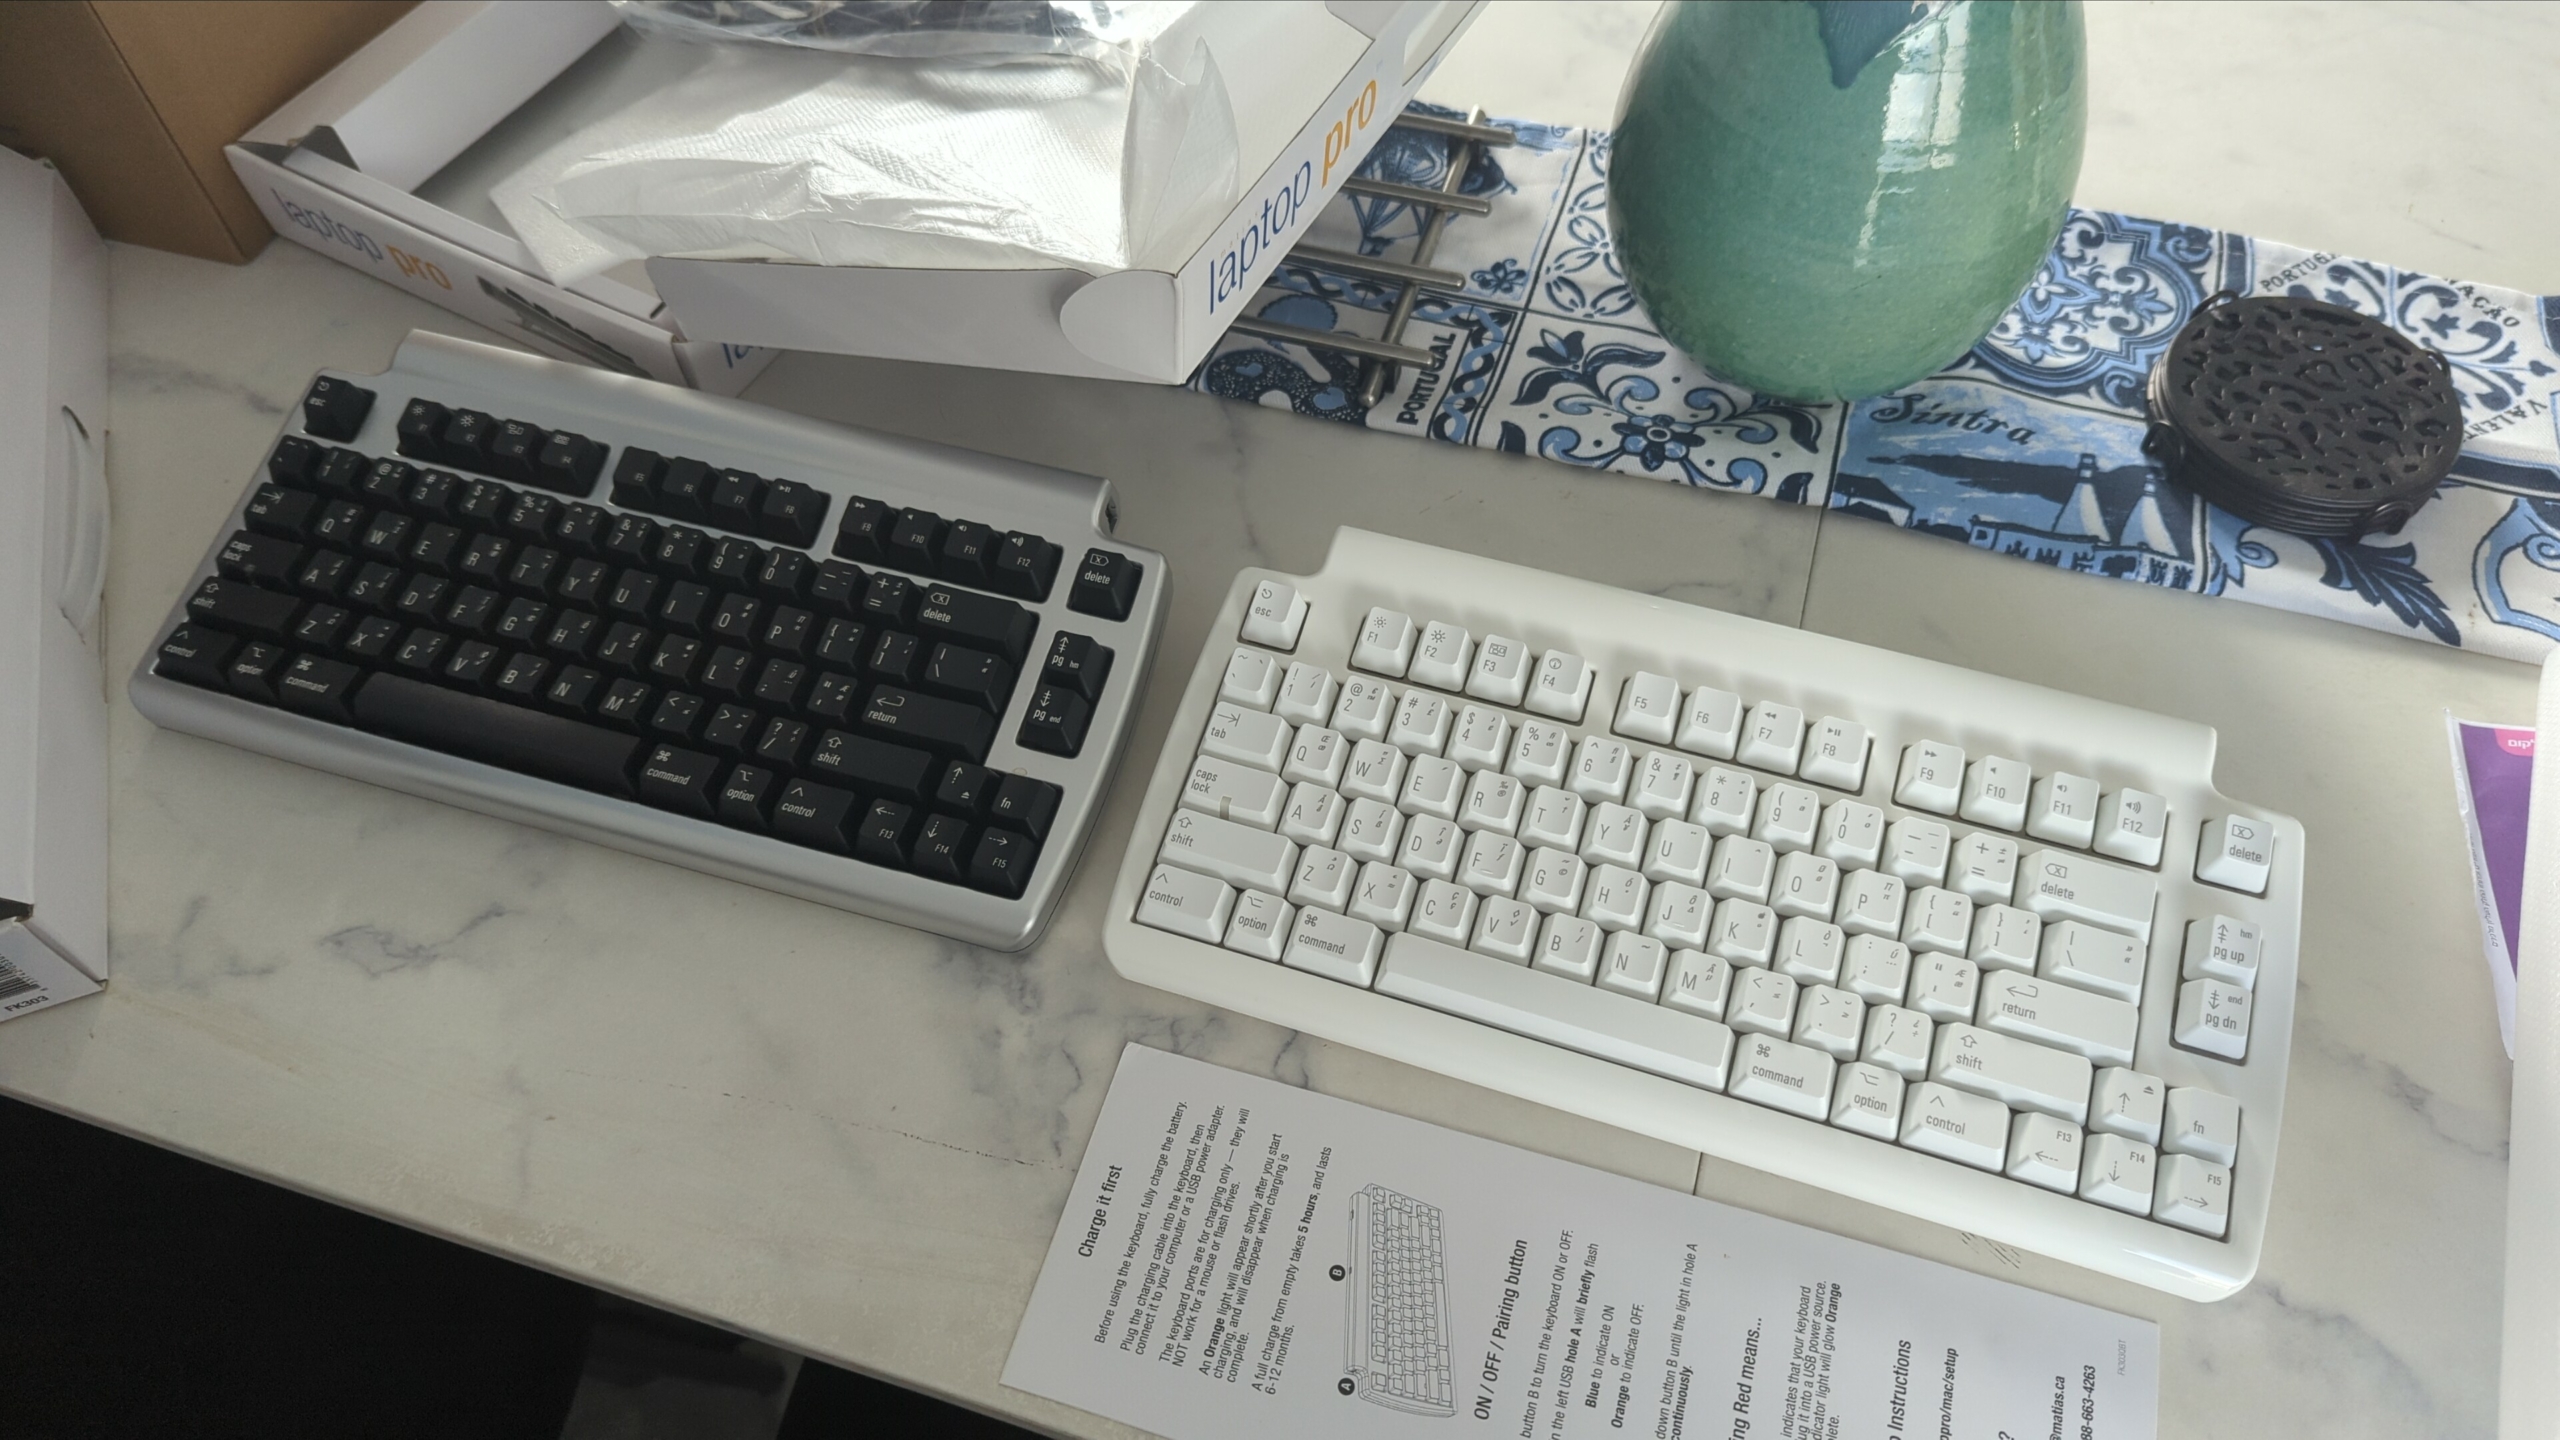
Matias told me they’re planning a mini, wireless keyboard with the same clicky switches of the Mini Tactile Pro. I guarantee to you this will be the best wireless keyboard of all time. I can’t wait.
And I should probably learn DVORAK.
Processor (CPU)
Which CPU should we choose for the computer?
My uses are pretty light. You’ll often find me with 10-20 open browser tabs, maybe a spreadsheet or two or a couple large text files, all open at the same time. This is mostly RAM-intensive, not CPU-intensive. Any average desktop CPU these days can easily handle all that.
However, I went with an Intel i9-9900 because I could get it for 50% off.
The 9900 is a very fast 8 core 16 thread CPU that will blaze through all my workloads. Though an overkill, it will more than see me through many years of use and will only get better as I throw more workloads at it. At 50% off, I couldn’t go wrong so might as well enjoy the power on tap.
What are your uses? It takes a CPU a certain amount of time to render anything, including a web page. A stronger CPU can do things in less time. To illustrate, think about it this way:
An 8-core can render a page in 1 second, whereas a 4-core might take 1.3 seconds. In both cases, you blinked and it was over with. But on large scale, it’s a different story. Edit a video while compiling code at the same time and the 4-core got swamped. An 8-core wouldn’t blink.
So, again, what are your uses? If you compile Python code every day, then an 8-core CPU will have time gains over a 6-core CPU. But if you compile code just once a week, the few minutes saved don’t matter. It’s nothing more than work done while you are in the bathroom, or getting food.
On every-day tasks like opening web pages, I seriously doubt there’d be any noticeable difference to humans, as you’d not be saturating the CPU. We are talking here about nanosecond differences:
An old CPU might be able to deal with 1,000 instructions per 1 clock cycle, and at 4.2GHz there’s 4.2 billion cycles. A newer CPU might handle 2000 instructions per clock cycle and be at 5.0GHz or 5 billion cycles. You are into nanoseconds in time per instruction. You can’t see the difference in anything less than a second without 2 comparisons, and even then maybe not. Of course, differences between the CPUs go much farther –
There’s core count, bandwidth per core, memory speeds, memory controller speeds, Lcache, and a host of other factors. High-end CPUs usually have more cores, higher Lcache, better memory controller, etc, so it is faster and stronger all around. But do you actually need it?
Do your homework.
Should you buy AMD or Intel?
AMD is superior these days, the company has earned people’s trust in coming up with new stuff that will be better than Intel’s equivalent and work on their old motherboards. With AMD you get a more performant CPU on a more modern architecture, and pay less.
For example, my i9-9900 has higher turbo clock speeds, but an AMD Ryzen 3700X can turbo boost multiple cores, and that’s a big advantage in productivity apps. The Ryzen also supports PCIe Gen4, which means it can leverage the much higher bandwidth of next gen GPUs (not that I need it). The Ryzen also has twice the cache of the 9900, it supports faster memory, and it runs a lot cooler and more efficient. And it’s cheaper.
There were also security issues with Intel – go read about the Kernel Virus affecting their processors – Meltdown & Spectre (also on Wikipedia). Nobody wants their sensitive data stolen from their CPU kernel.
Update, May 2022: Most of the above info is not relevant anymore. Intel is the chip-leader again since introducing their 12th gen CPUs, which blow away everything AMD has to offer for the same amount of money.
There is, however, one big advantage to Intel. Their CPUs come with an integrated graphic card. The benefits are huge. First of all, it’s good enough for me – I don’t play any games. Second, no need to buy a separate card. Third, no noise! A separate graphic card brings additional heat, fans and noise, while an integrated graphic card does not.
Also, you can’t game on an integrated card – which will keep you more productive ;) All in all, I love integrated graphics.
In reality, for my kind of work, it’s not going to be so much what the CPU can do, but what the supporting equipment will allow the CPU to do. Low memory, slow storage, limited peripherals ability, lack of options. All that just adds up to one thing: Extended nap times, which I want to avoid.
So, I bought the i9-9900. It’s way too powerful for what I do, but I got it for 50% off and it has an integrated GPU. For my second computer, I bought a newer i5-12600K. The 12th-gen CPUs by Intel are absolute killers. This i5 is stronger than my i9-9900K! I’m delighted with both of them.
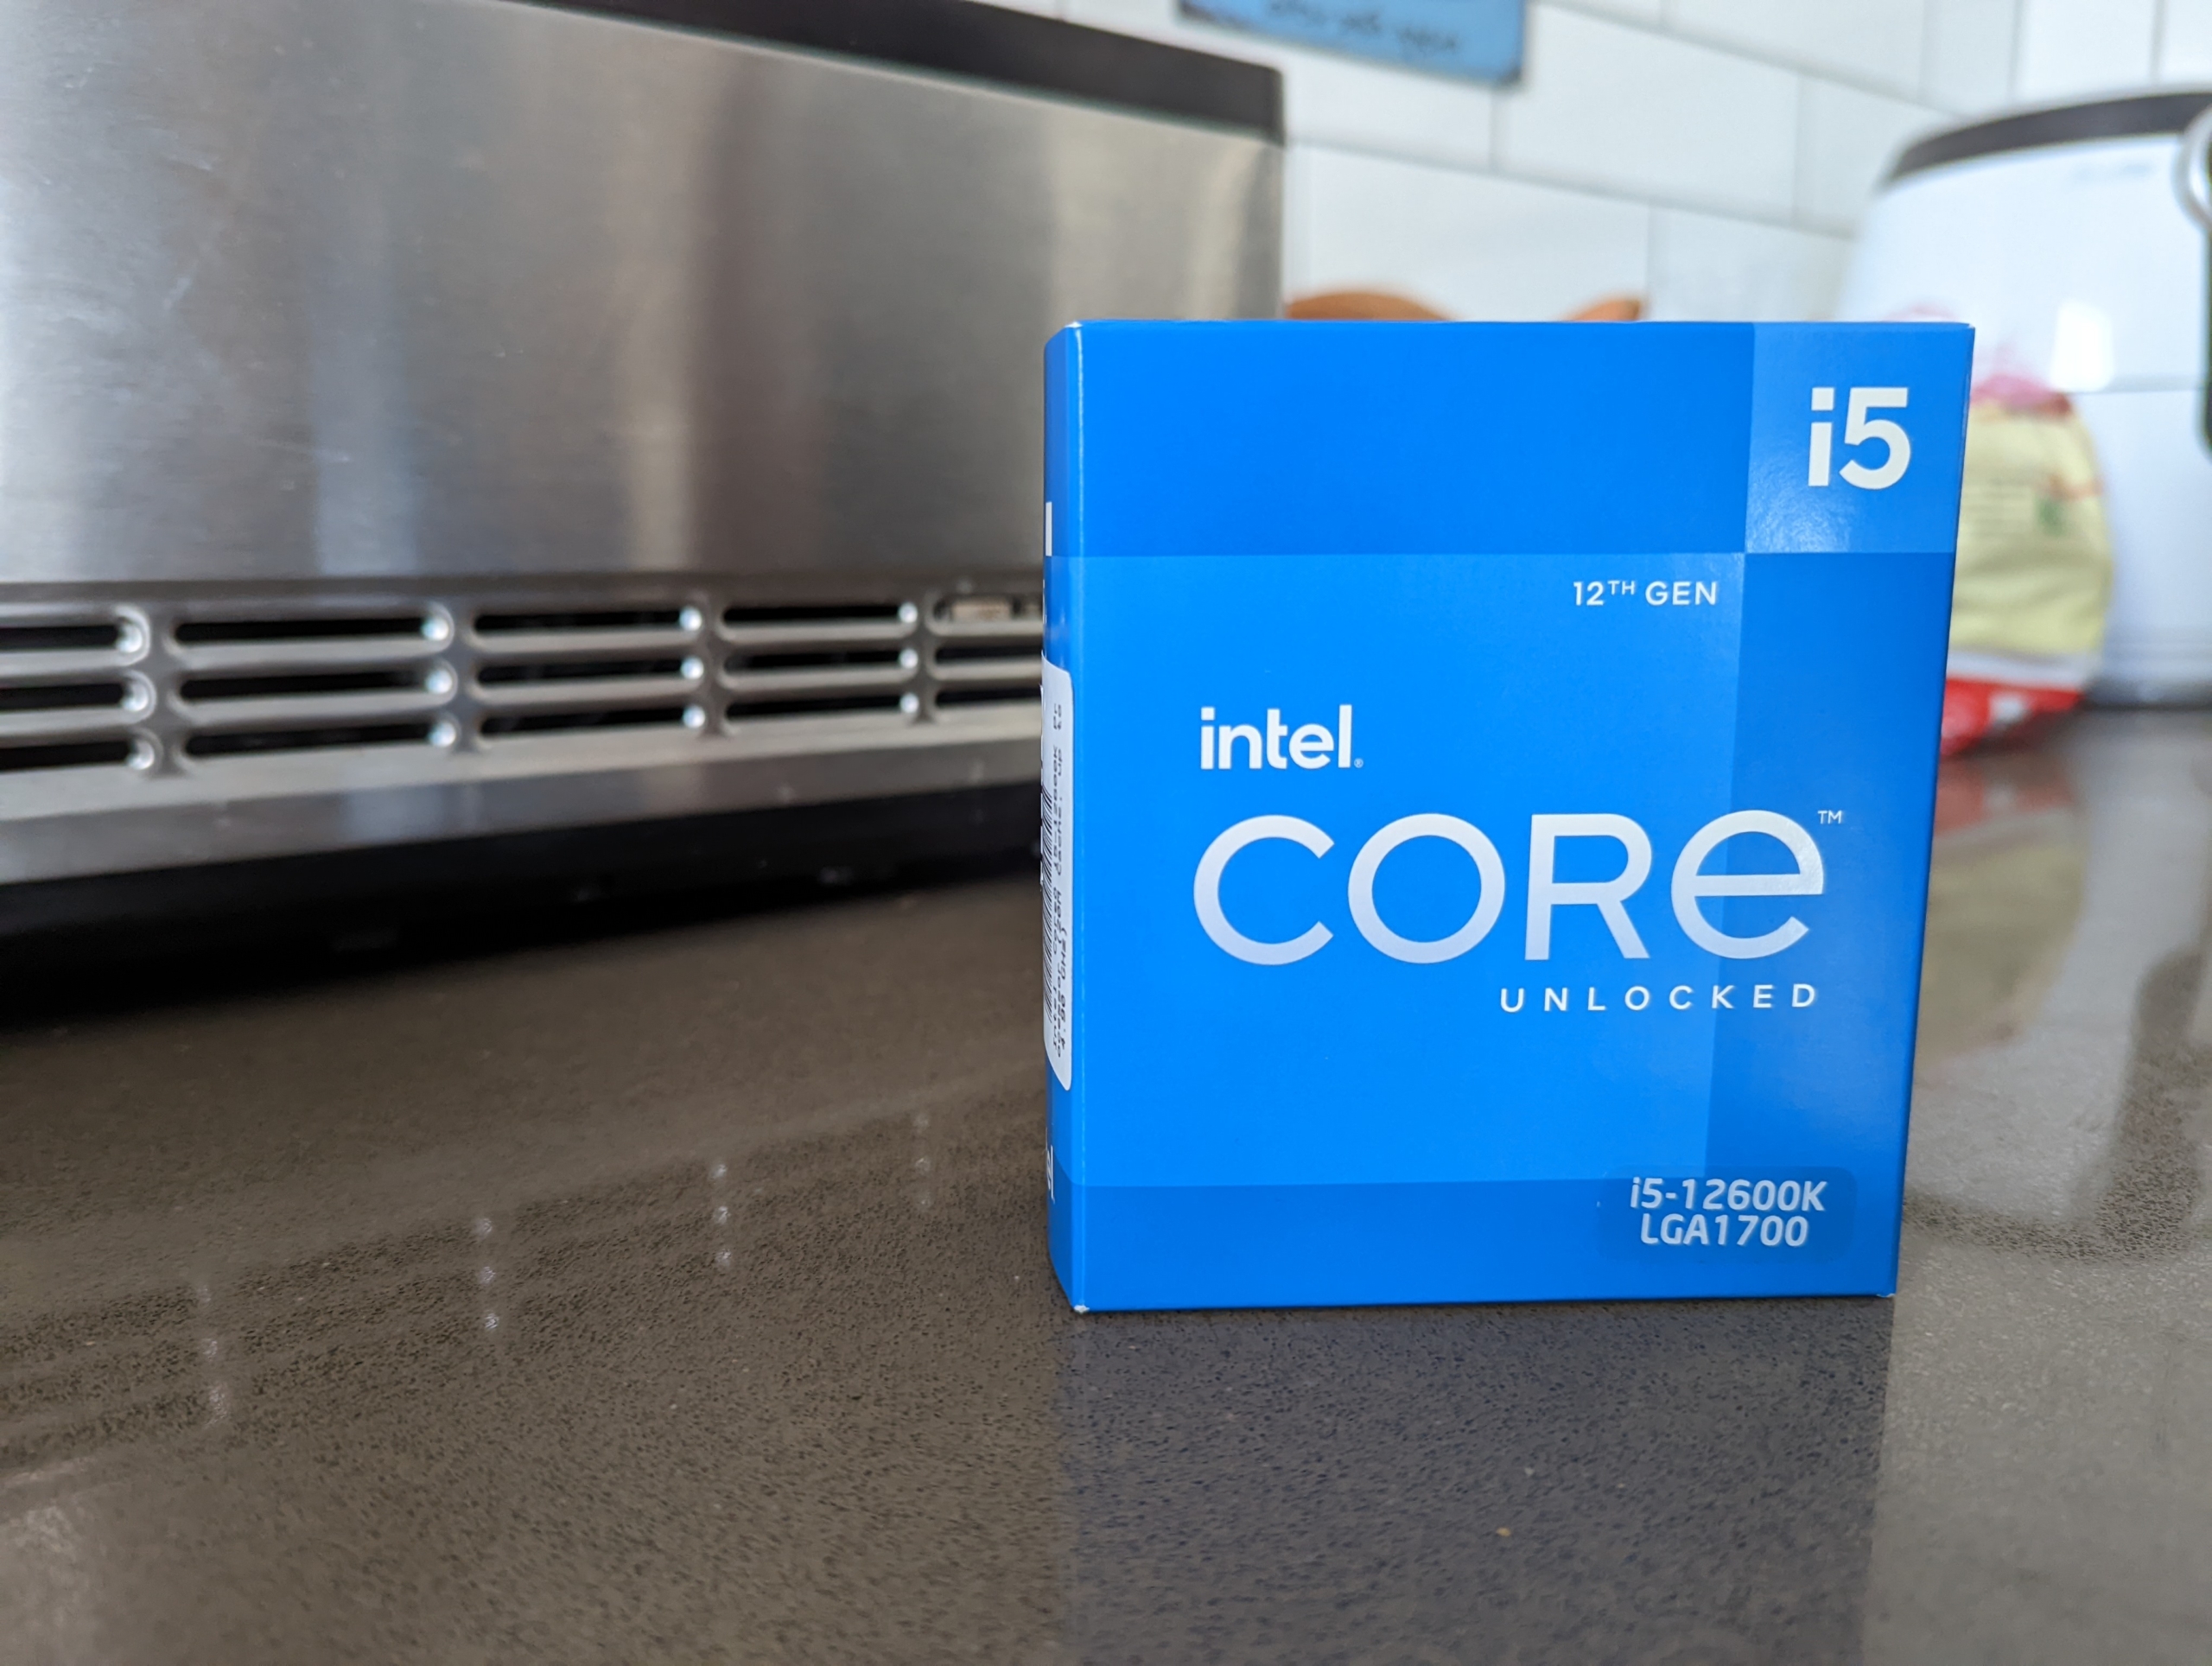
Not much else to say.
Cooling Unit
To cool the i9-9900, I picked the Noctua NH-D15 Chromax Black, an absolute monstrosity of a CPU dual-tower cooler. It is rather pricey, but I felt it was a necessary expense. Reasons I got it?
Performance.
Running a hot, power-hungry CPU like the i9 with a small cooler is a bad idea. It’s not a matter of risk, but of performance loss, since the CPU will be auto-throttling half the time. A stock or average cooler simply cannot keep the i9 within the thermal envelope required to maintain its boost profiles, which is where most of its performance will come from.
Clock speed is still king, and without good boost behavior, performance will suffer for most usage. You’ll never get by with the stock cooler Intel includes in the box of the i9. It is such a pathetic joke that I didn’t even bother to keep it as a backup. Straight to the trash can.
NOISE.
I had to use capitals I’m afraid.
The i9-9900 is a very hot CPU at full load. Once it starts boosting, fans will start spinning. The difference between running a 92mm stock cooling fan at 2400rpm vs a 140mm fan at 1000rpm under heavy load is impossible to even describe. This, to me, is the most important factor.
If you’ve ever used a stock cooler, then you know exactly what I’m talking about. The harmonics and monotonous fan ramping on small coolers is intolerable. The annoying hum and up and down droning are enough to drive a room full of recovering alcoholics into heroin addiction. Believe me, you don’t want to listen to that when you’re trying to work.
I want my system to be dead silent.
The D15 is silent, not because of the large 140mm fans (tho that’s also true, since they will spin slower than 120mm fans to move the same amount of air), but because of the sheer size of the heatsink itself, which, even passively, will likely cool better than other coolers with a fan installed. So, compared to smaller coolers, there will be a lot fewer occasions where the fans on the D15 even need to spin up.
There’s a tradeoff when it comes to CPU cooling. A larger heatsink surface area is more efficient at dispersing heat, and it can be used with a larger, slower spinning fan. The only way to have equivalent cooling with a small heatsink is via brute force cooling from the fans. But you will exchange size for an exponential increase in noise and fan volume.
No thanks.
So, I bought the Noctua NH-D15 Chromax Black (looks a lot nicer than the regular design). It keeps the i9-9900 cool, ~30c most of the time (running on 750 RPM), and I can’t hear it even when it starts spinning up.
Nobody out there is making better coolers than Noctua. They’re pricey, but a good air cooler is an investment. It can be used through potentially a lifetime of CPU upgrades or platform changes.
And forget liquid coolers. Loops leak, heatsink don’t. Pumps fail, far more often and usually with far worse consequences, than fans do. And let’s not even talk about the annoying gurgling noises they make.
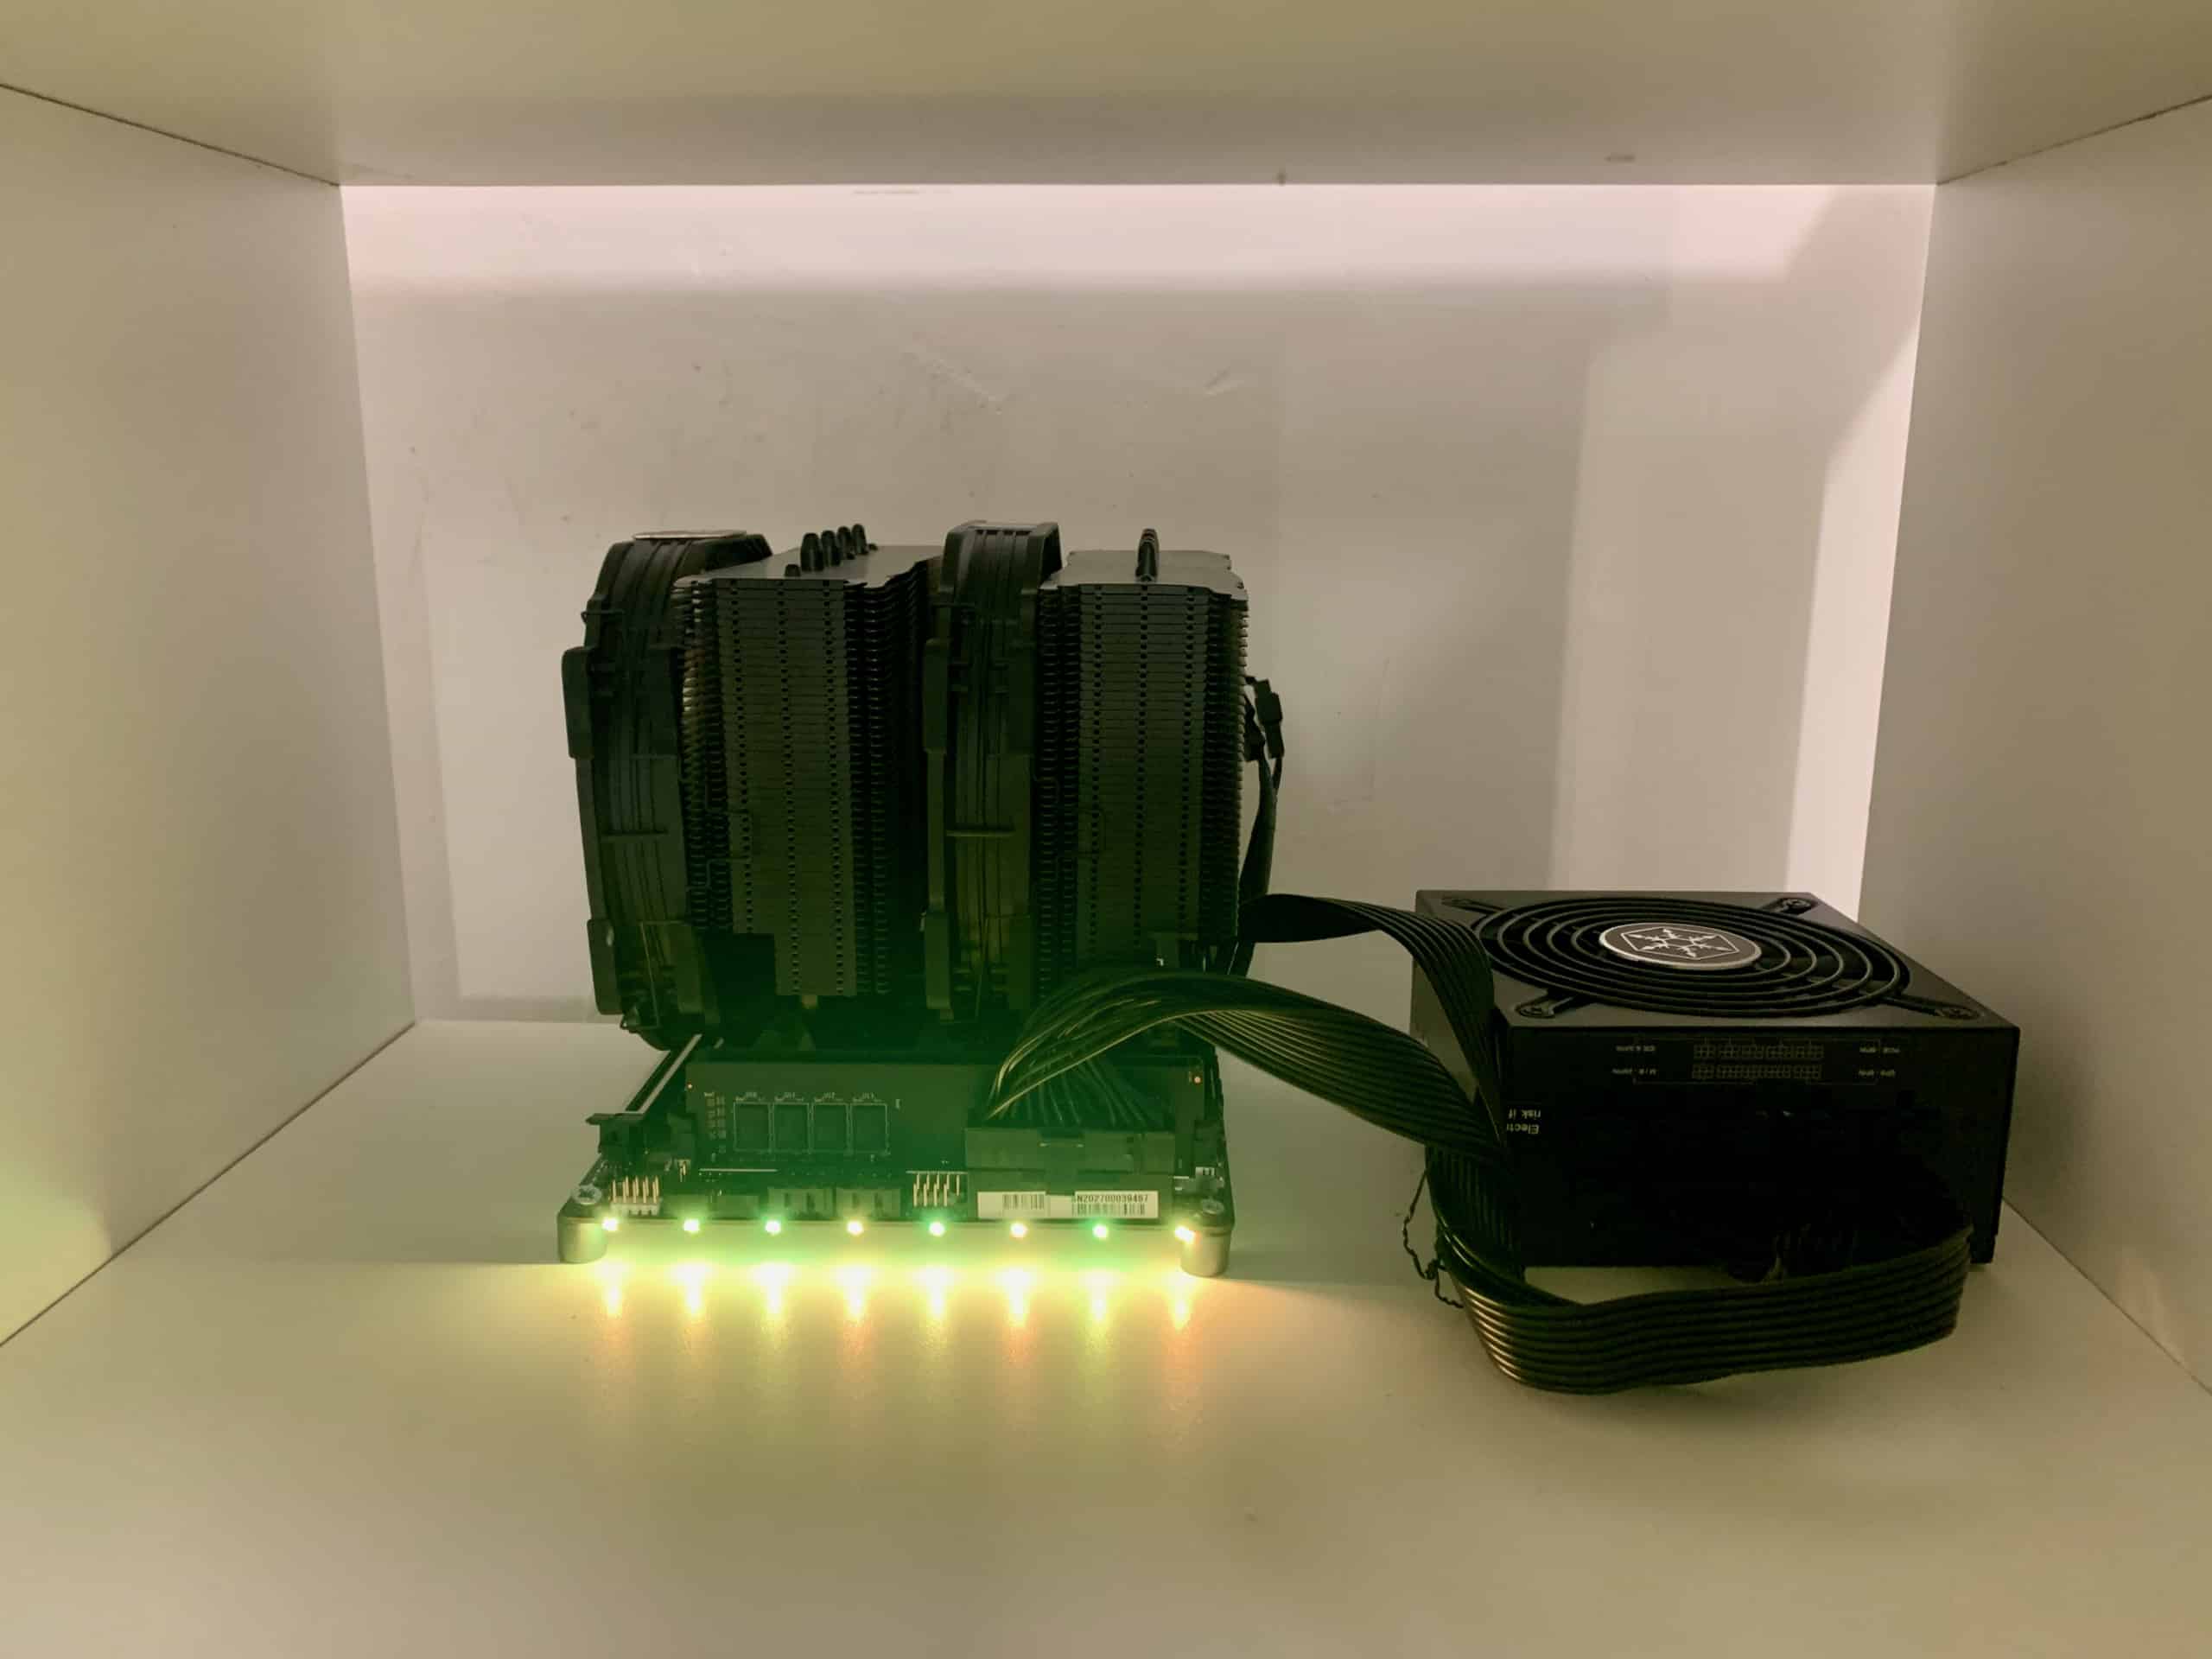
Here’s how my system looks with the NH-D15 installed. No case, I simply bolted the motherboard into the top shelf of a vitrine next to my TV:
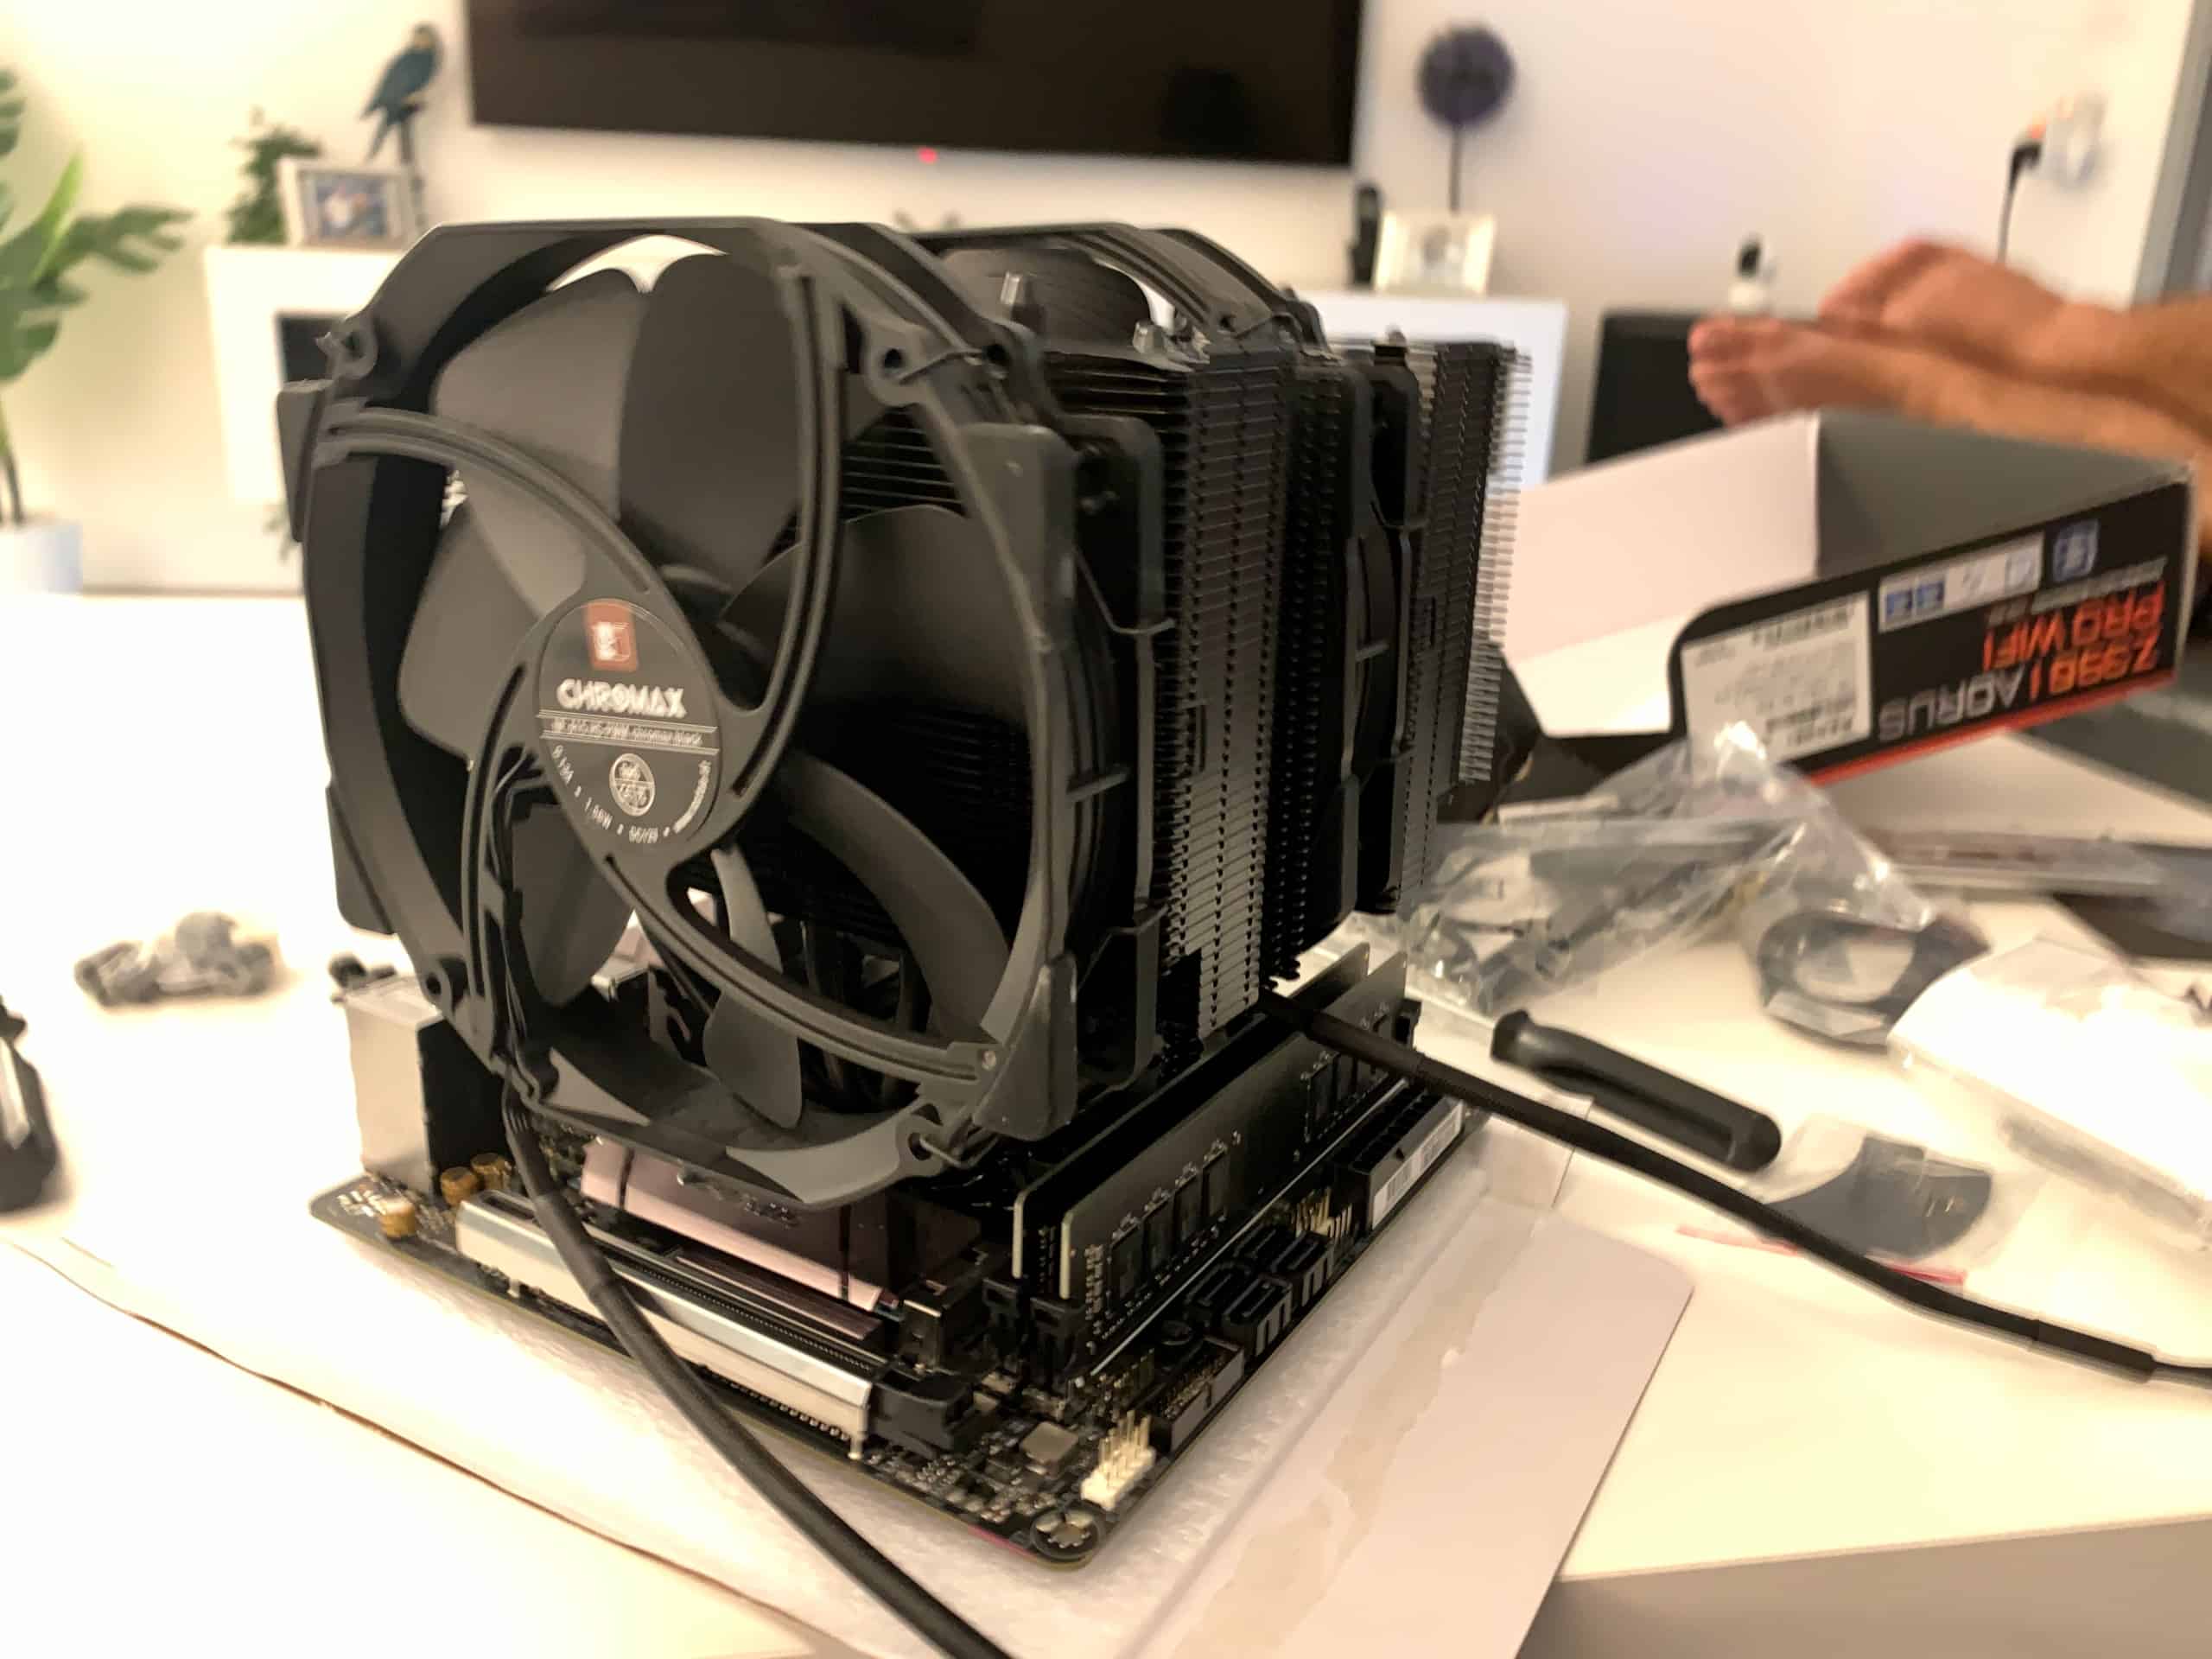
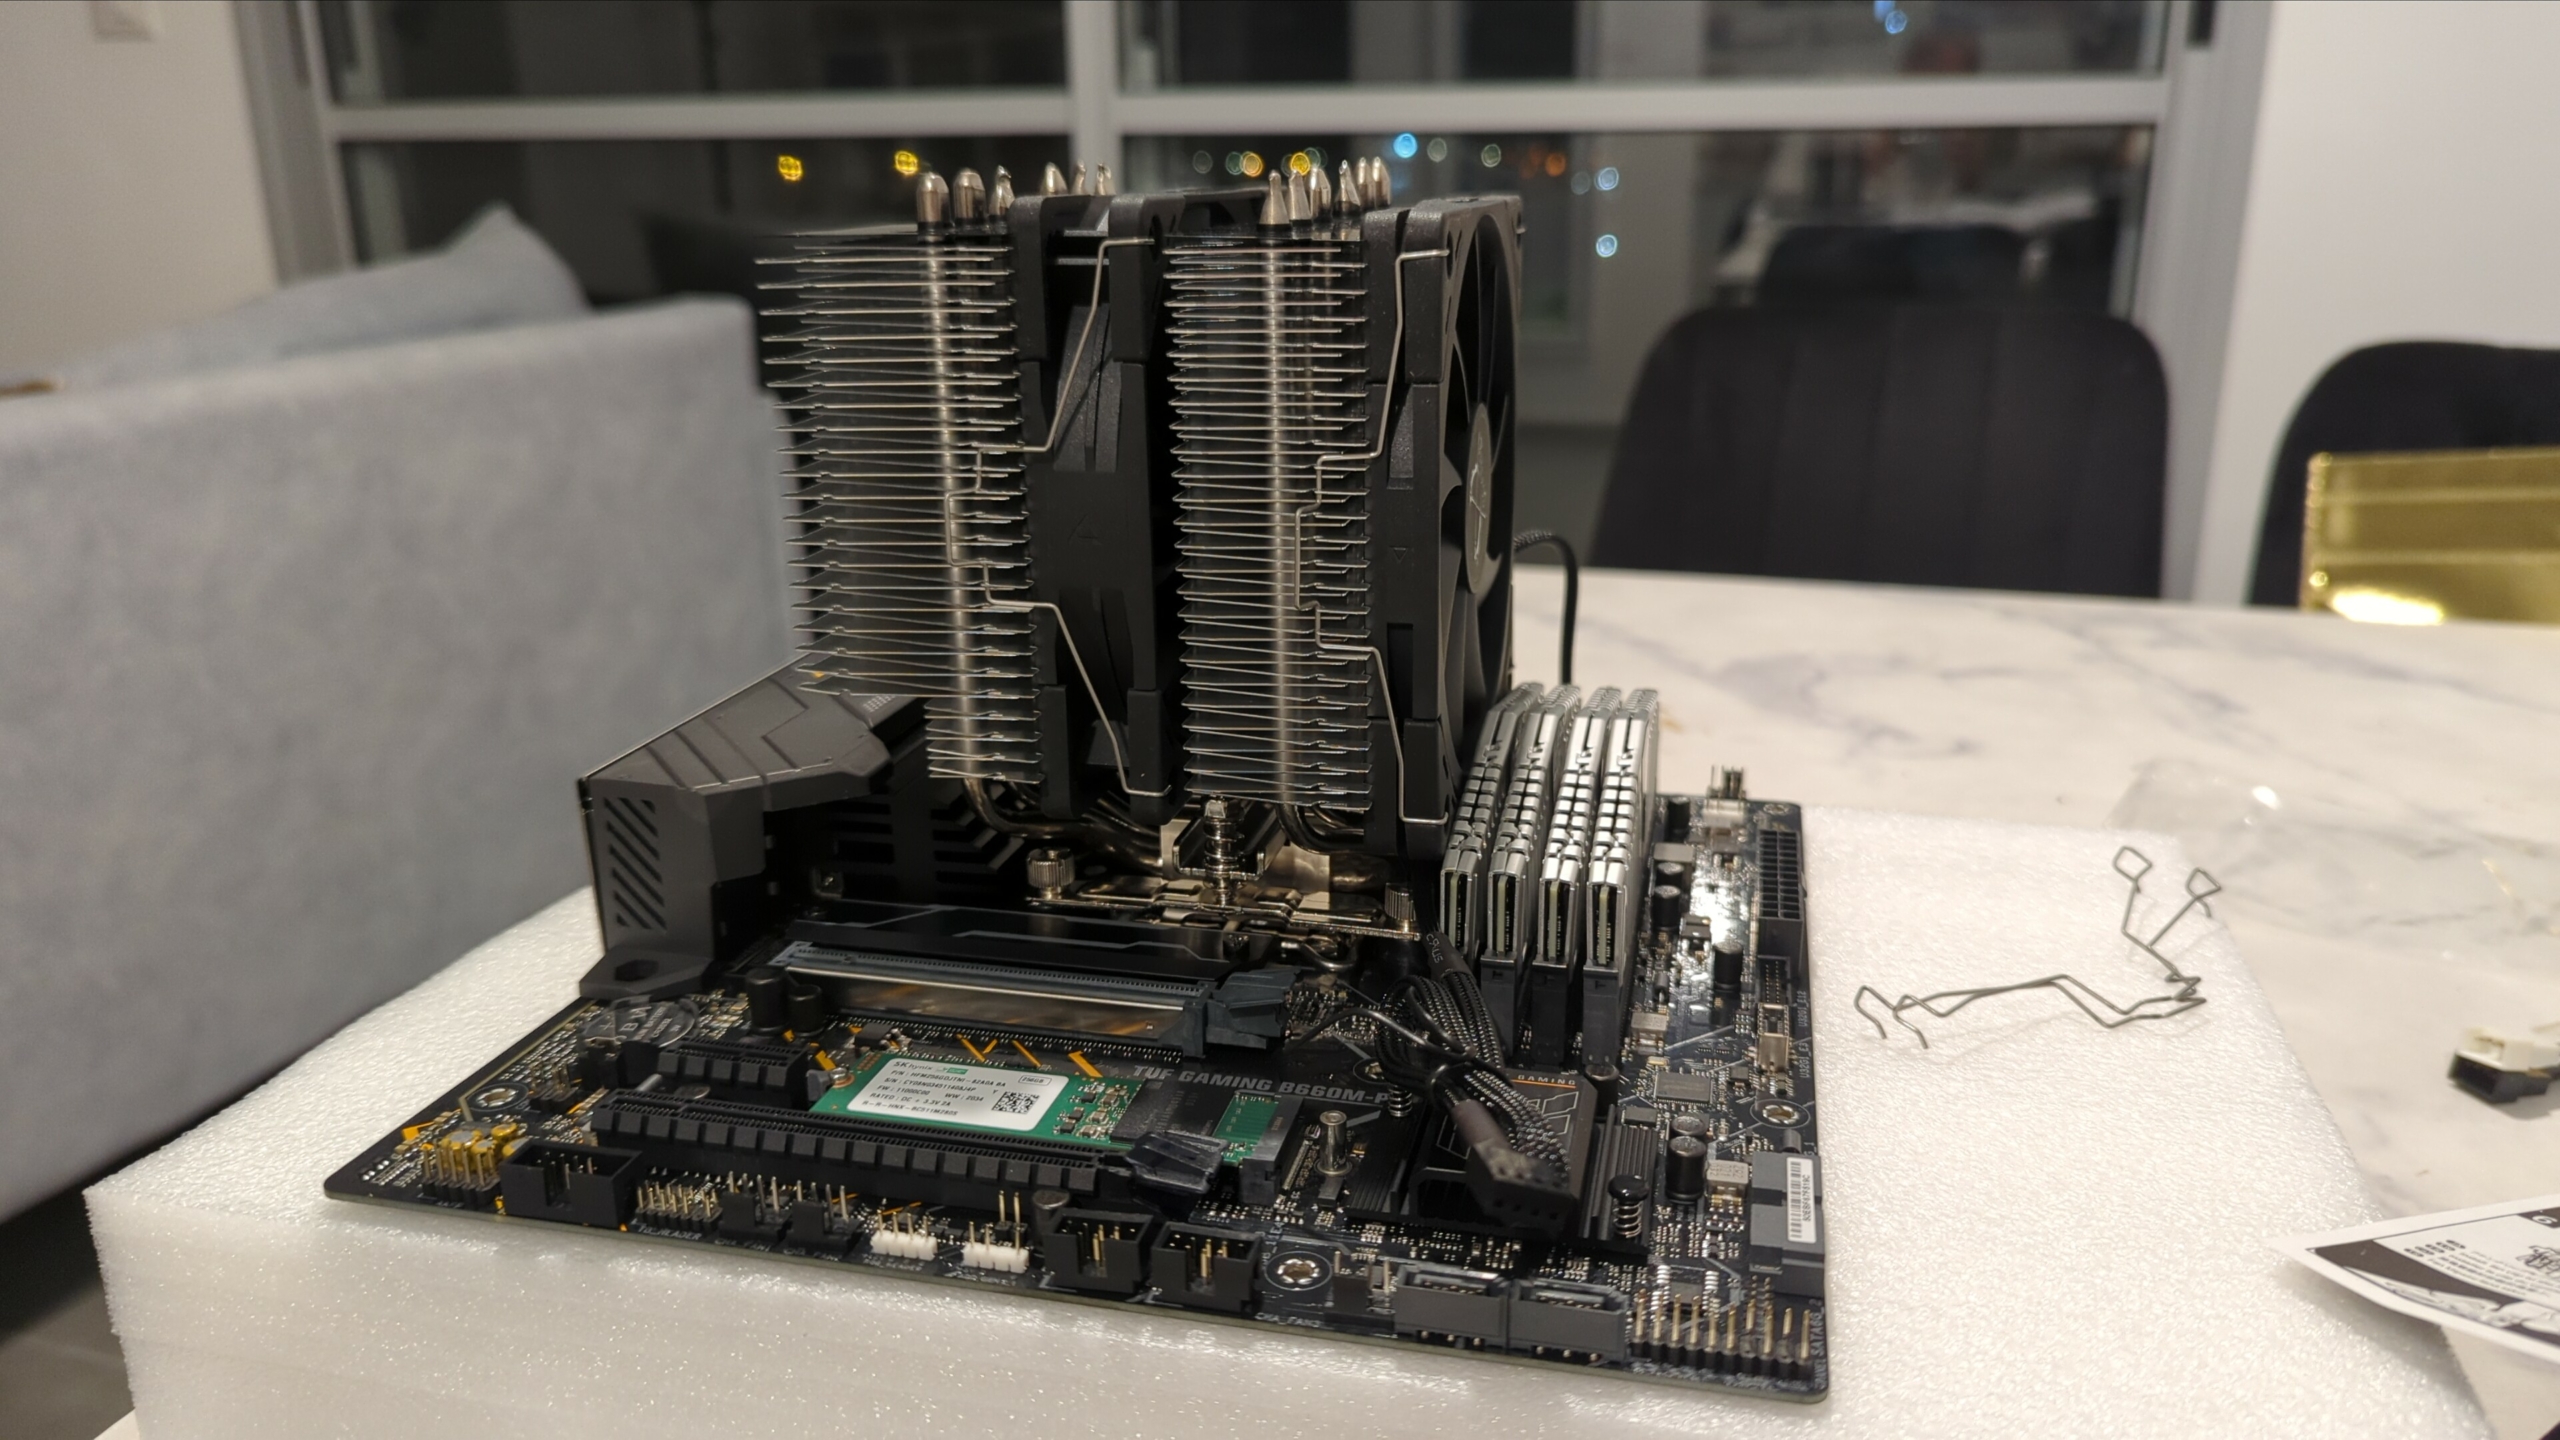
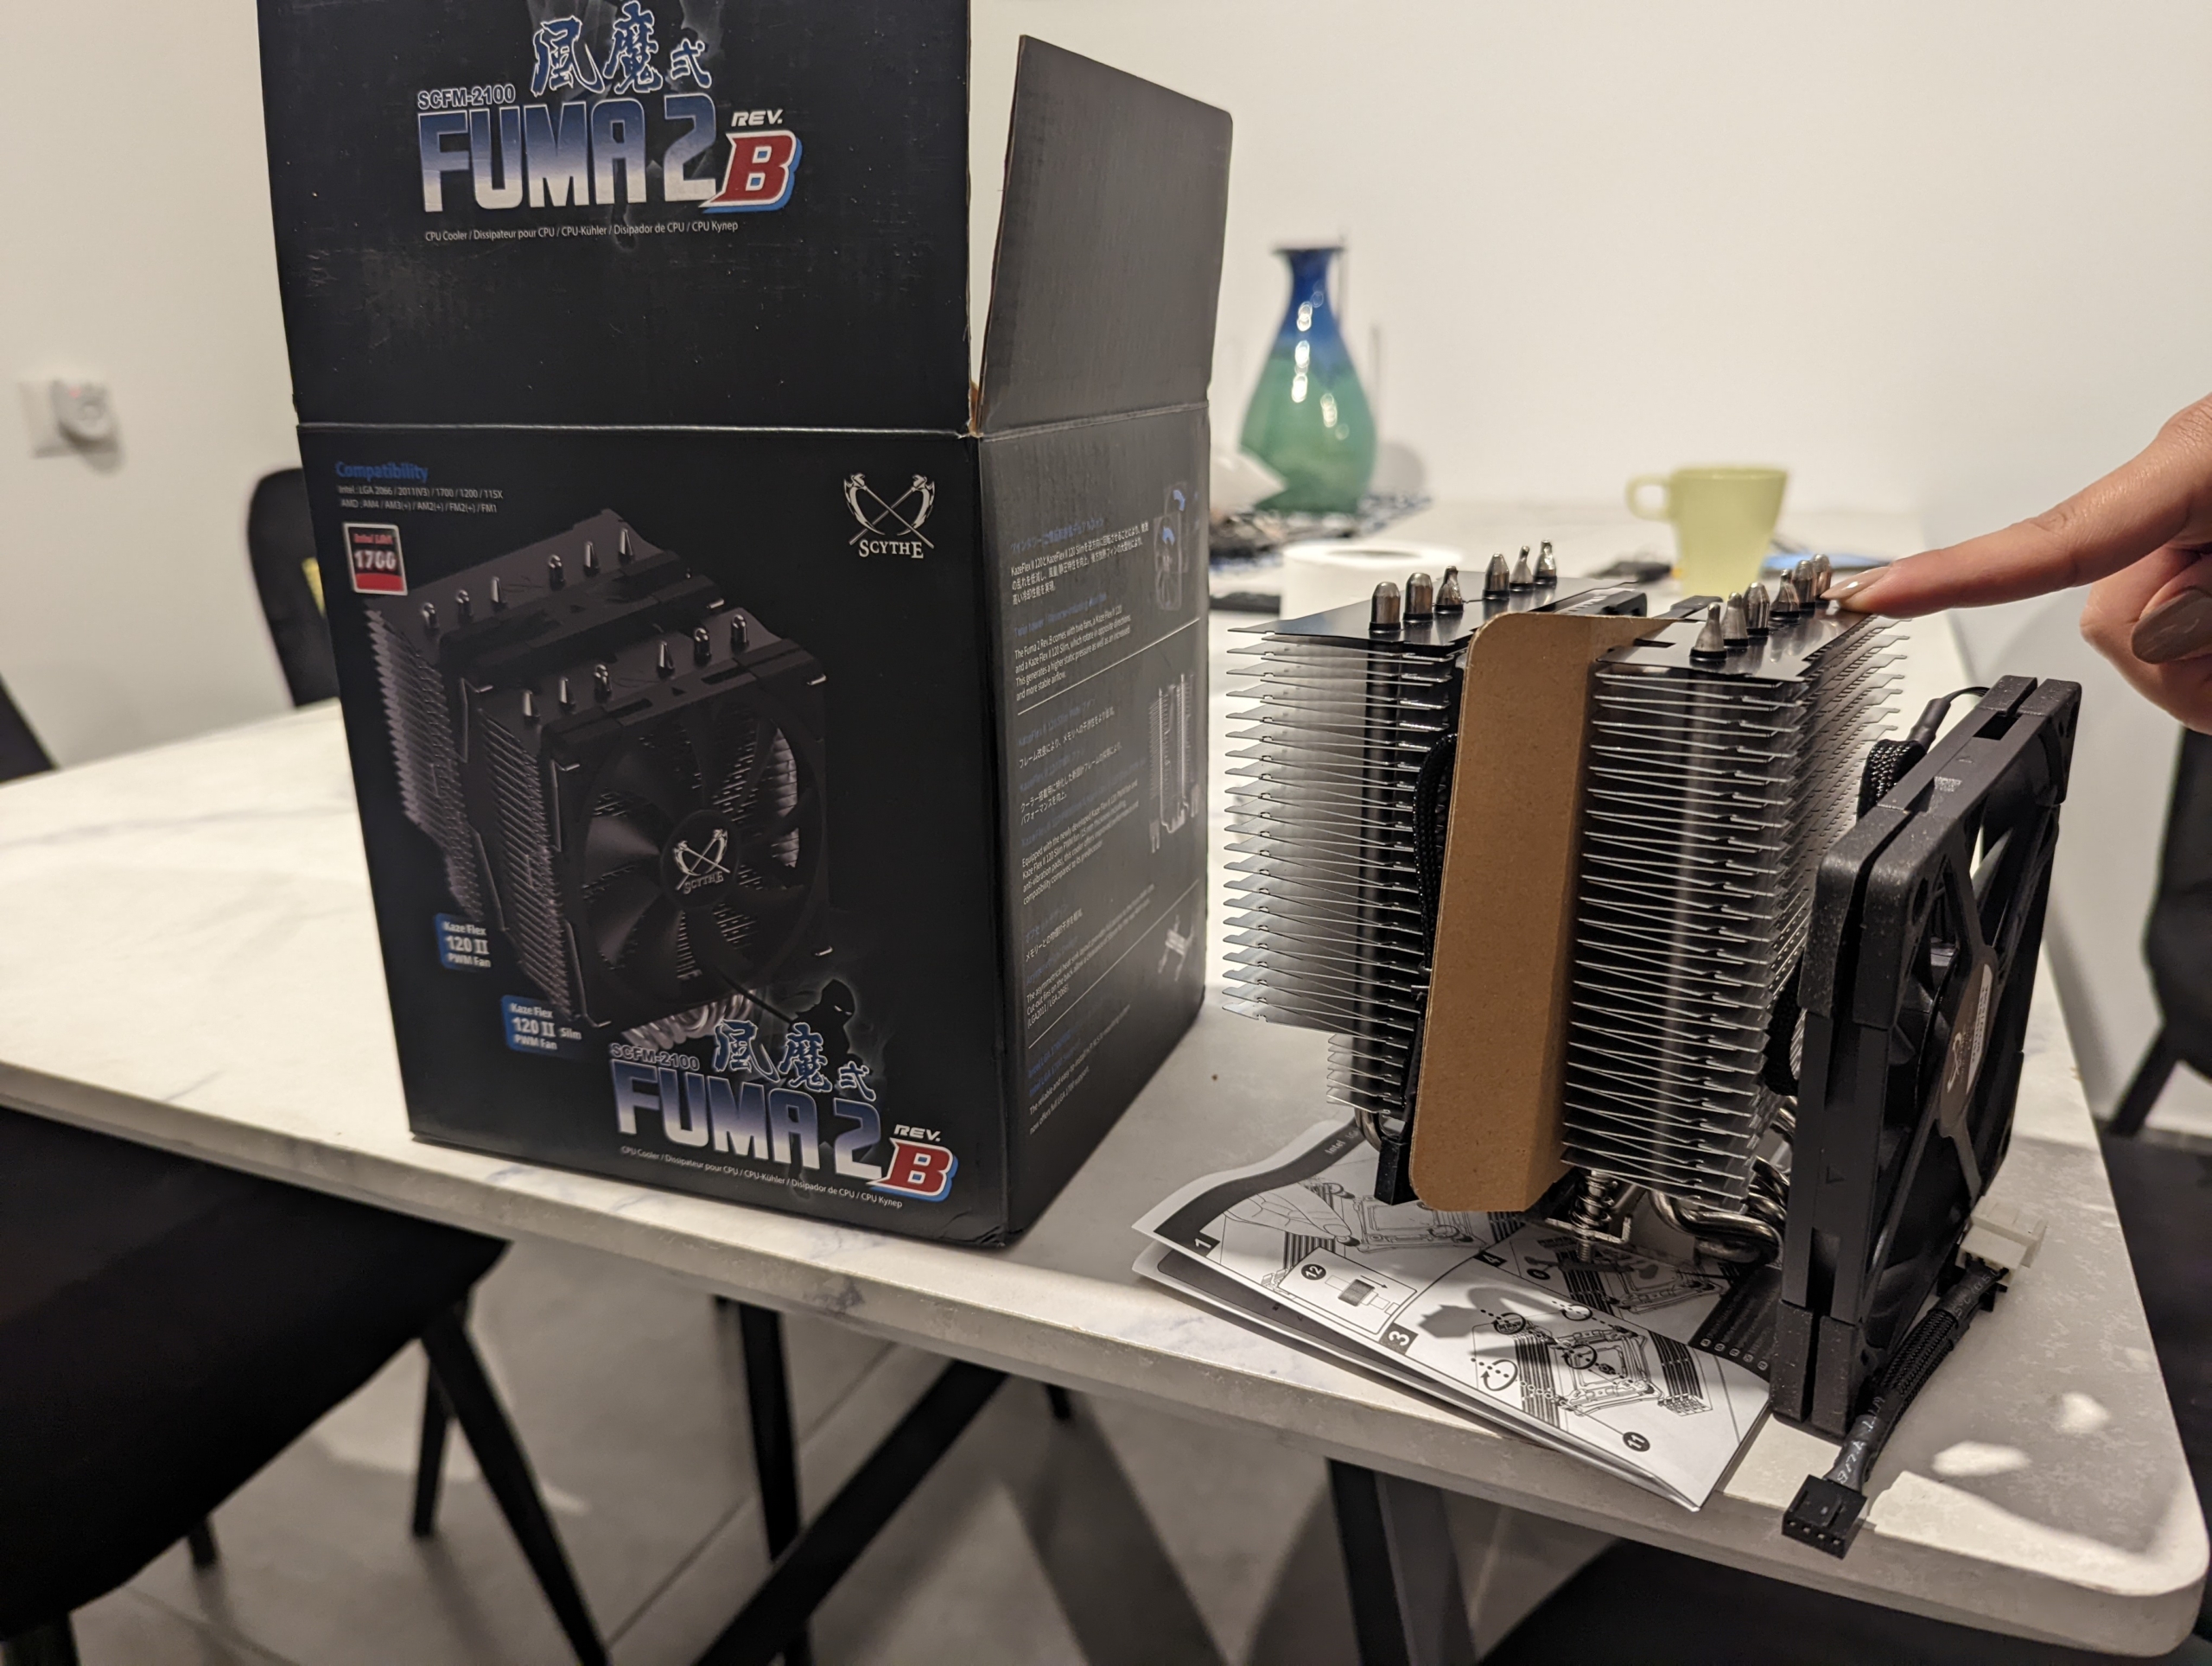
As to my second computer, I picked up a $65 Scythe Fuma 2 Rev.B. It’s an outstanding cooler, and according to reviews it’s almost as good as the D15, but for half the price. I highly recommend it, because it’s shorter and can fit in many cases that the D15 can’t. Here’s how it looks like:
Computer Case
Update: I now house my i9-9900K computer inside a gorgeous Silverstone LD-03. I got it because I was tired getting anxious when the kids start to play around my naked hardware. The LD03 is the most beautiful case I’ve ever seen. It’s made of black tempered glass, which perfectly fits my office, as everything here is black glass – my table, my drawer, even black glass boards on the walls. It all just looks super slick now.
The LD03 vertical design works similar to the Xbox Series X, where the case yanks cold air from the bottom and exhausts it from the top. I picked this case because I love its elegant engineering. It’s the most gorgeous compact case that can fit in the monstrous Noctua DH-15 cooler:
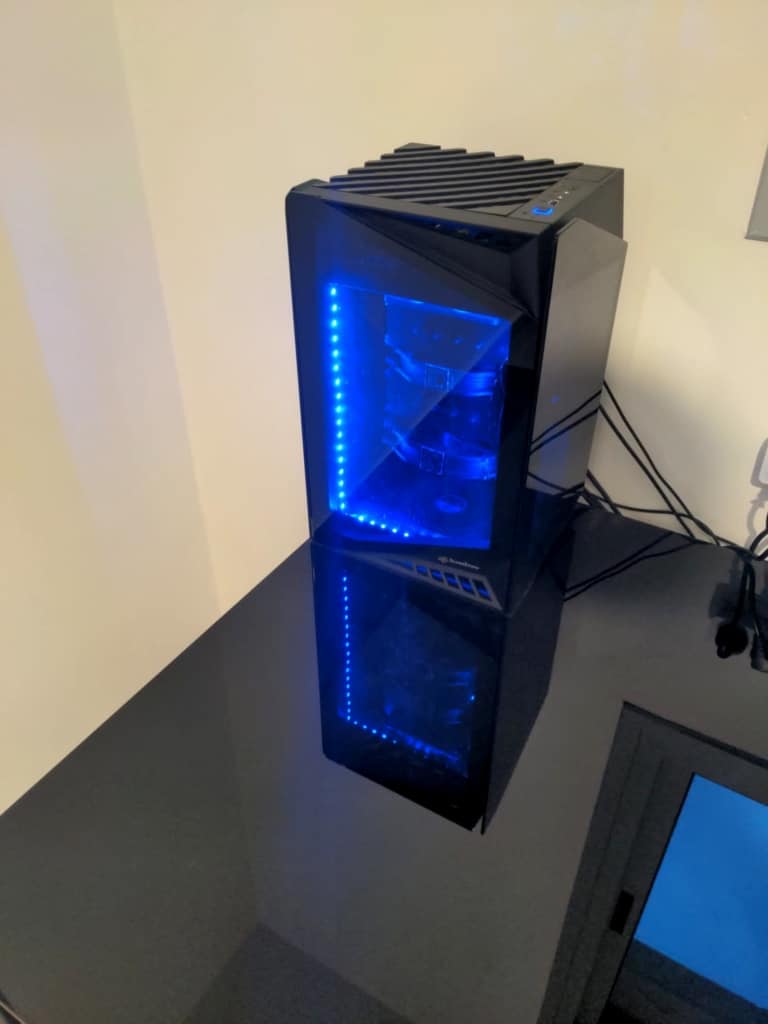
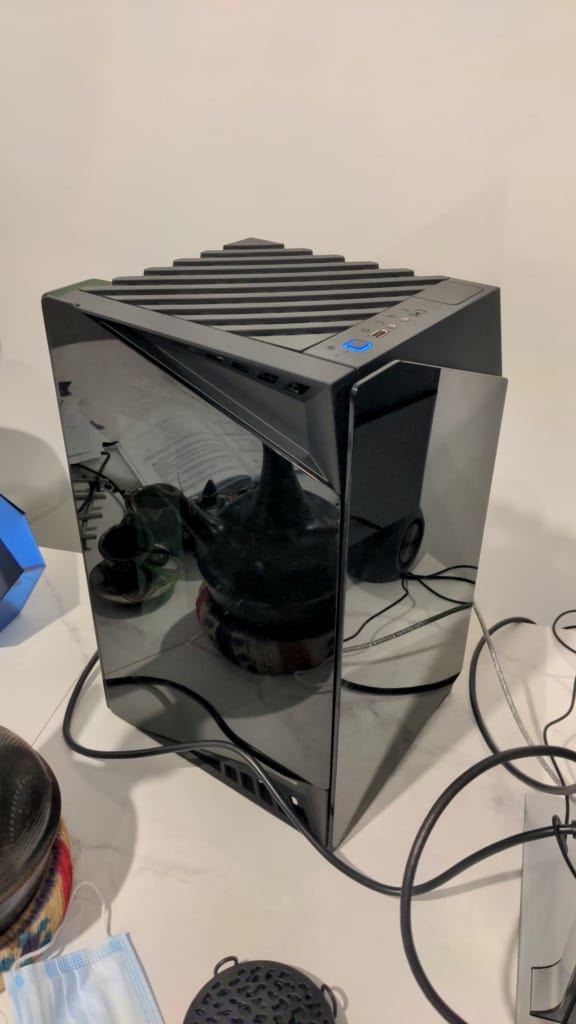
To me, that case was a bingo. Fits the huge Noctua cooler, and I already had the right power supply and motherboard form factors (SFX-L, and Mini-ITX) for it. Couldn’t ask for a better minimalist case – highly, highly recommended. Silverstone makes some really amazing products.
P.S. Those LED strips cost a couple dollars on eBay.
For the second computer, I’m using the ALTA G1M, another Silverstone case with their stack-effect design (vertical design, where cool air can flow from the bottom up for the most efficient heat dissipation):
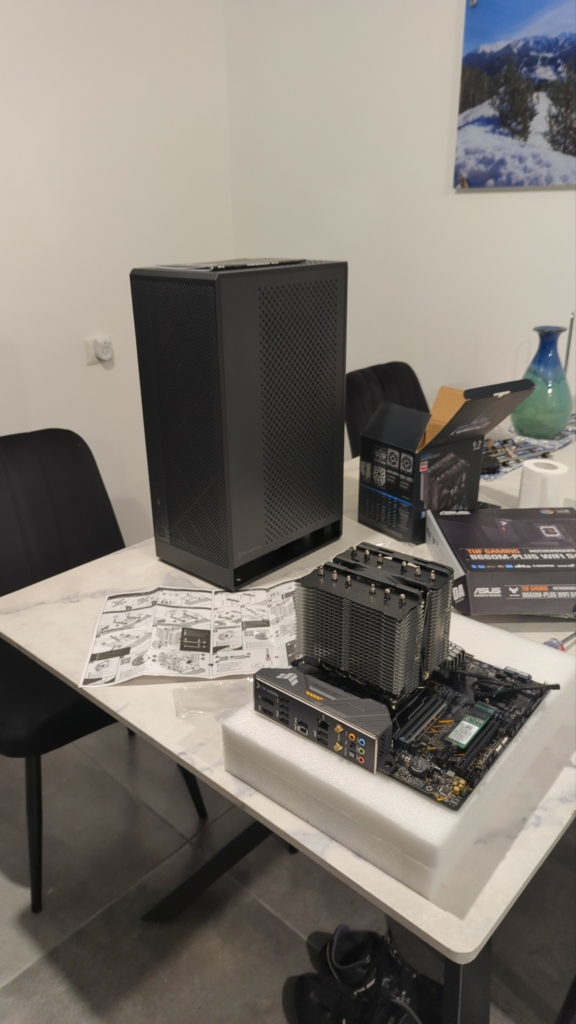
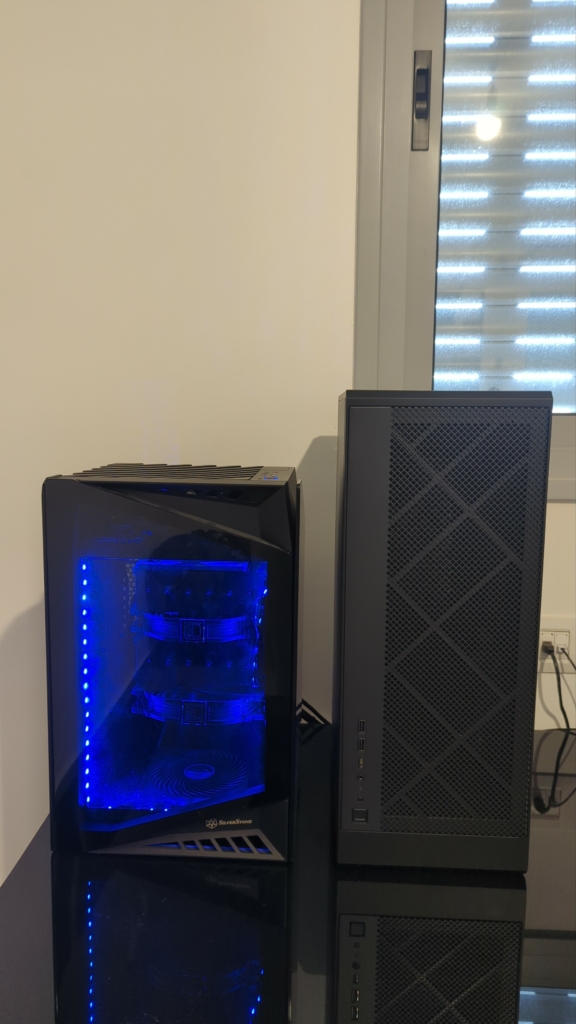
As you can see in the photos, it’s taller than the LD03, but it’s also narrower. Design-wise, it’s more enterprise-ish looking than the LD03. I like it. I like it a lot in fact. People always think it’s a fancy speaker rather than a computer case (remember, it sits in the living room).
Construction-wise, it is extremely solid. Easier to work with than the LD03, because it has more space. I also love the way everything is put together – very easy to open, close, and tinker with. I highly recommend this case. Silverstone, in my opinion, is the most innovative case manufacturer in the world. They keep coming with unique, interesting designs, time after time, year after year. Amazing company.
Performance-wise, the stack-effect design doesn’t disappoint. My 12600K is kept very cool. The motherboard is rotated 90 degrees, so the cooler yanks cold air from the bottom and pushes it up. This design ensures ultimate heat dissipation, because hot air naturally rises.
Silverstone – amazing job, folks.
Motherboard
In a productivity machine, stability is key. Any downtime and you’re losing time that could otherwise be spent producing. That’s why you want to cover the basics and get a motherboard with good power delivery.
That means a good voltage regulator module (VRM).
The VRM is a converter that provides a processor the appropriate voltage, converting +5V or +12V to the much lower voltage needed by the CPU. You want a strong, stable VRM that can fuel your CPU even at full boost.
A weak VRM will heat up and thermally throttle, reducing the CPU speed. If your CPU is power-hungry (like my i9), that requires a significantly beefier VRM configuration to feed it with enough electricity.
You can find motherboard lists made by enthusiasts, carefully examining the VRM quality of each. Here’s the one I used to find myself a solid Z390 (an i9-9900’s chipset) motherboard. There are links to similar lists for other chipsets on the spreadsheet’s very bottom.
I picked the Gigabyte AORUS Z390 Mini-ITX. Not only because it has a great VRM, but also because Mini-ITX boards are the only Z390 boards that come with an HDMI2.0 port for the integrated GPU. HDMI2.0 allowed the 4K LG TV I used to run at 60hz, instead of 30hz with HDMI1.4.
Of course, you don’t need a top-tier VRM if you don’t buy a monster CPU. A tier-III motherboard will suffice for an i5 or an equivalent Ryzen at stock speeds, though I wouldn’t go below tier-II for anything.
My point is, don’t cheap out on the board. The cheap ones usually mean cutting something out in order to accommodate an imposed price restriction, and you’re never (or very, very rarely) going to get the desired result combining a performance part with a budget part.
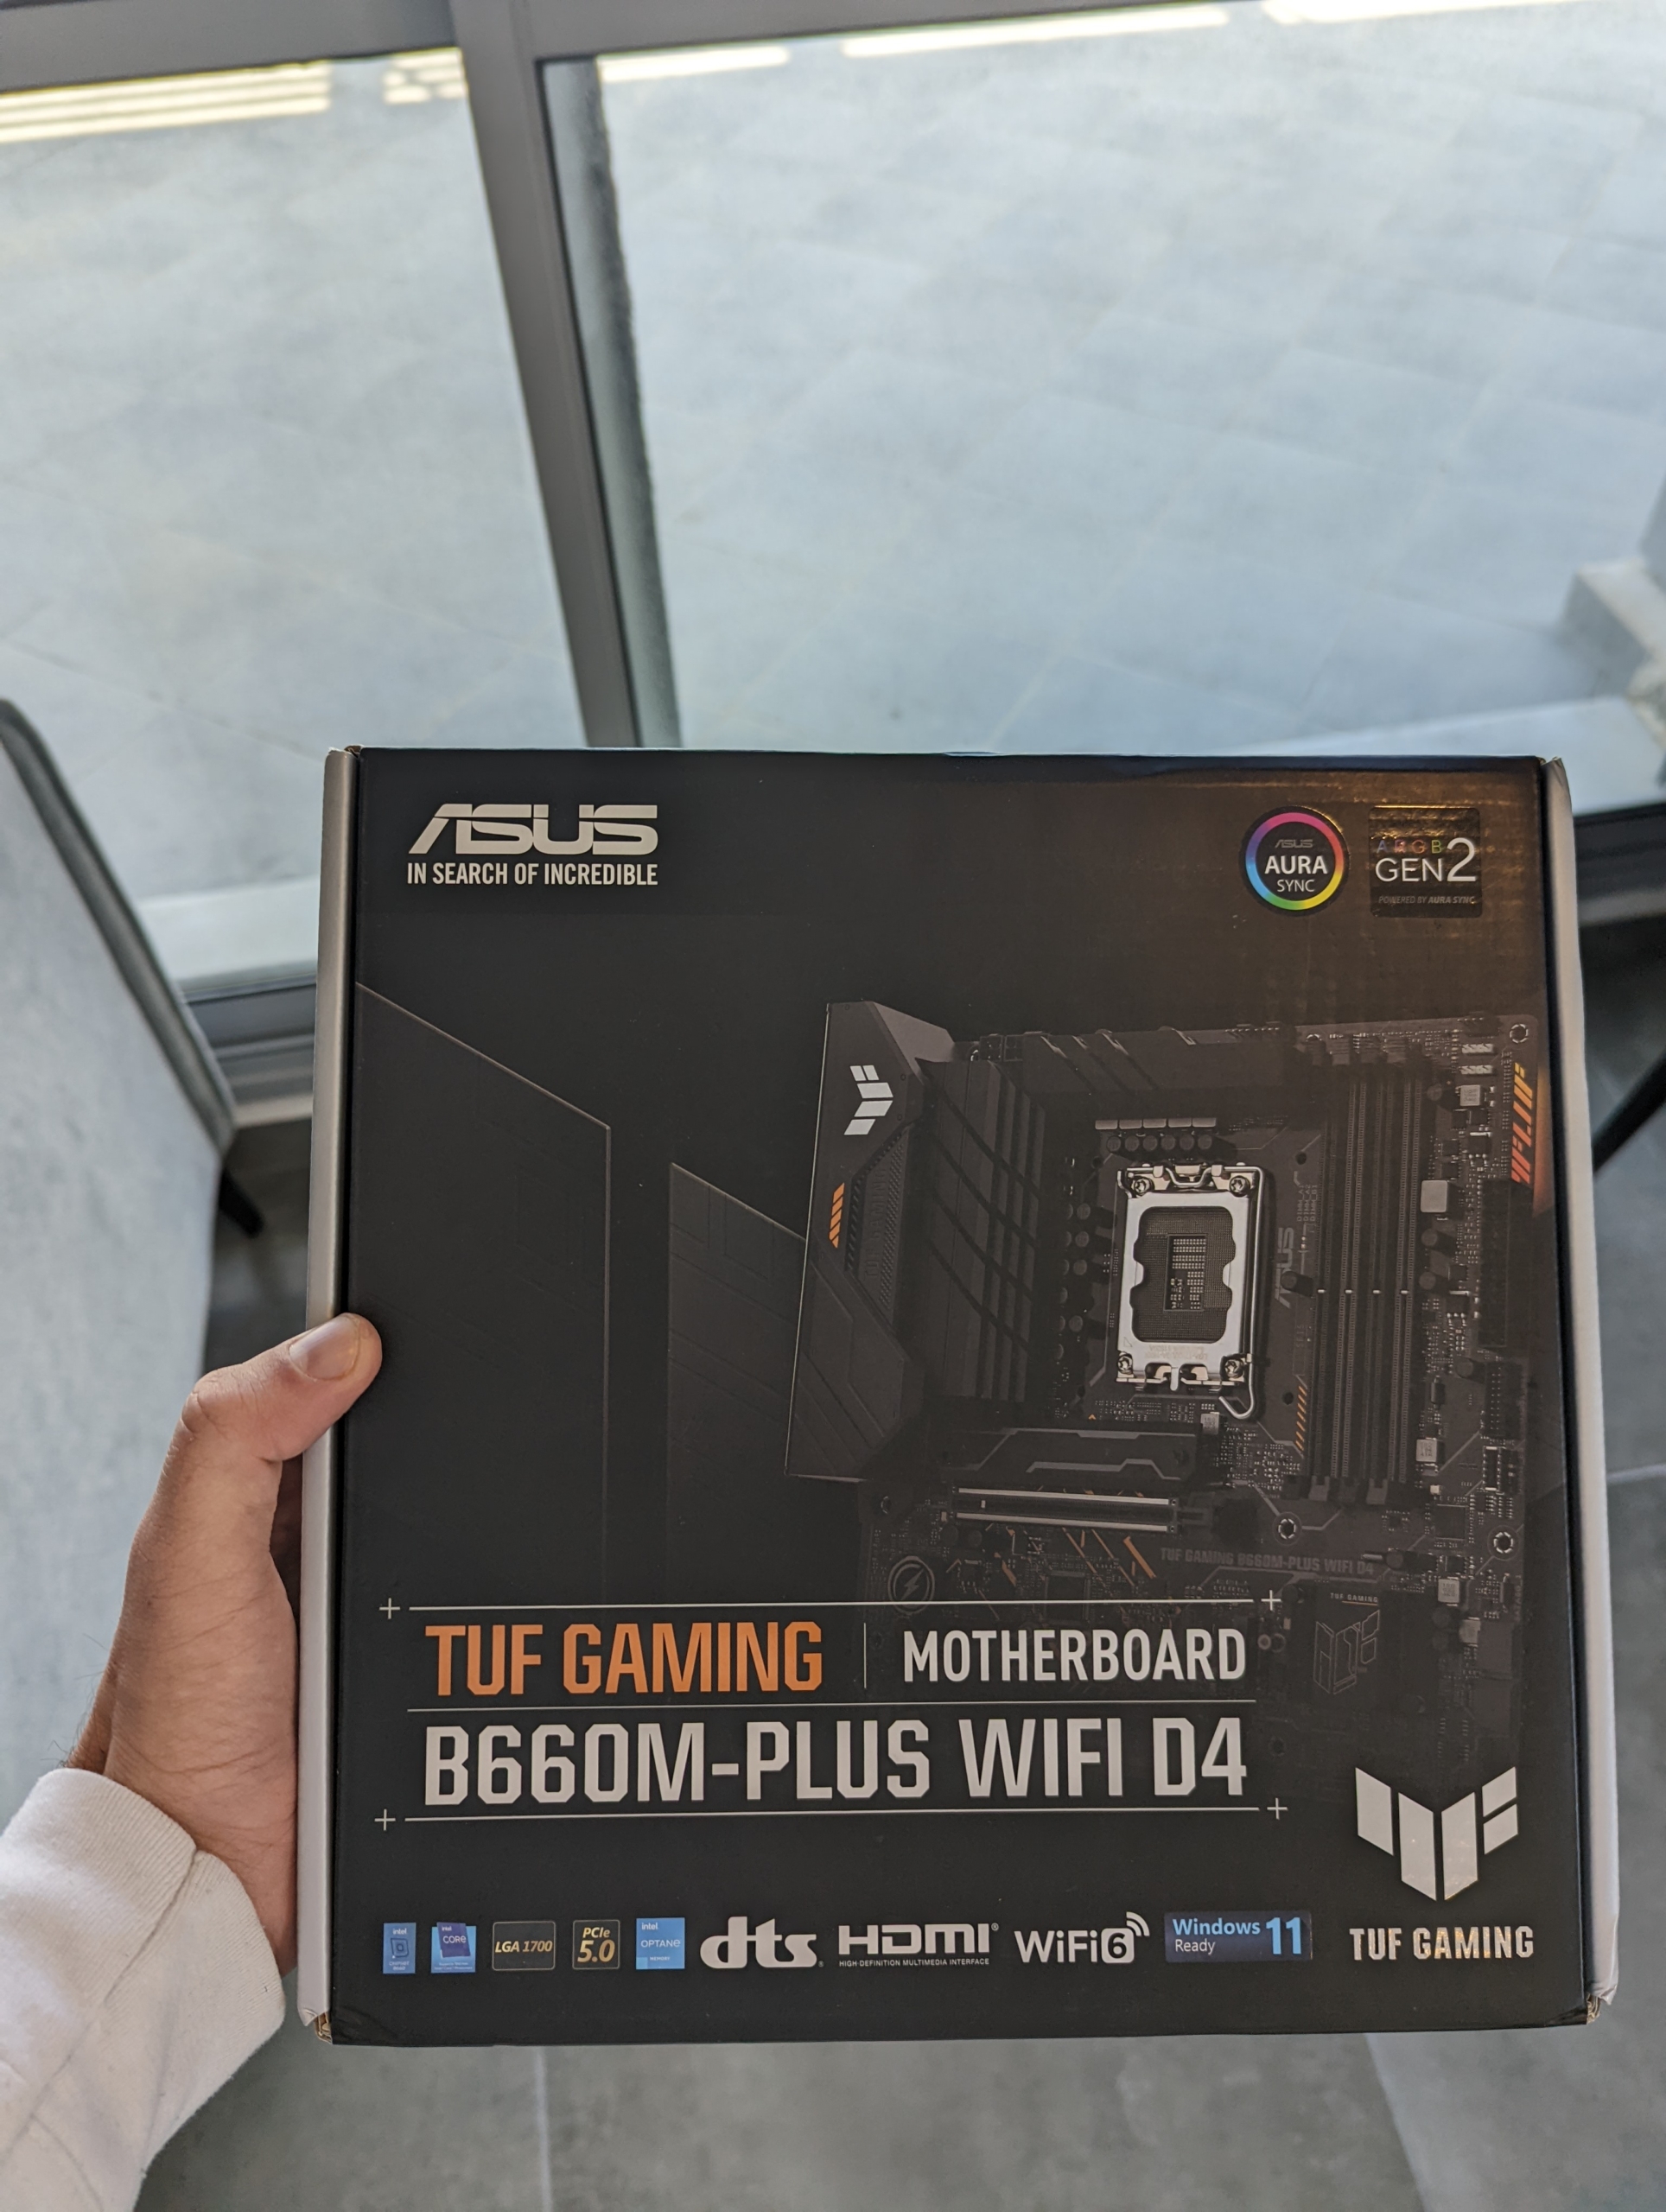
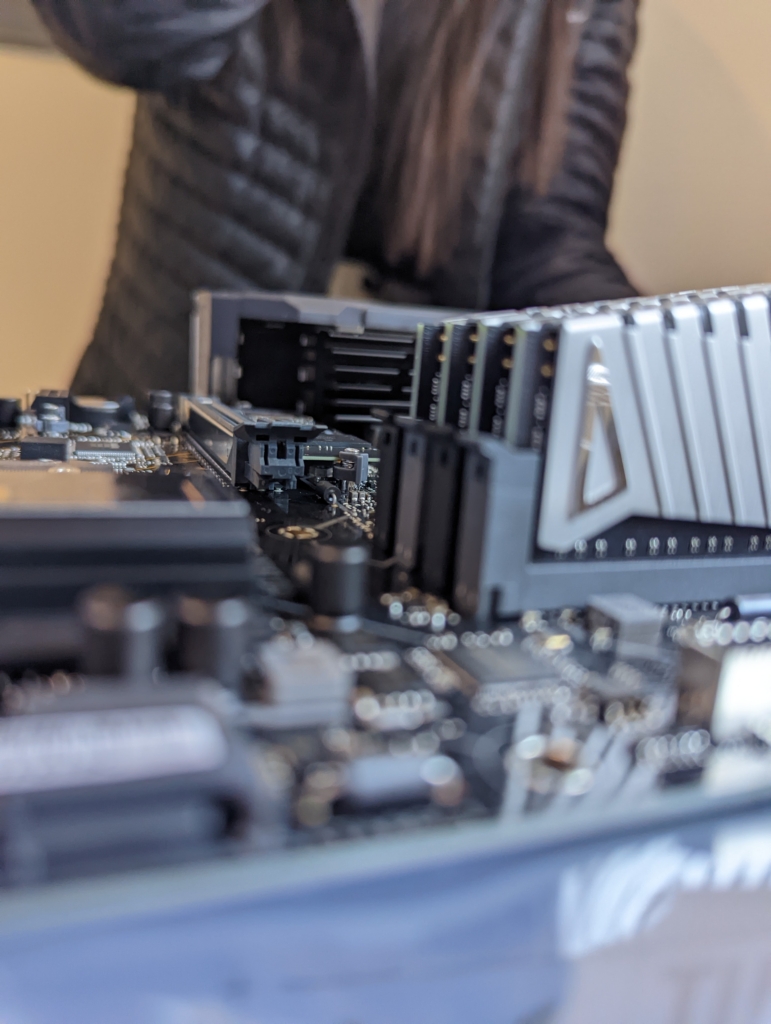
For the newer 12600K, I picked up an ASUS TUF-GAMING B660M-Plus Wifi. It has an excellent VRM, and all the features I needed.
Memory (RAM)
Everything in my day takes lots of RAM. A million open tabs? RAM. Massive text files? RAM. Lots of images, PHP files, heavy browser usage? RAM. 16GB isn’t going to cut it. It might be everything the average gamer needs, but for productivity uses, I’d be looking at 32-64GB.
RAM is so cheap these days, just get more than you think you need. DDR4-2666 at least. Often you will find DDR4-3200 or DDR4-3600 for just a little more. I doubt at that point RAM speeds are going to make any discernible difference, but if it’s just $10-15 extra then definitely go for it.
For my system I got a 32GB kit (16×2) from Silicon Power. I got the ones without heatsinks (RAM doesn’t need cooling). Nothing much to say about the memories – they’re great. Fast and snappy. Silicon Power consistently delivers great products at the lowest prices.
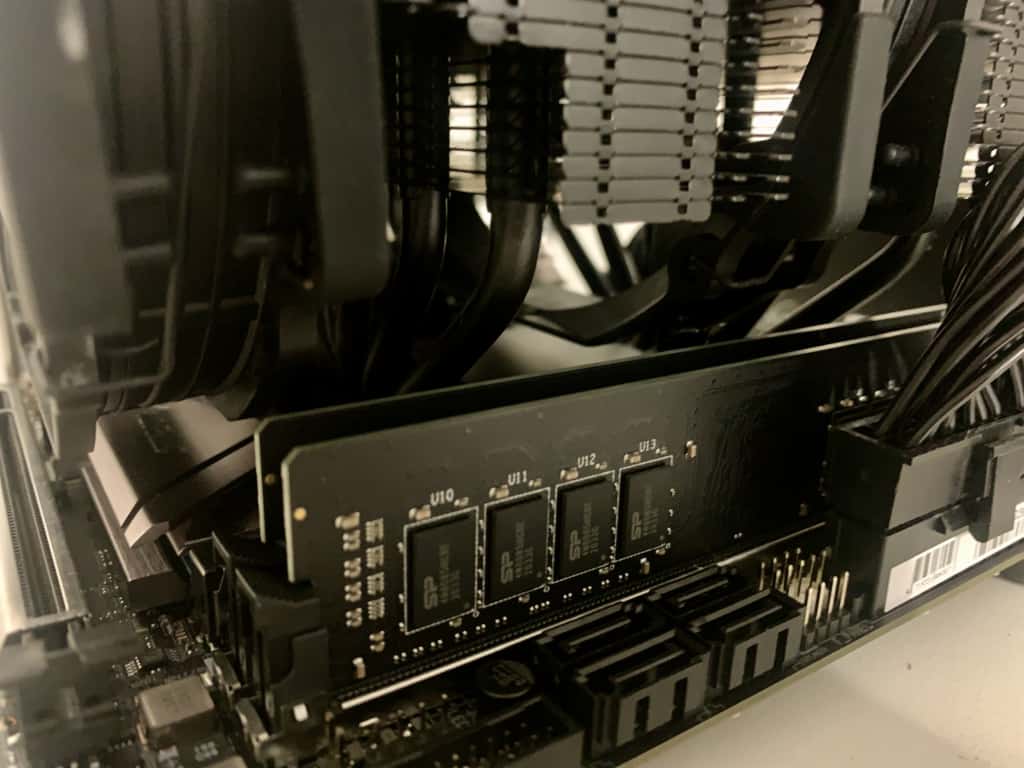
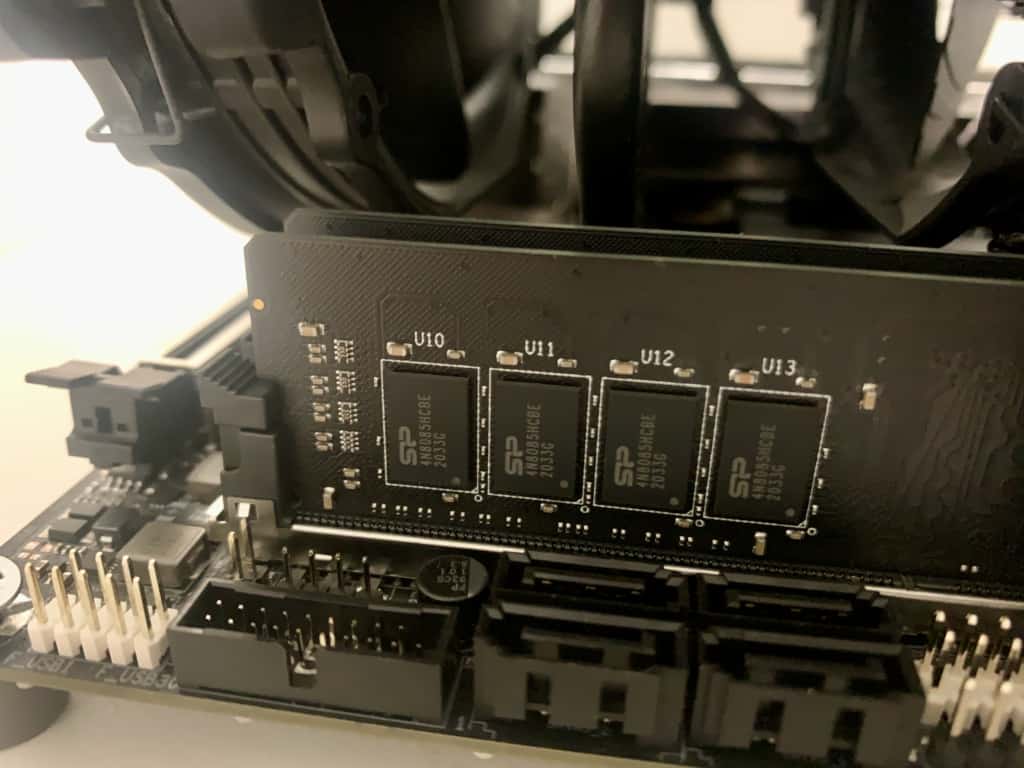
Update: I upgraded to Crucial Ballistix 16GBx2 DDR4-3600 CL16.
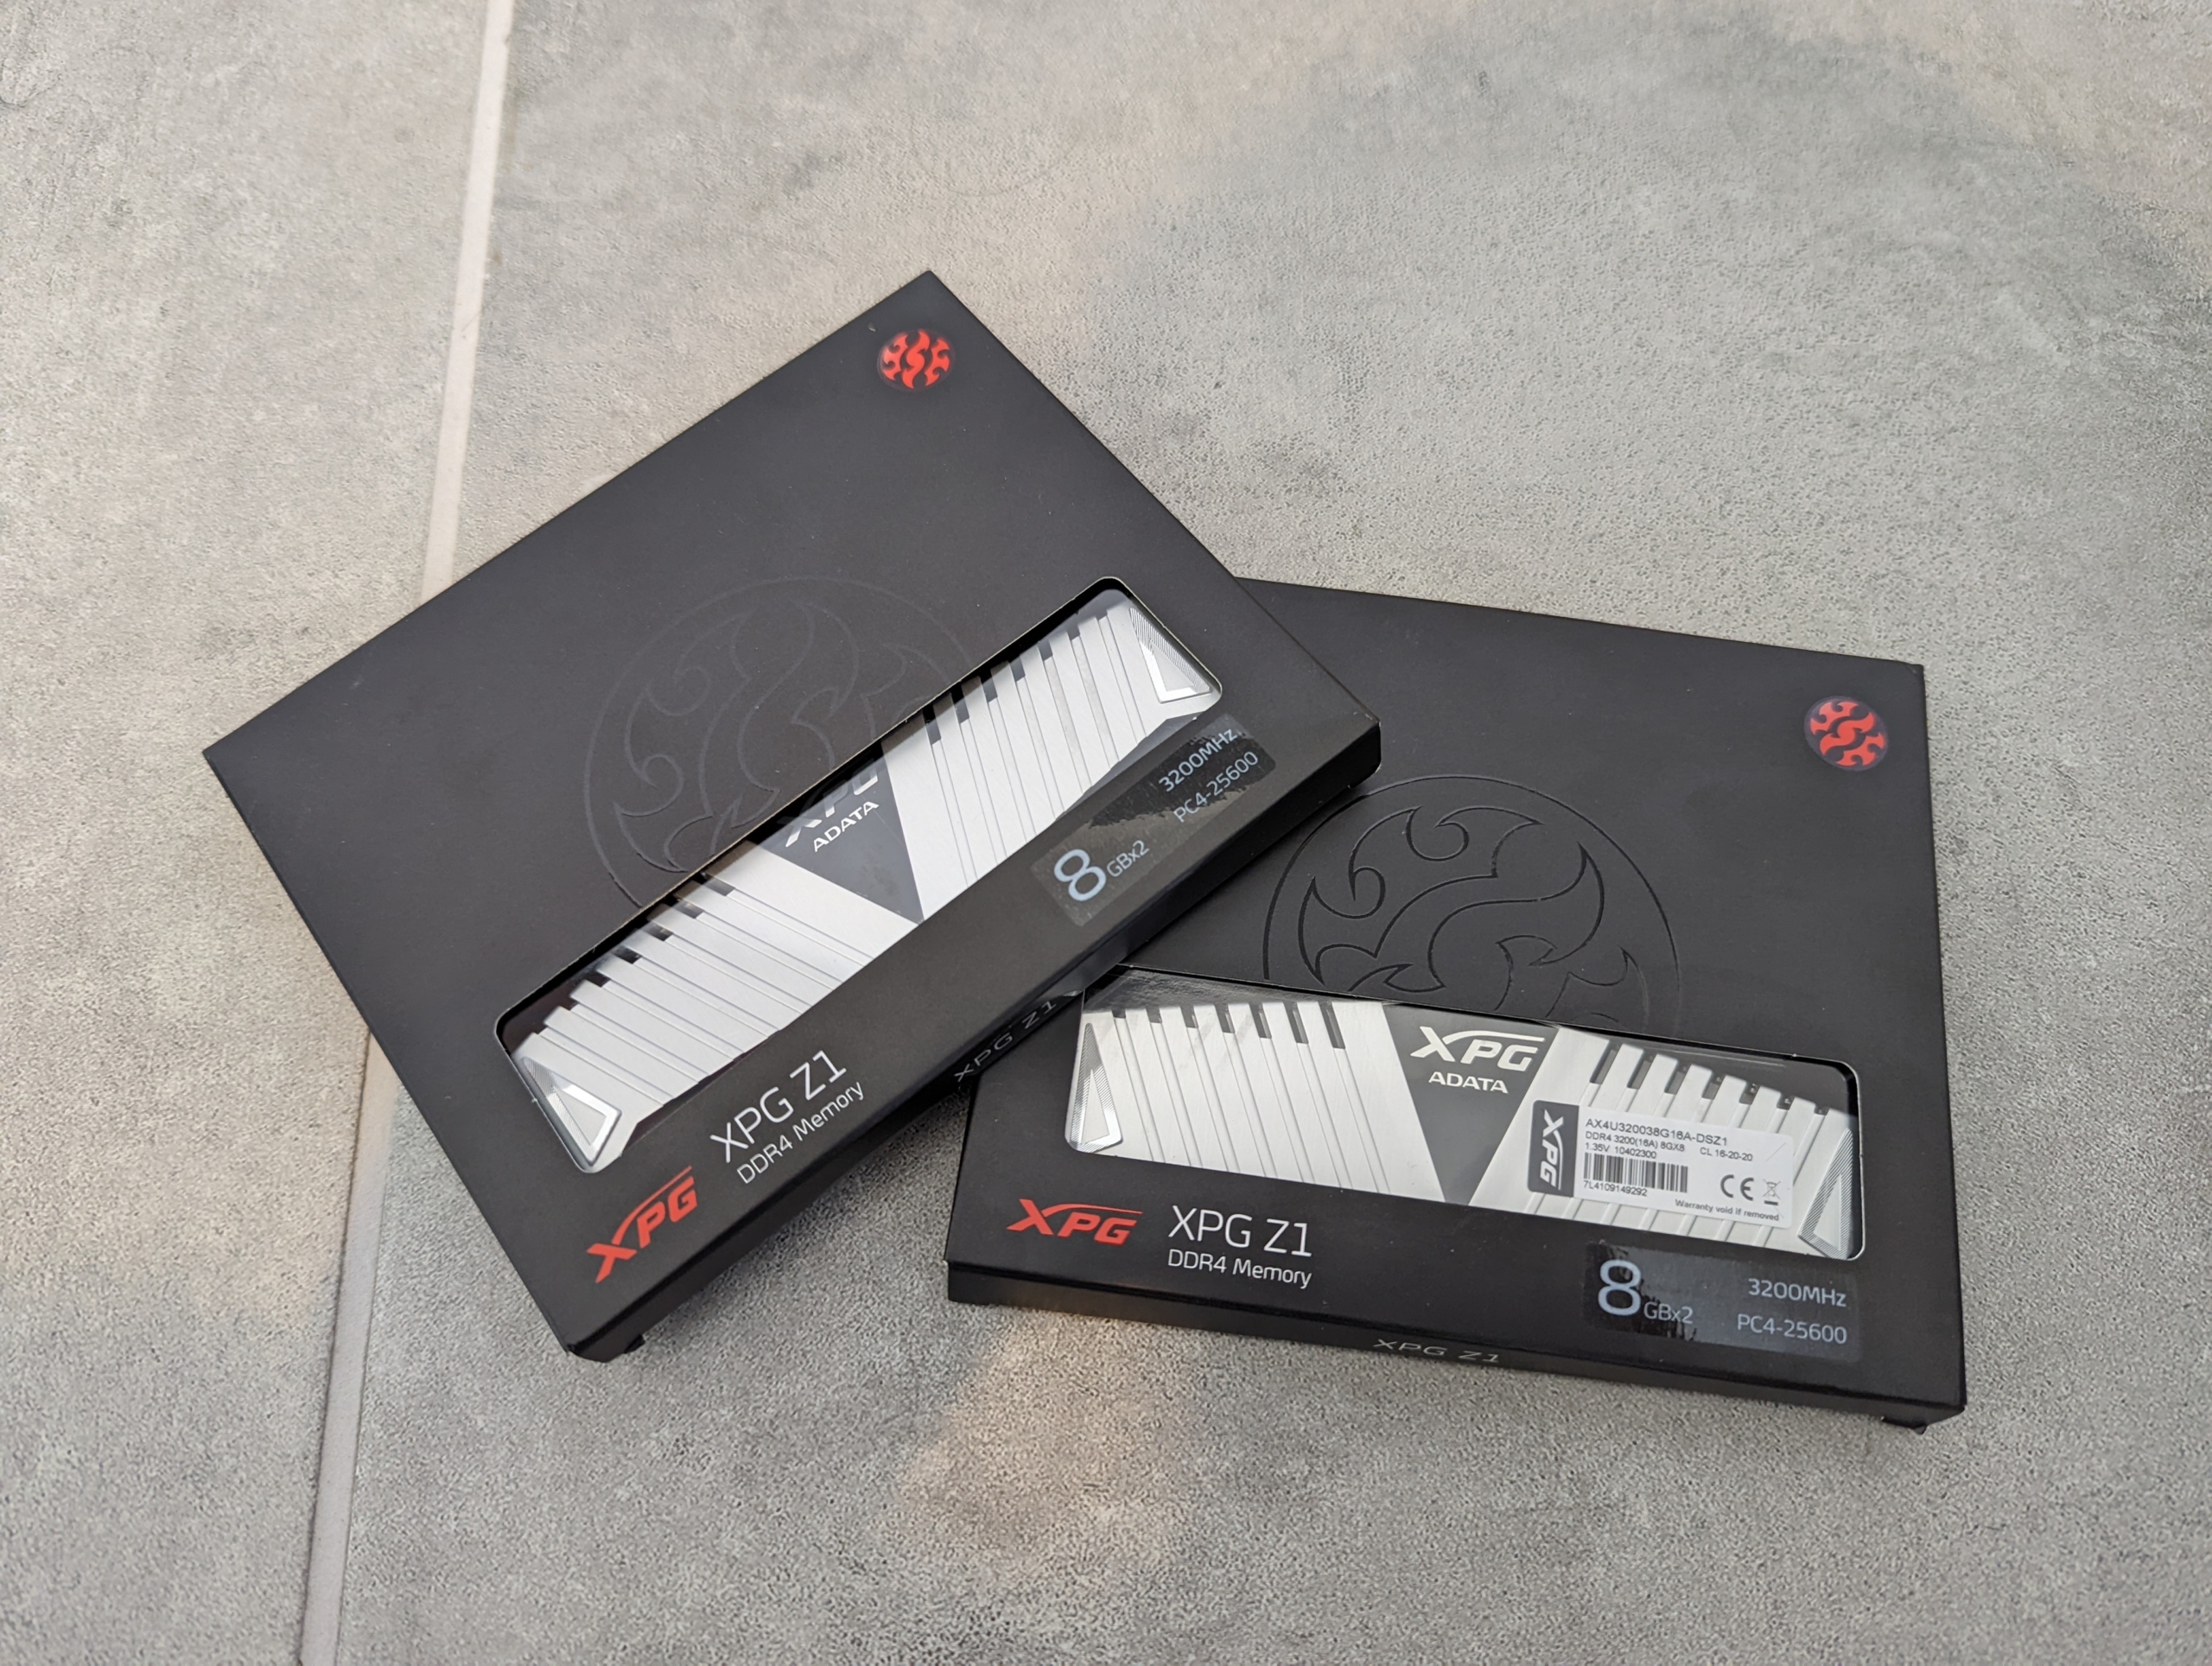
For my newer computer, I got four sticks of 8GB (total of 32GB) of ADATA’s XPG Z1 DDR4 3200MHz. They’re great:
Storage Drive(s)
There’s no reason to ever consider conventional HDD drives anymore. SSDs are faster, less likely to fail, and are finally affordable even at large volumes. Go with the new M.2 NVMe SSDs, which are extremely fast, and are mounted straight onto the motherboard – no ugly cables needed.
I picked two drives:
- 1TB Gen3 Sabrent Rocket (Read/Write: 3400/3000 MB/s).
- 1TB Gen3 Silicon Power (Read/Write: 2200/1600 MB/s).
I installed Linux Debian on one drive, and Linux Arch on the second. I run Debian as the main environment, but am simply changing the SSD boot order in the BIOS whenever I want to run and learn Arch.
Both drives run great so far.
The Silicon Power offers great performance per dollar. If you don’t deal with large files (editing videos, data transfer, etc), then you won’t be able to tell the difference between this drive or a more expensive one.
The Sabrent Rocket costs more, but offers faster operation speeds. If you do anything that could benefit from those extra speeds (for example programs like Adobe After Effects, which like to store their cache on the SSD), then definitely buy the super-fast Sabrent. If you went for an AMD CPU, that means you can use the even faster, Gen4 Sabrent Rocket.
Update:
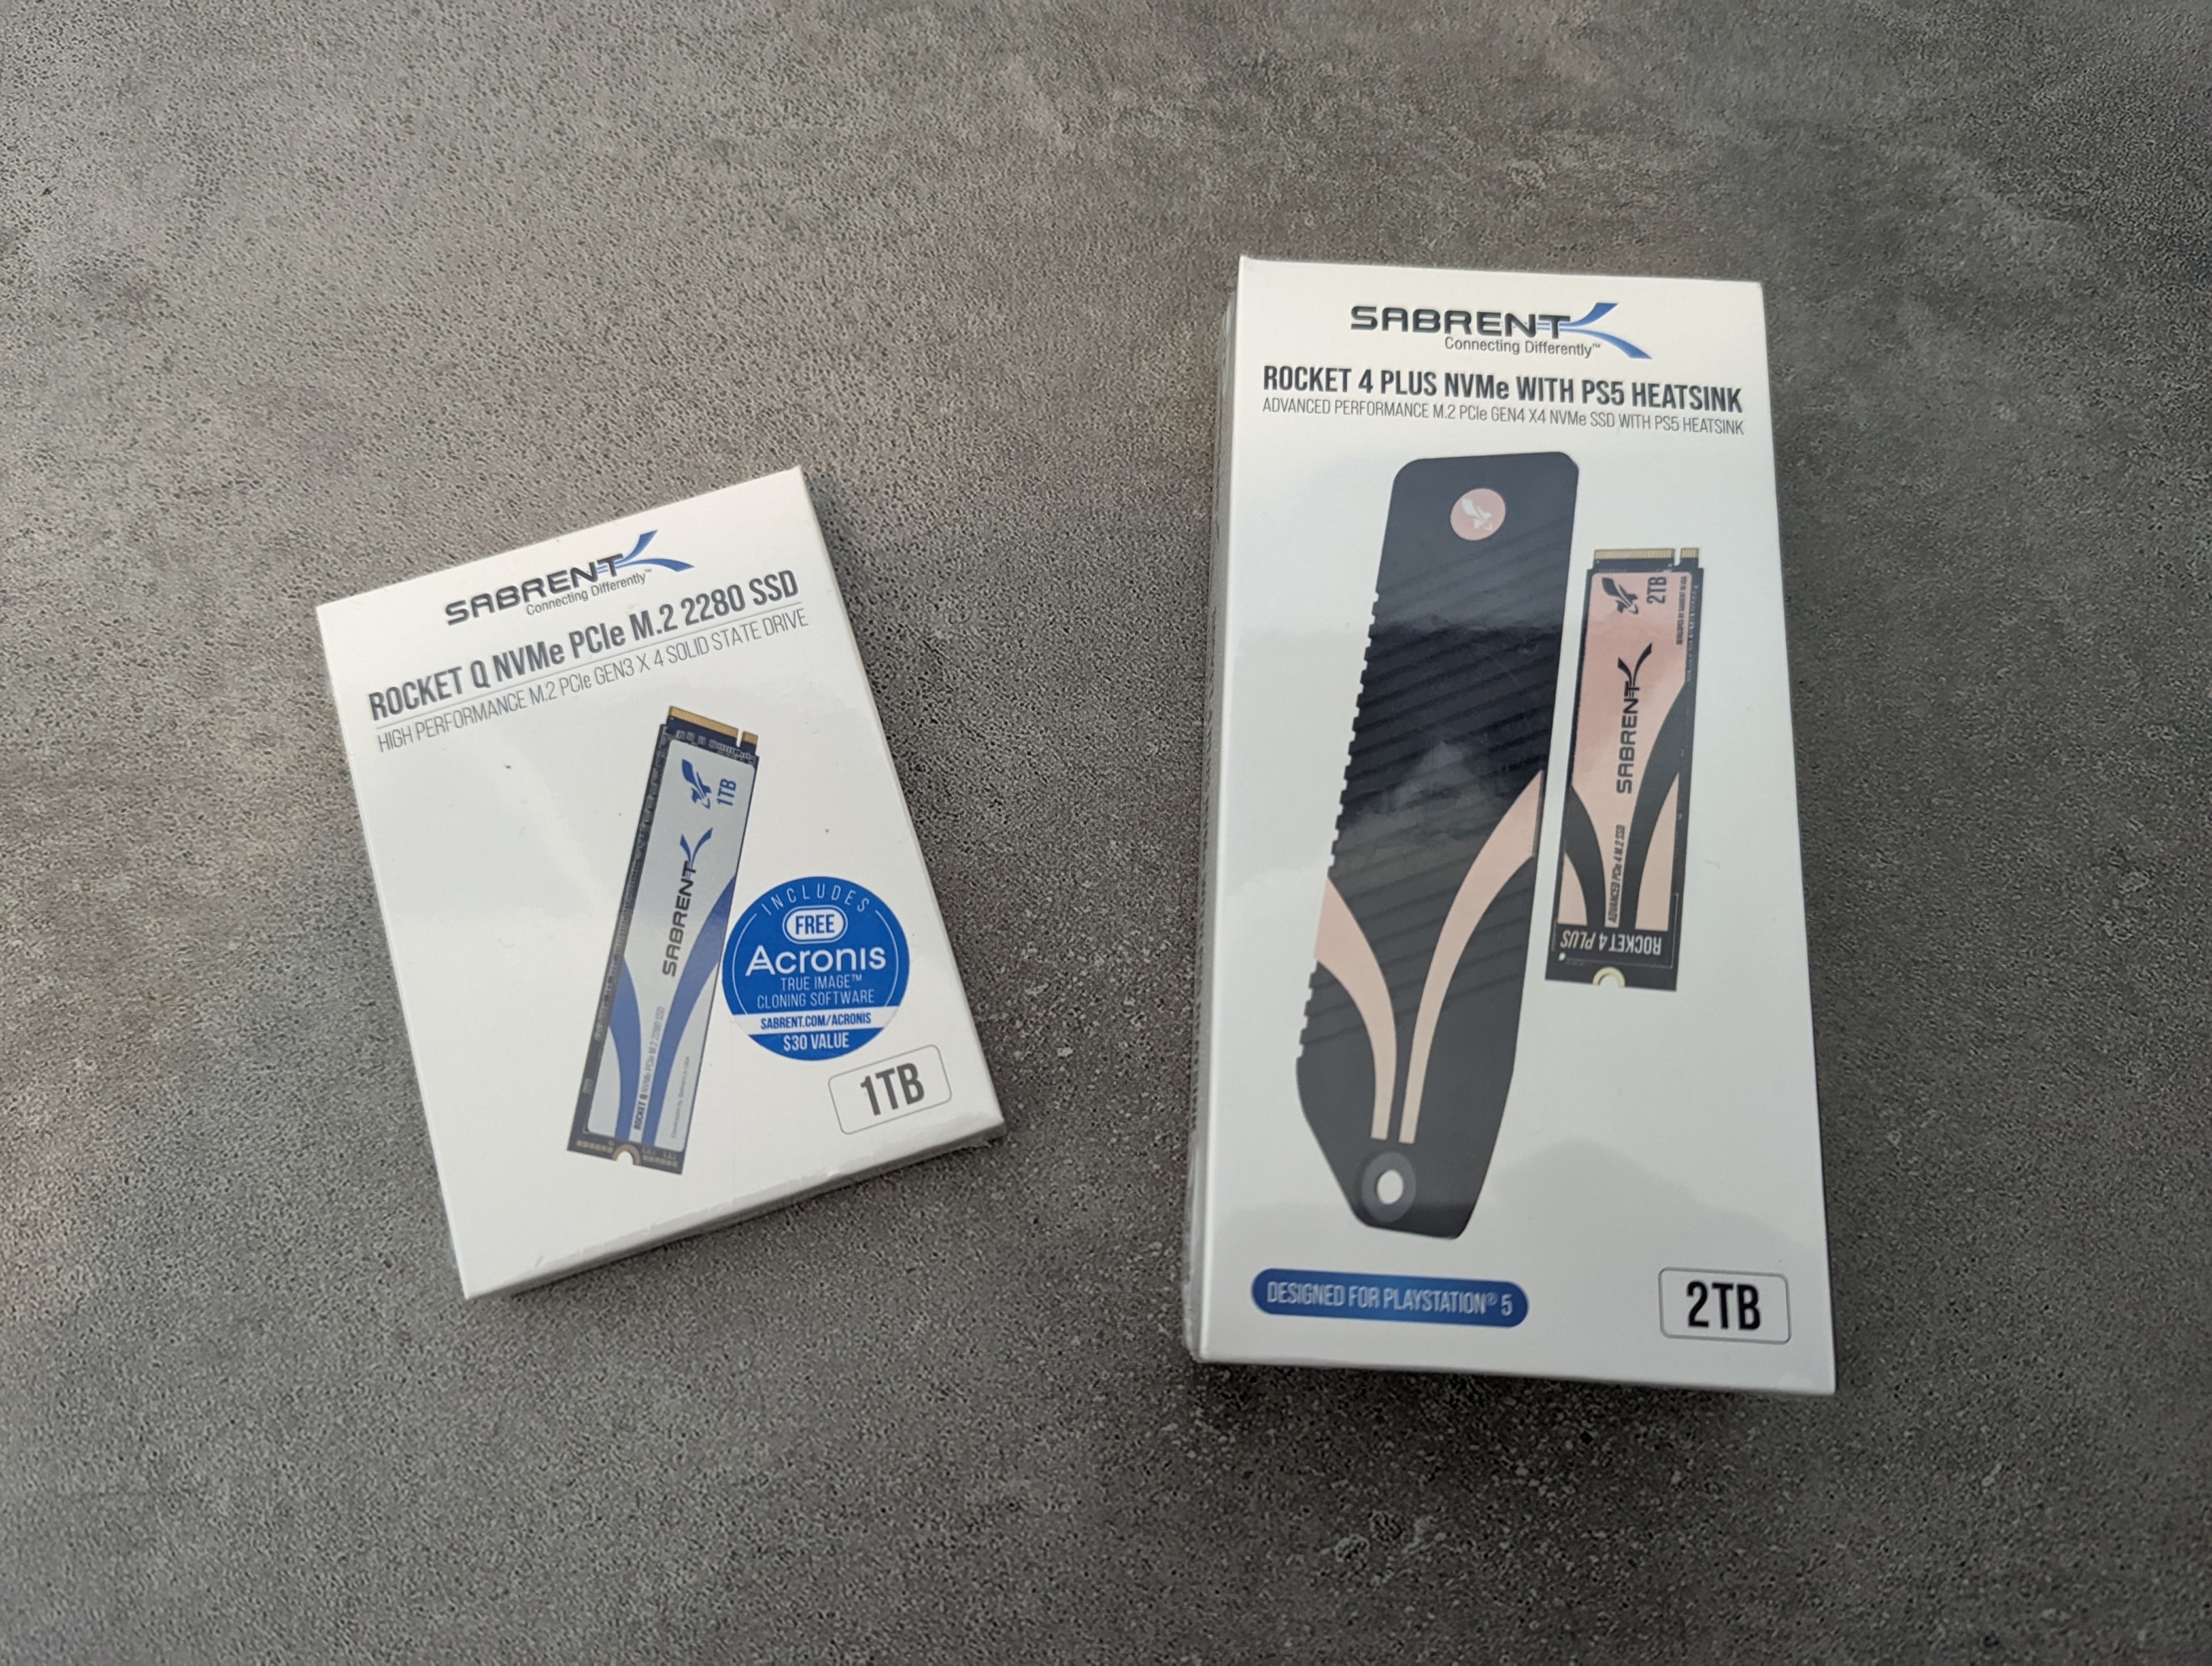
With the newer 12600K system, I went with a 2TB Gen4x4 from Sabrent, my favorite SSD brand. This beast boasts monstrous speeds of up to 7100 MB/s (read) and 6600 MB/s (write), faster than almost any other drive that exists. If your computing uses could use such speeds, by all means go for it. It’s pricey, but for people who move around massive files on a regular basis as part of their business, this drive is a well-spent expense.
It doesn’t get any better than this drive.
As a second, backup drive, I went with a Sabrent Rocket Q 1TB (Gen 3×4). It’s an amazing drive by itself, and if you don’t need the incredible speeds of Sabrent’s Gen4 drives, this baby could be all you need.
Power Supply (PSU)
Again, power delivery is very important for a production machine. We want to cover the basics, and there’s nothing more basic than electricity. We want to minimize the risk of hardware failure, especially at times where the weather is bad and the current becomes unstable.
I went with a Silverstone SX700-LPT, a 80 PLUS Platinum 700W PSU.
So far, it’s been amazing. As you know, I take noise levels seriously, and this PSU is dead silent. I mean, DEAD SILENT. The fan within the SX700-LPT will not spin at all unless PSU load reaches 30% (~210W).
That means the fan is deactivated most, if not all the time. The average PC uses around 200W, everything included except the graphics card. Another reason to love integrated graphics! It’s only when you add a separate GPU card that you climb into the 400-600W range.
I have a very power-hungry CPU, but even then it should rarely go above 200W (at full load!). As a result, the PSU fan never spins.
I love it.
I could get away with a fanless 450W PSU like the Silverstone NJ450-SXL, which would be as silent, but I wanted some margin for future upgrades in case I ever decide to install a top-tier graphics card.
The Silverstone SX700-LPT is also fully modular, and that was important to me. I didn’t want all that mess of ugly cables dangling from the PSU, and a modular unit allows you to connect only what you need.
Also, notice, this is an SFX-L power supply. It’s much smaller than regular ATX power supplies, although not as small as the SFX ones:
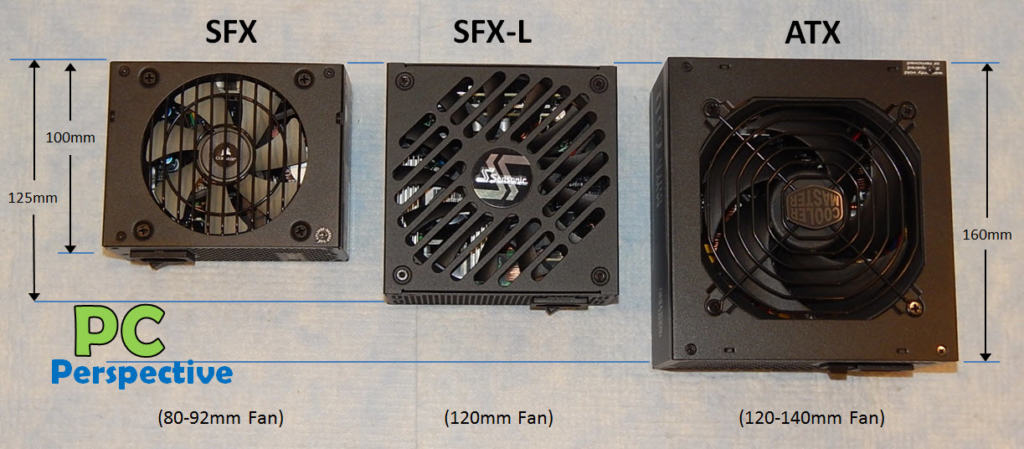
I like SFX-L the best. It’s small enough that it doesn’t take up much space, but it has a full-size 120mm fan, which means its much quieter than SFX (80-92mm fans) when it does spin. Also, that size still allows you to use some great looking cases, like the Silverstone LD03 I ended up with.
Overall, I highly recommend the Silverstone SX700-LPT.
Related read: Is it worth investing in a high-efficiency power supply? The SX700-LPT is rated 80 PLUS Platinum. You’ll also find PSUs rated Bronze, Silver, Gold, or Titanium. Read that article to see the differences.
Update: For my second, newer computer, I picked a Silverstone SX1000, another SFX-L PSU that would run fanless with my average loads:
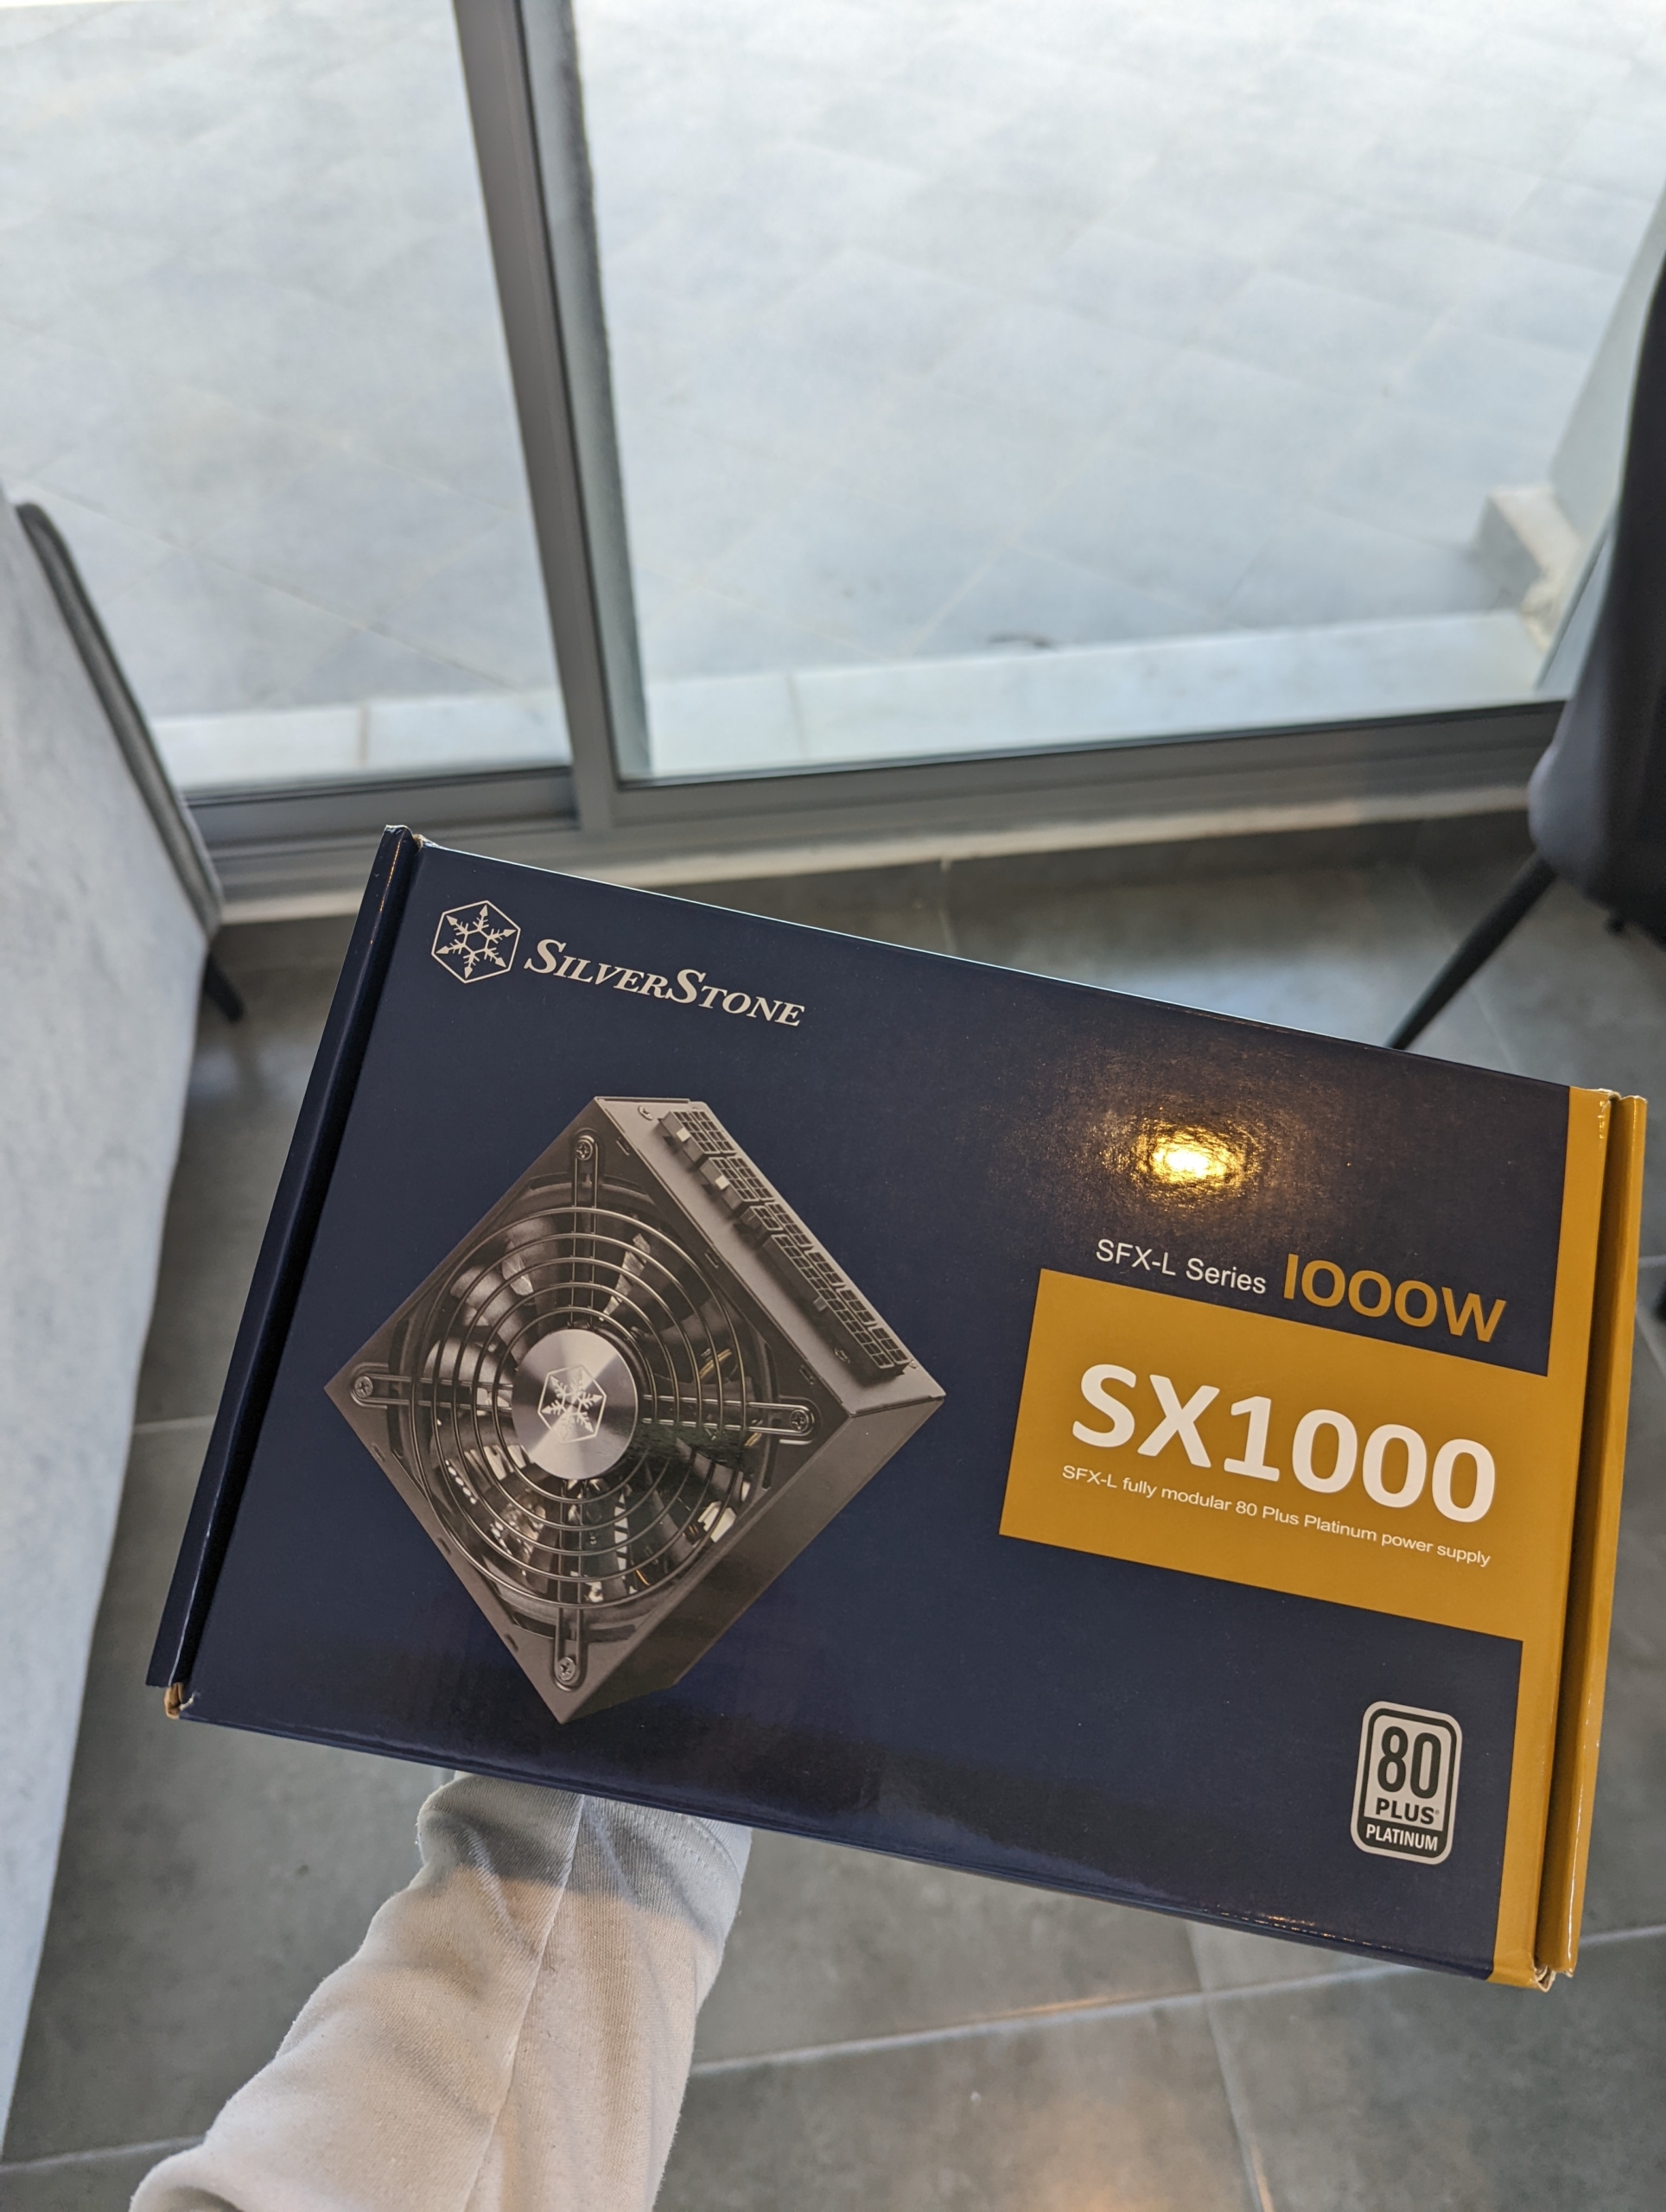
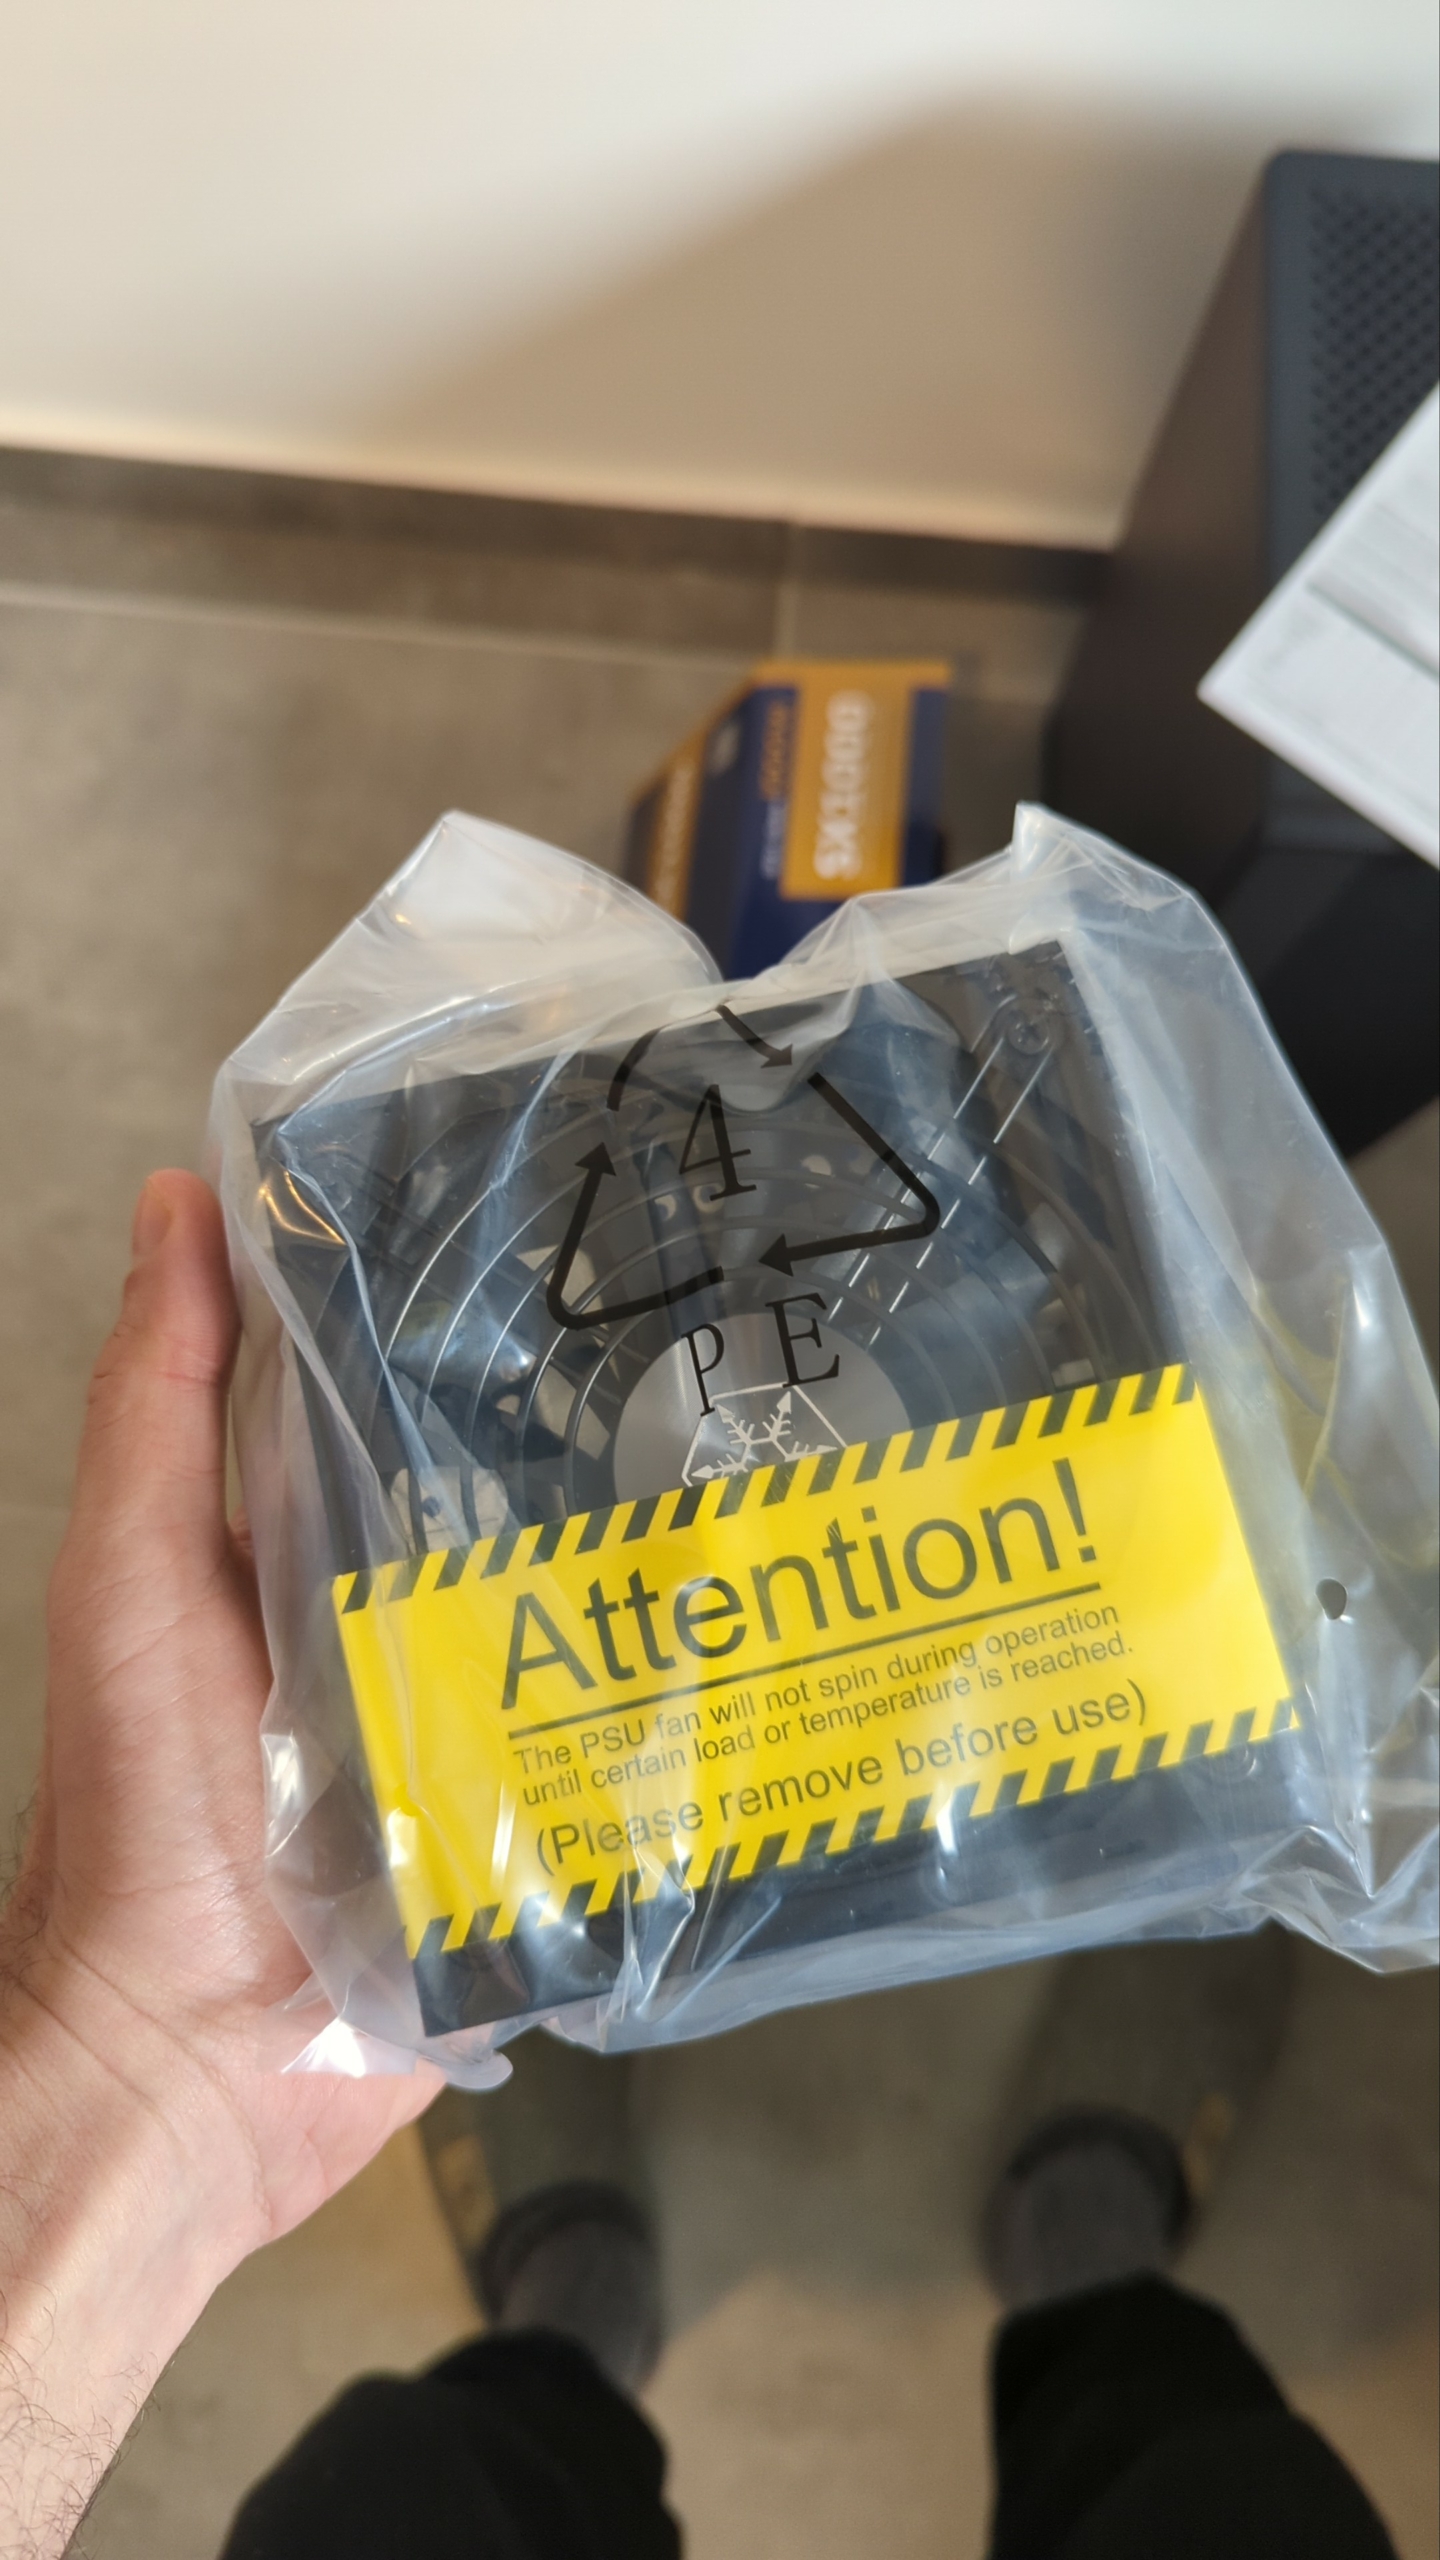
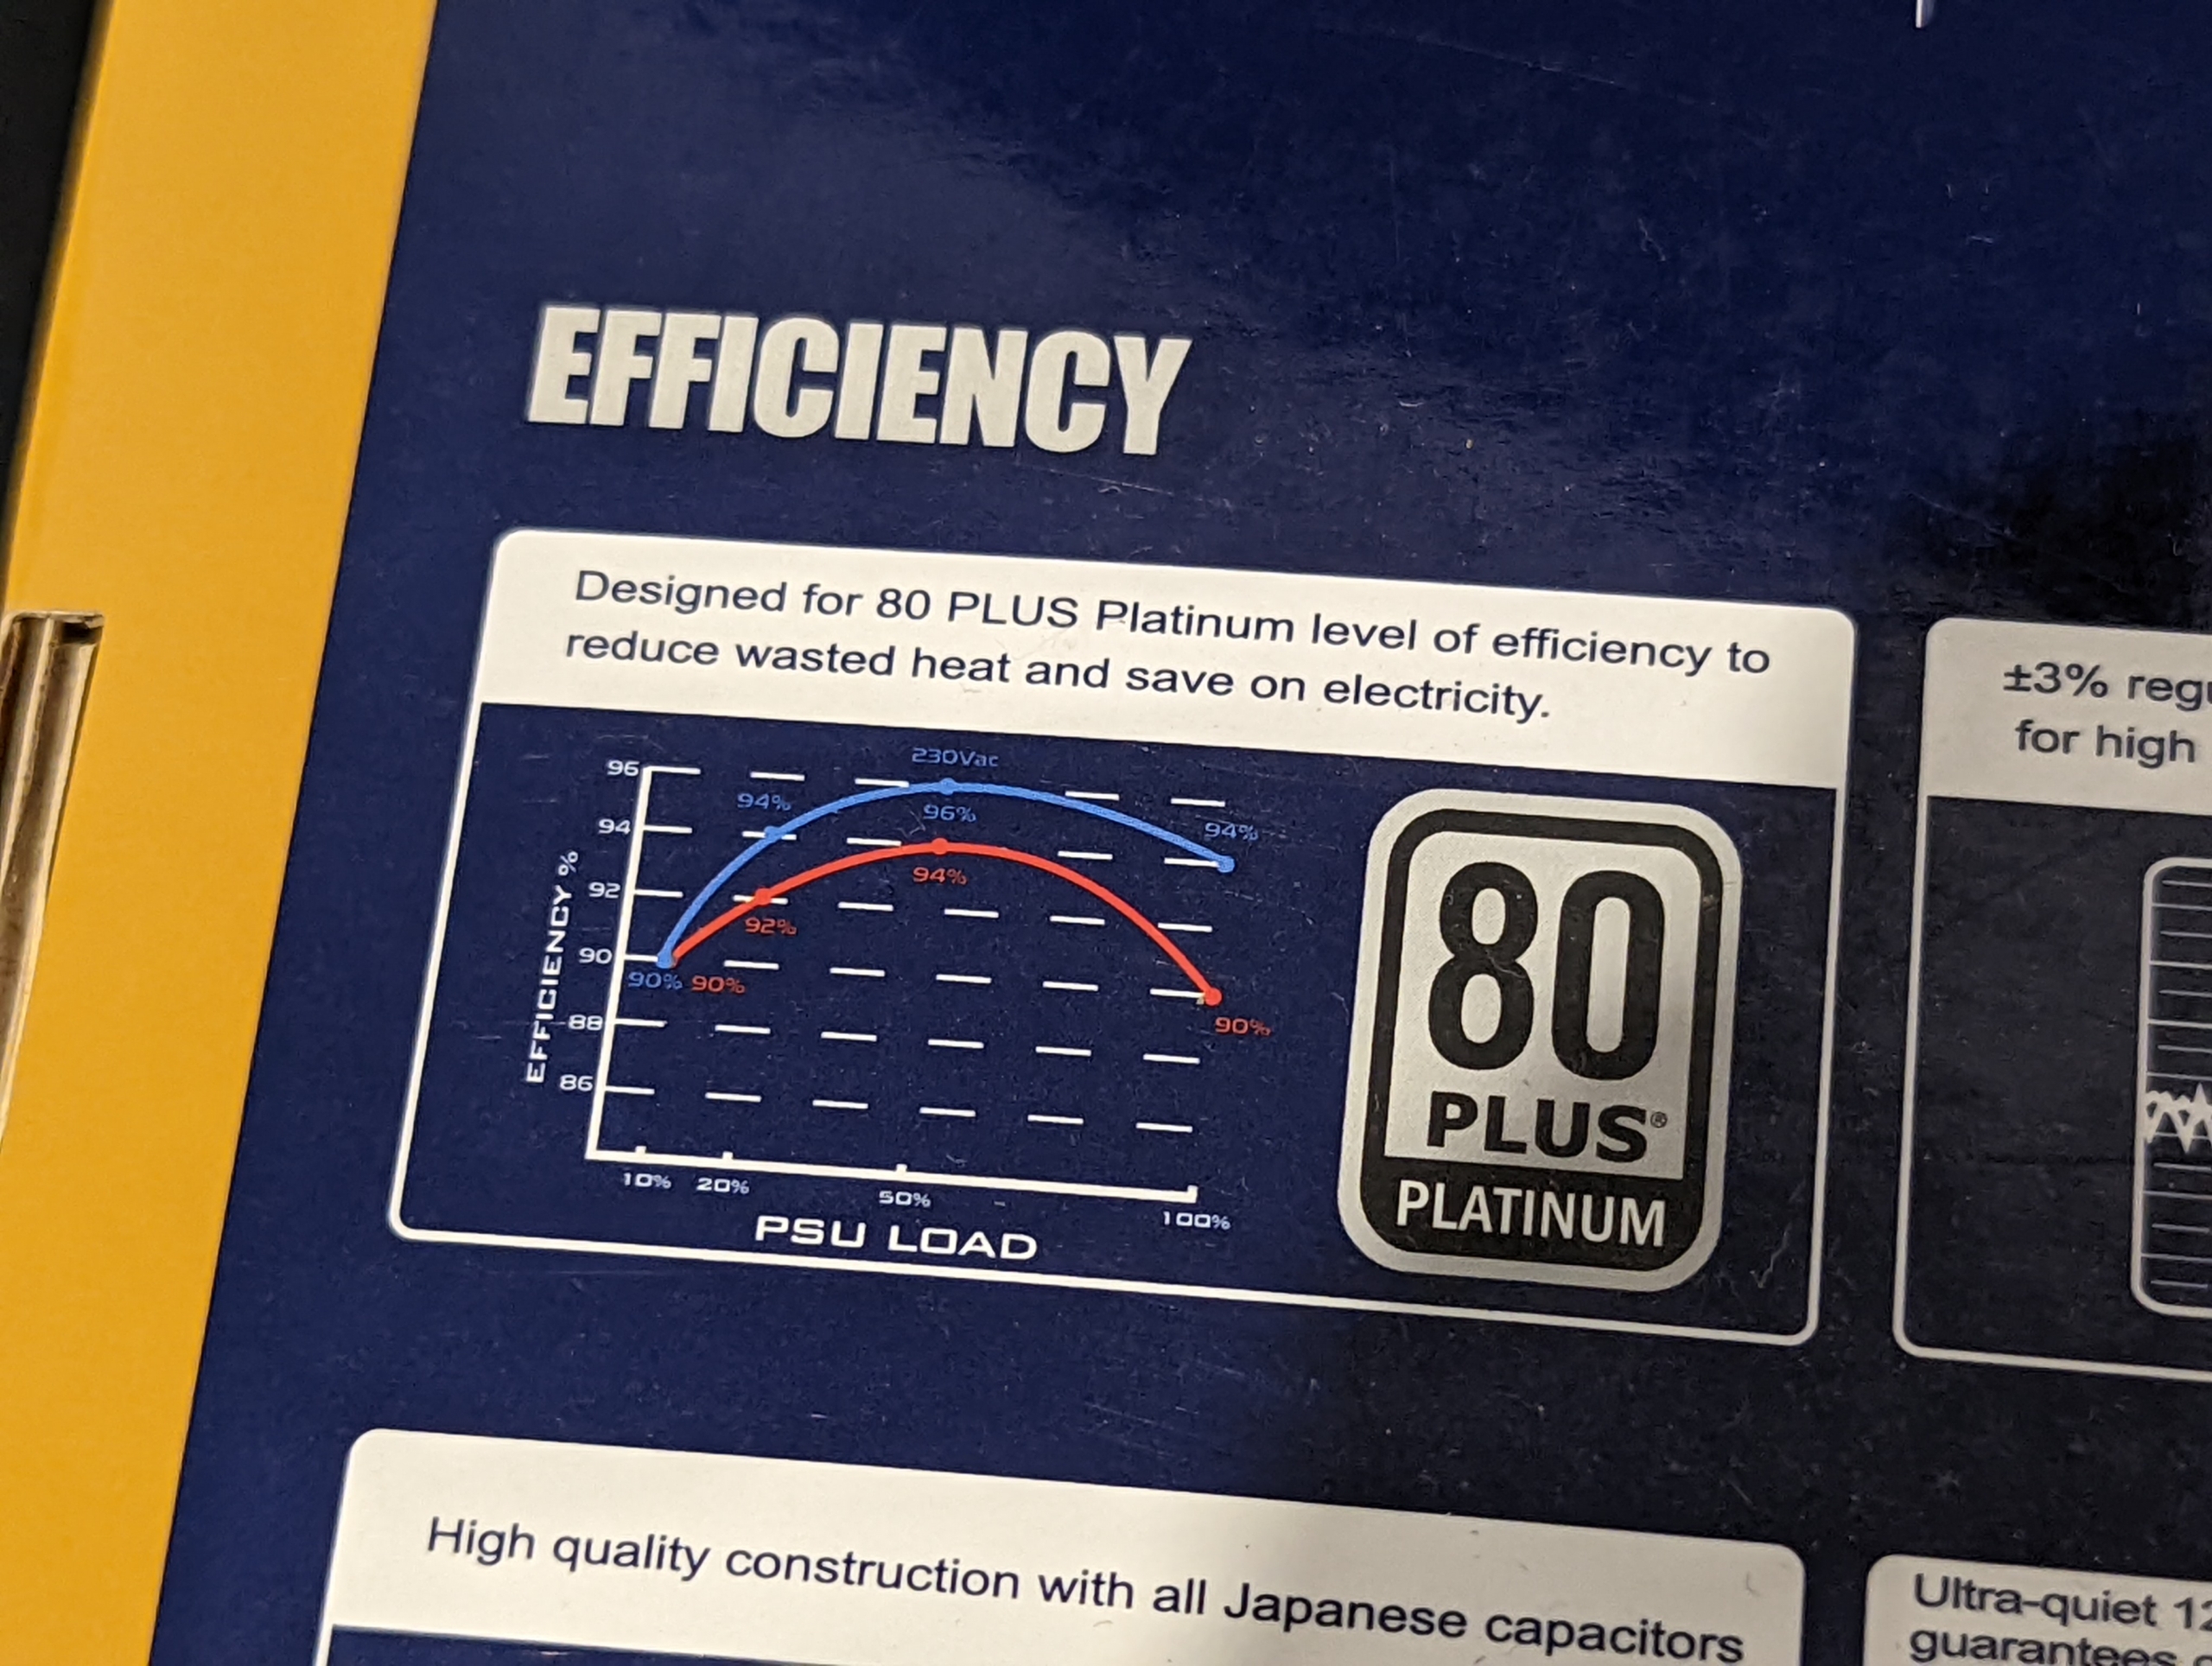
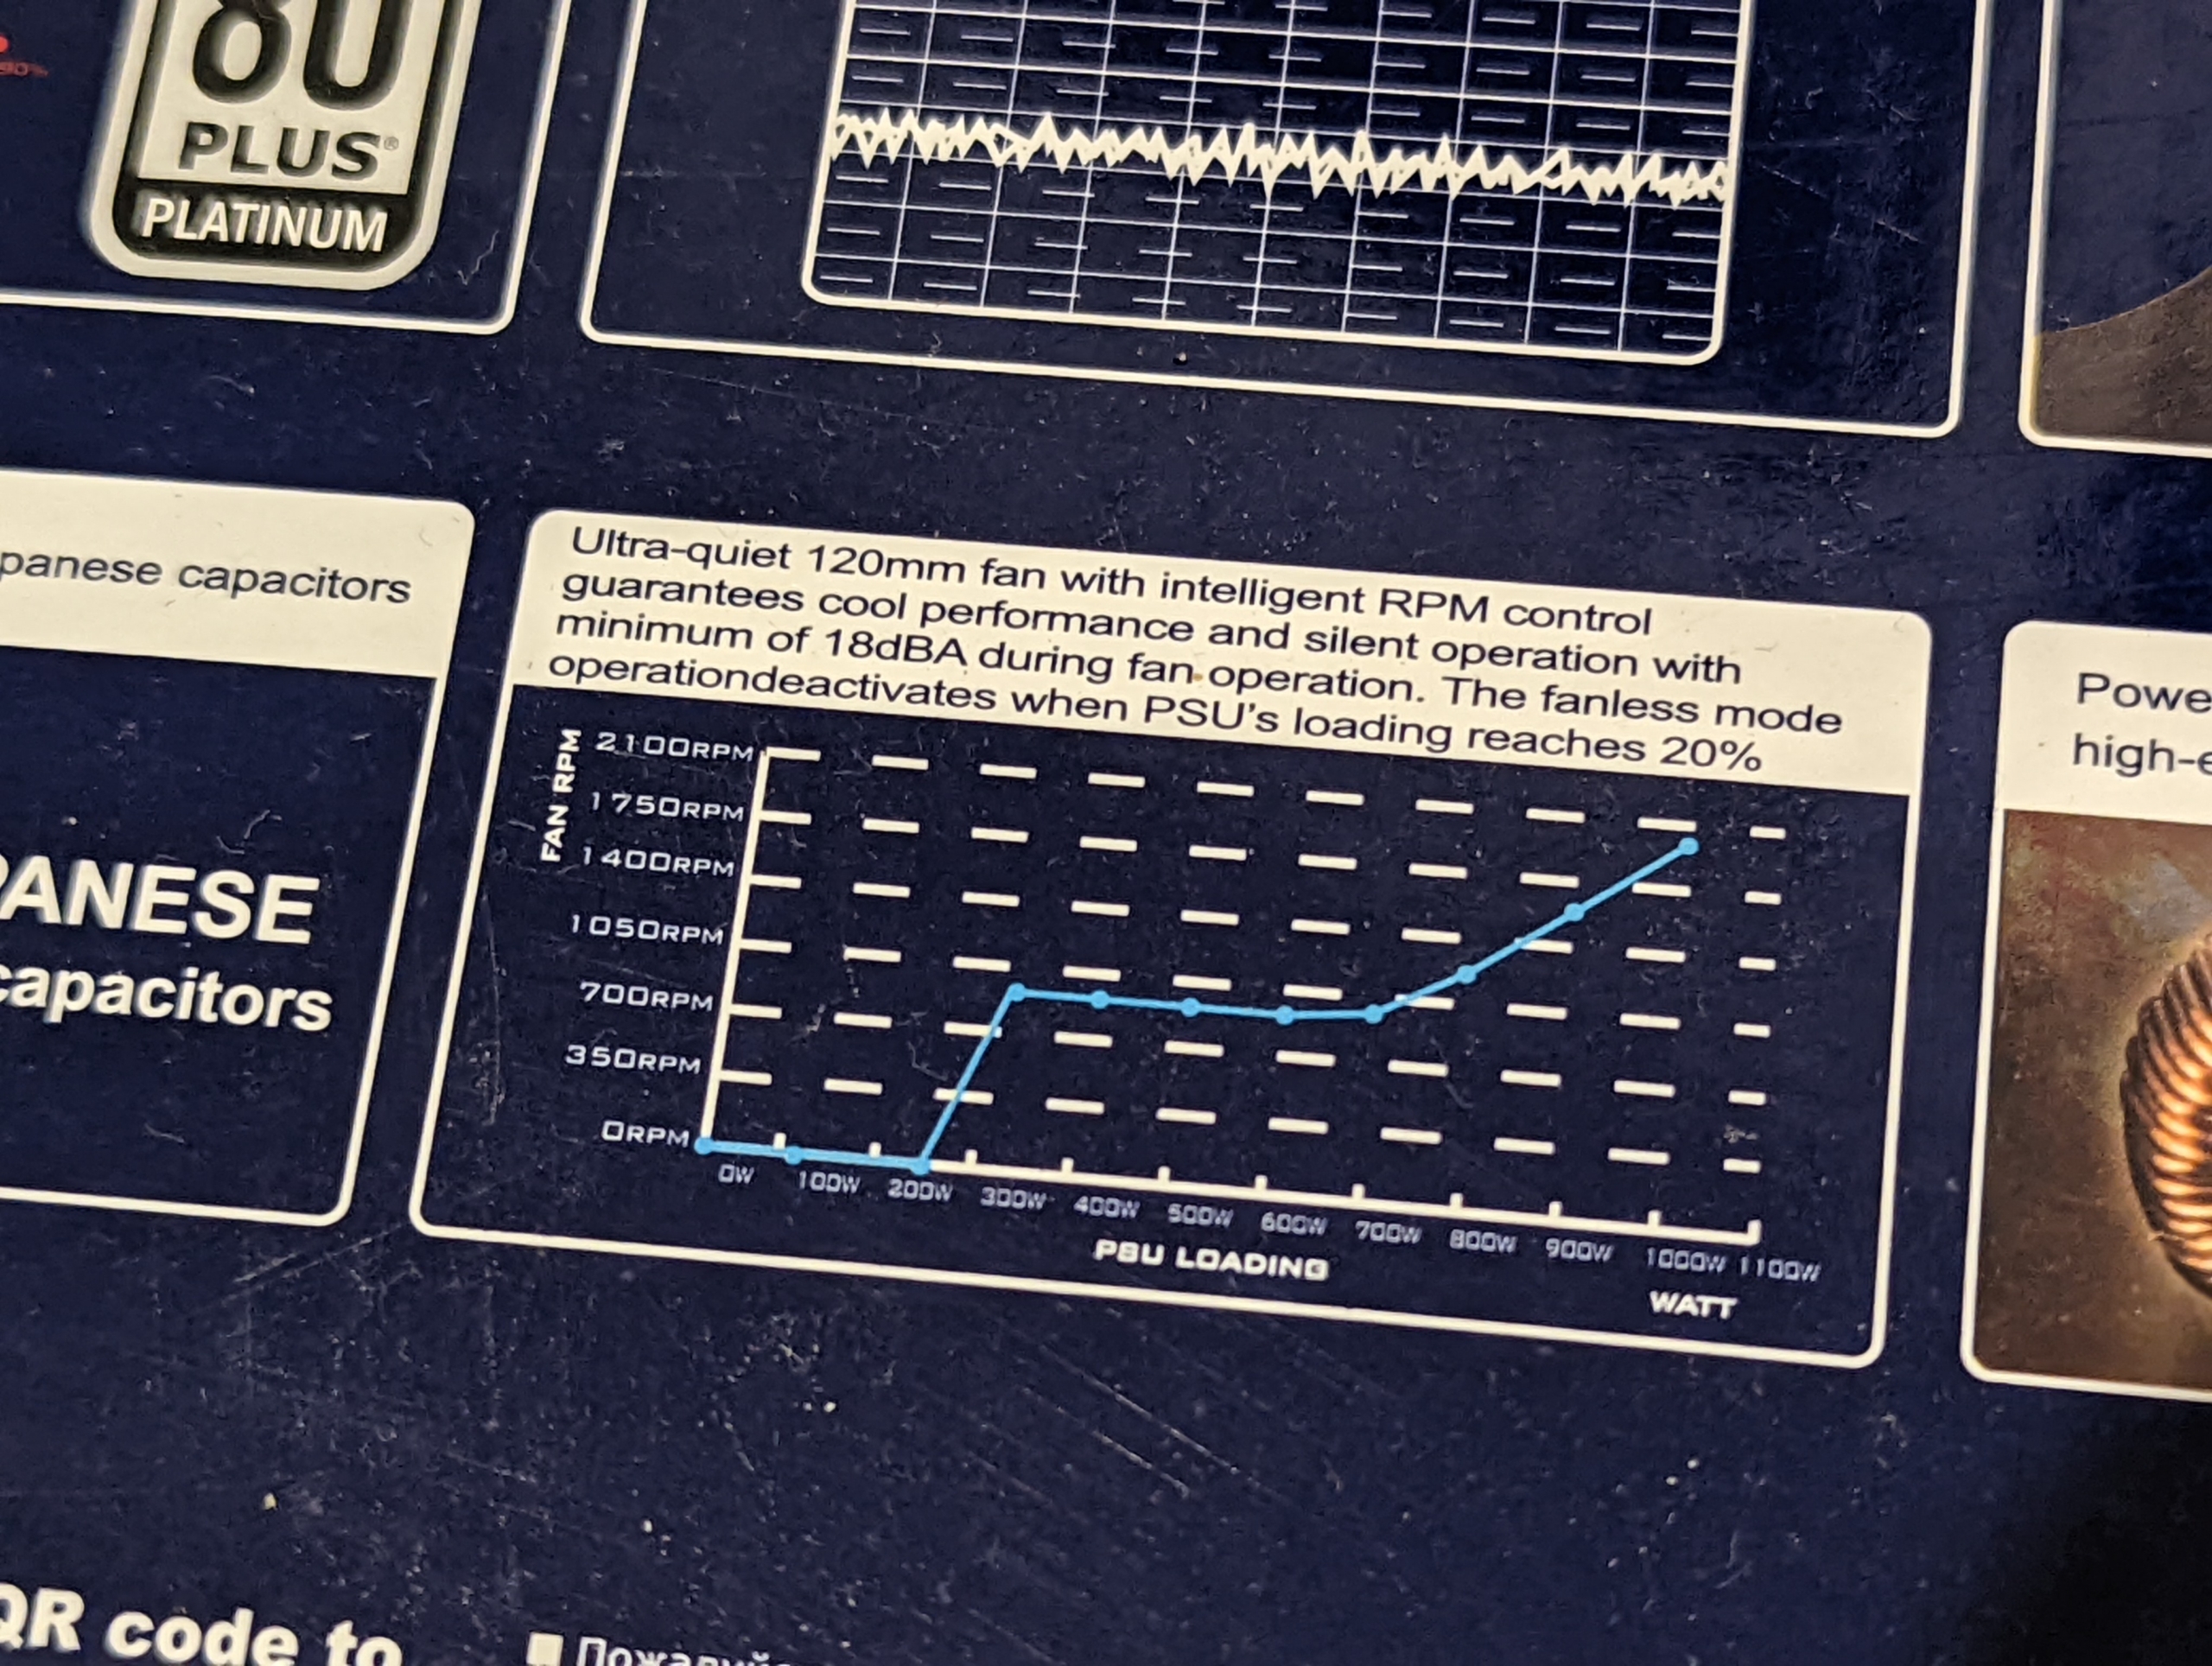
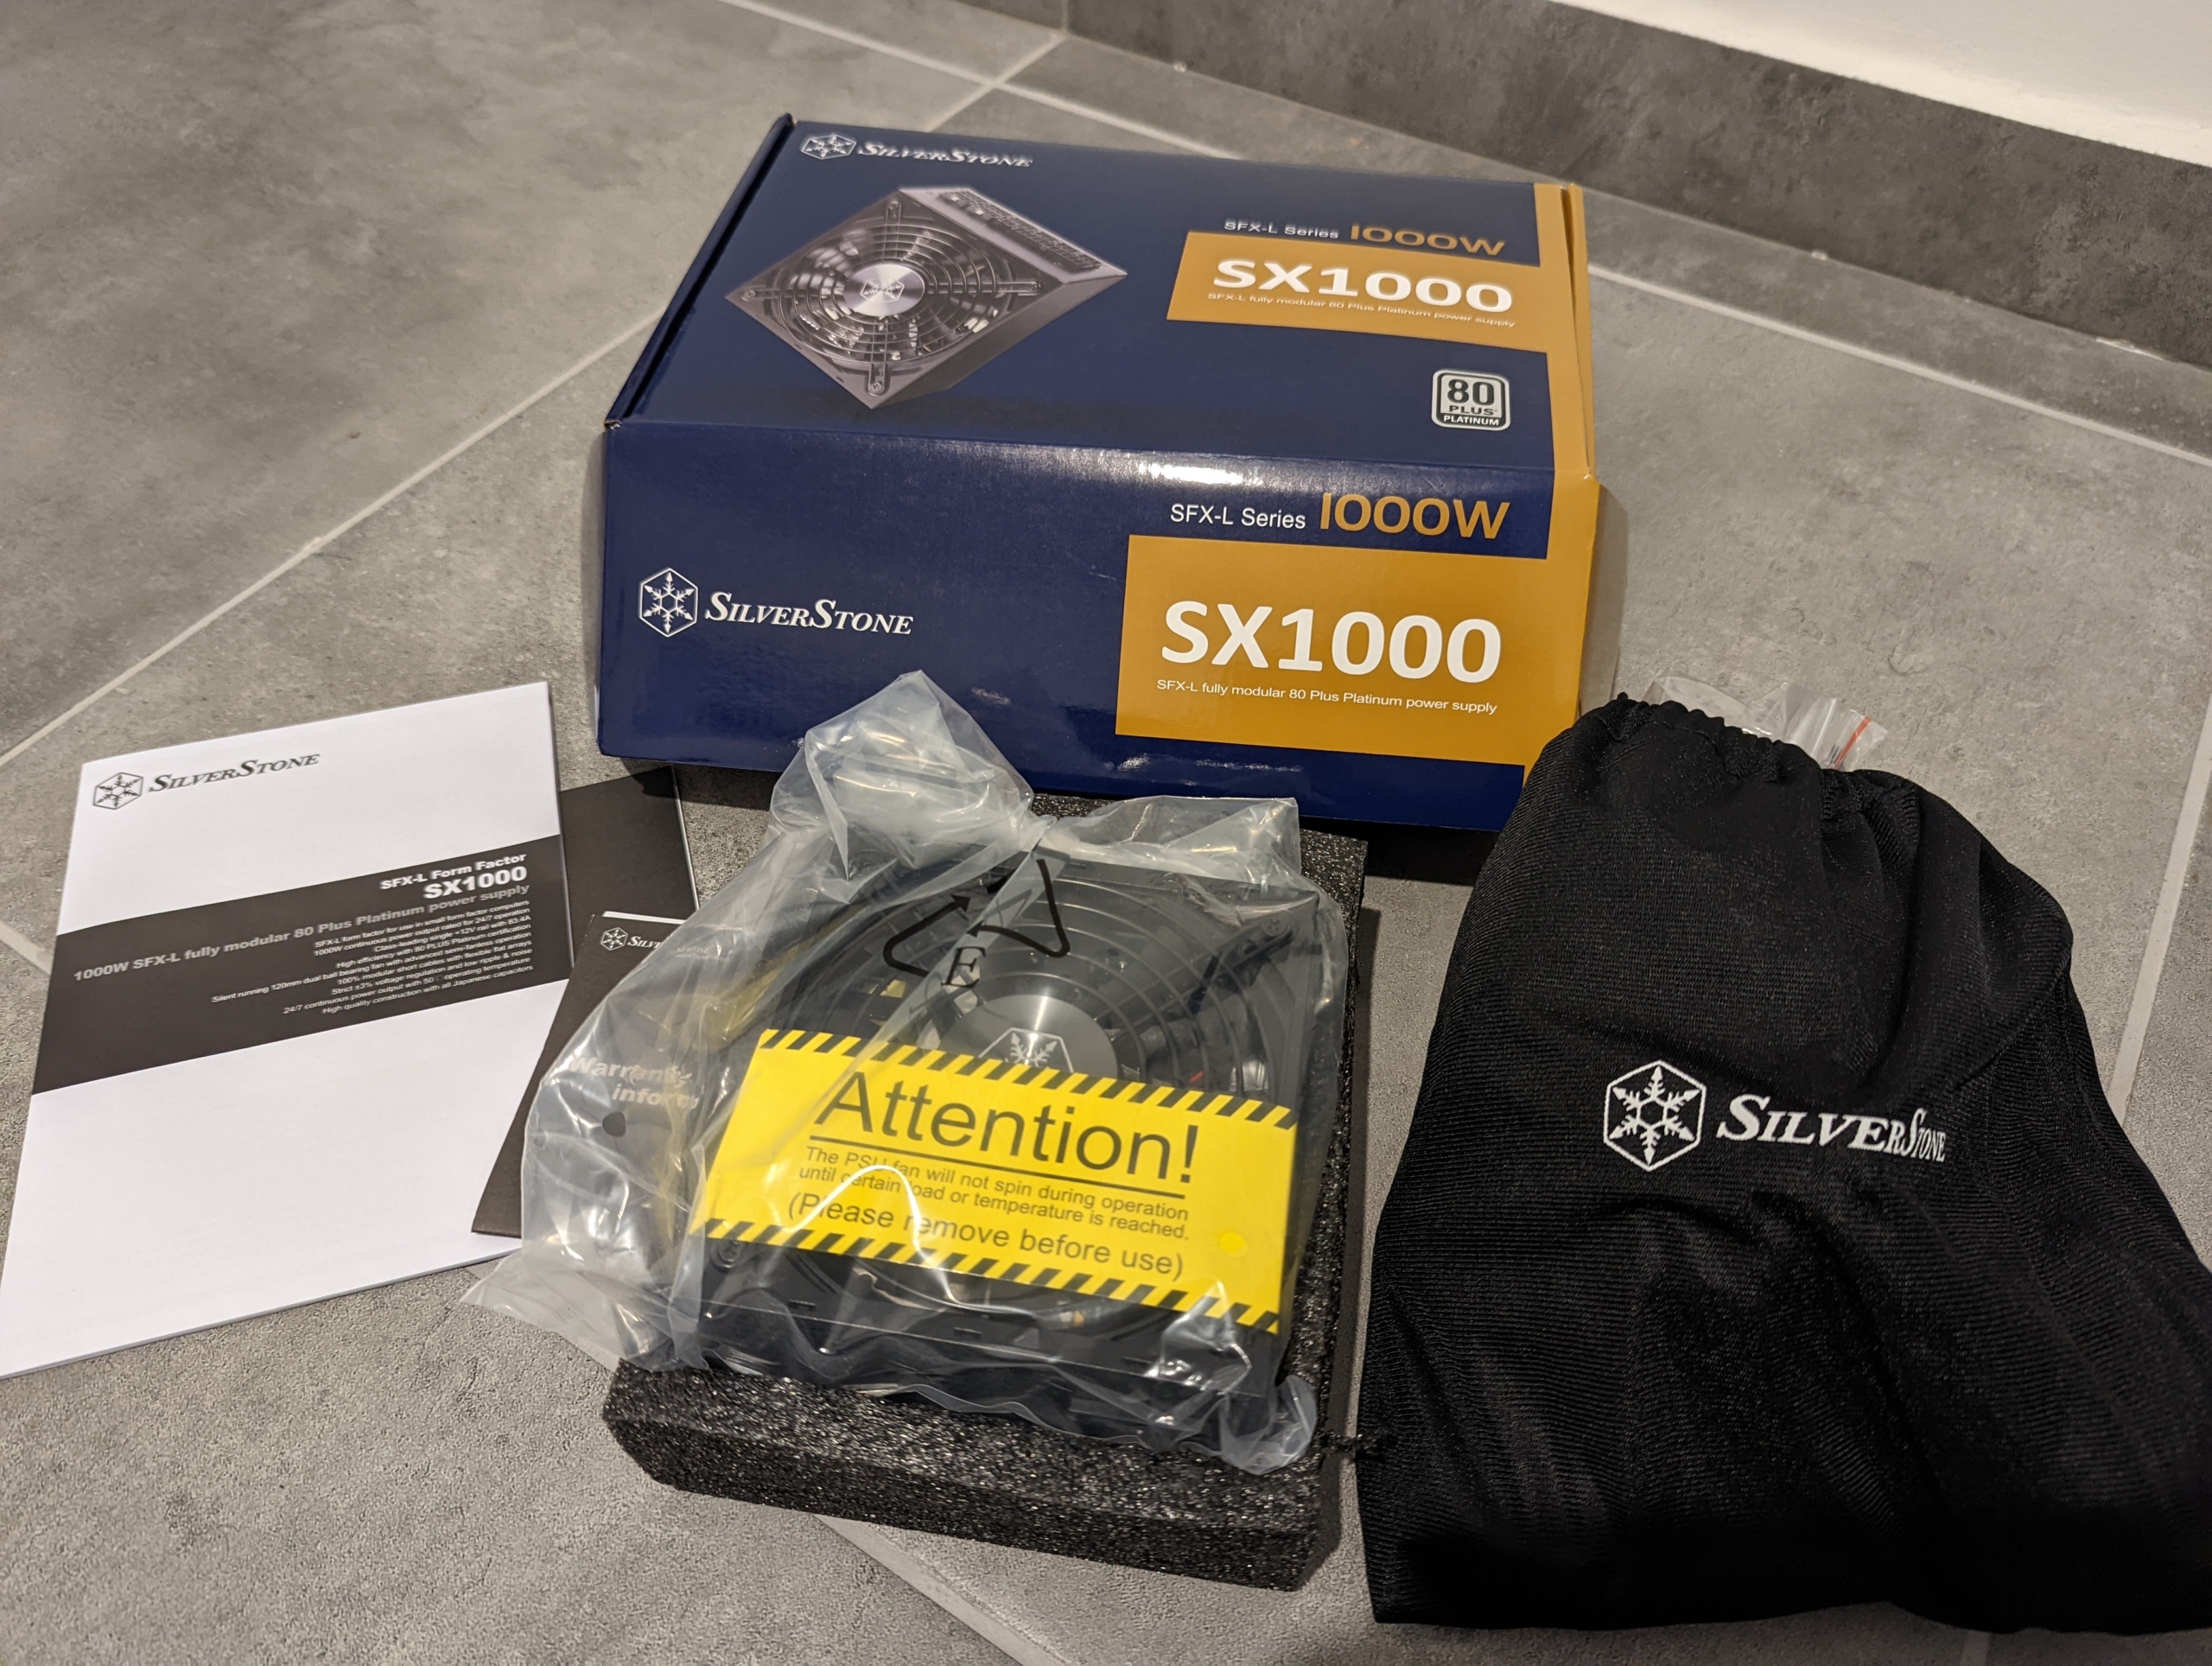
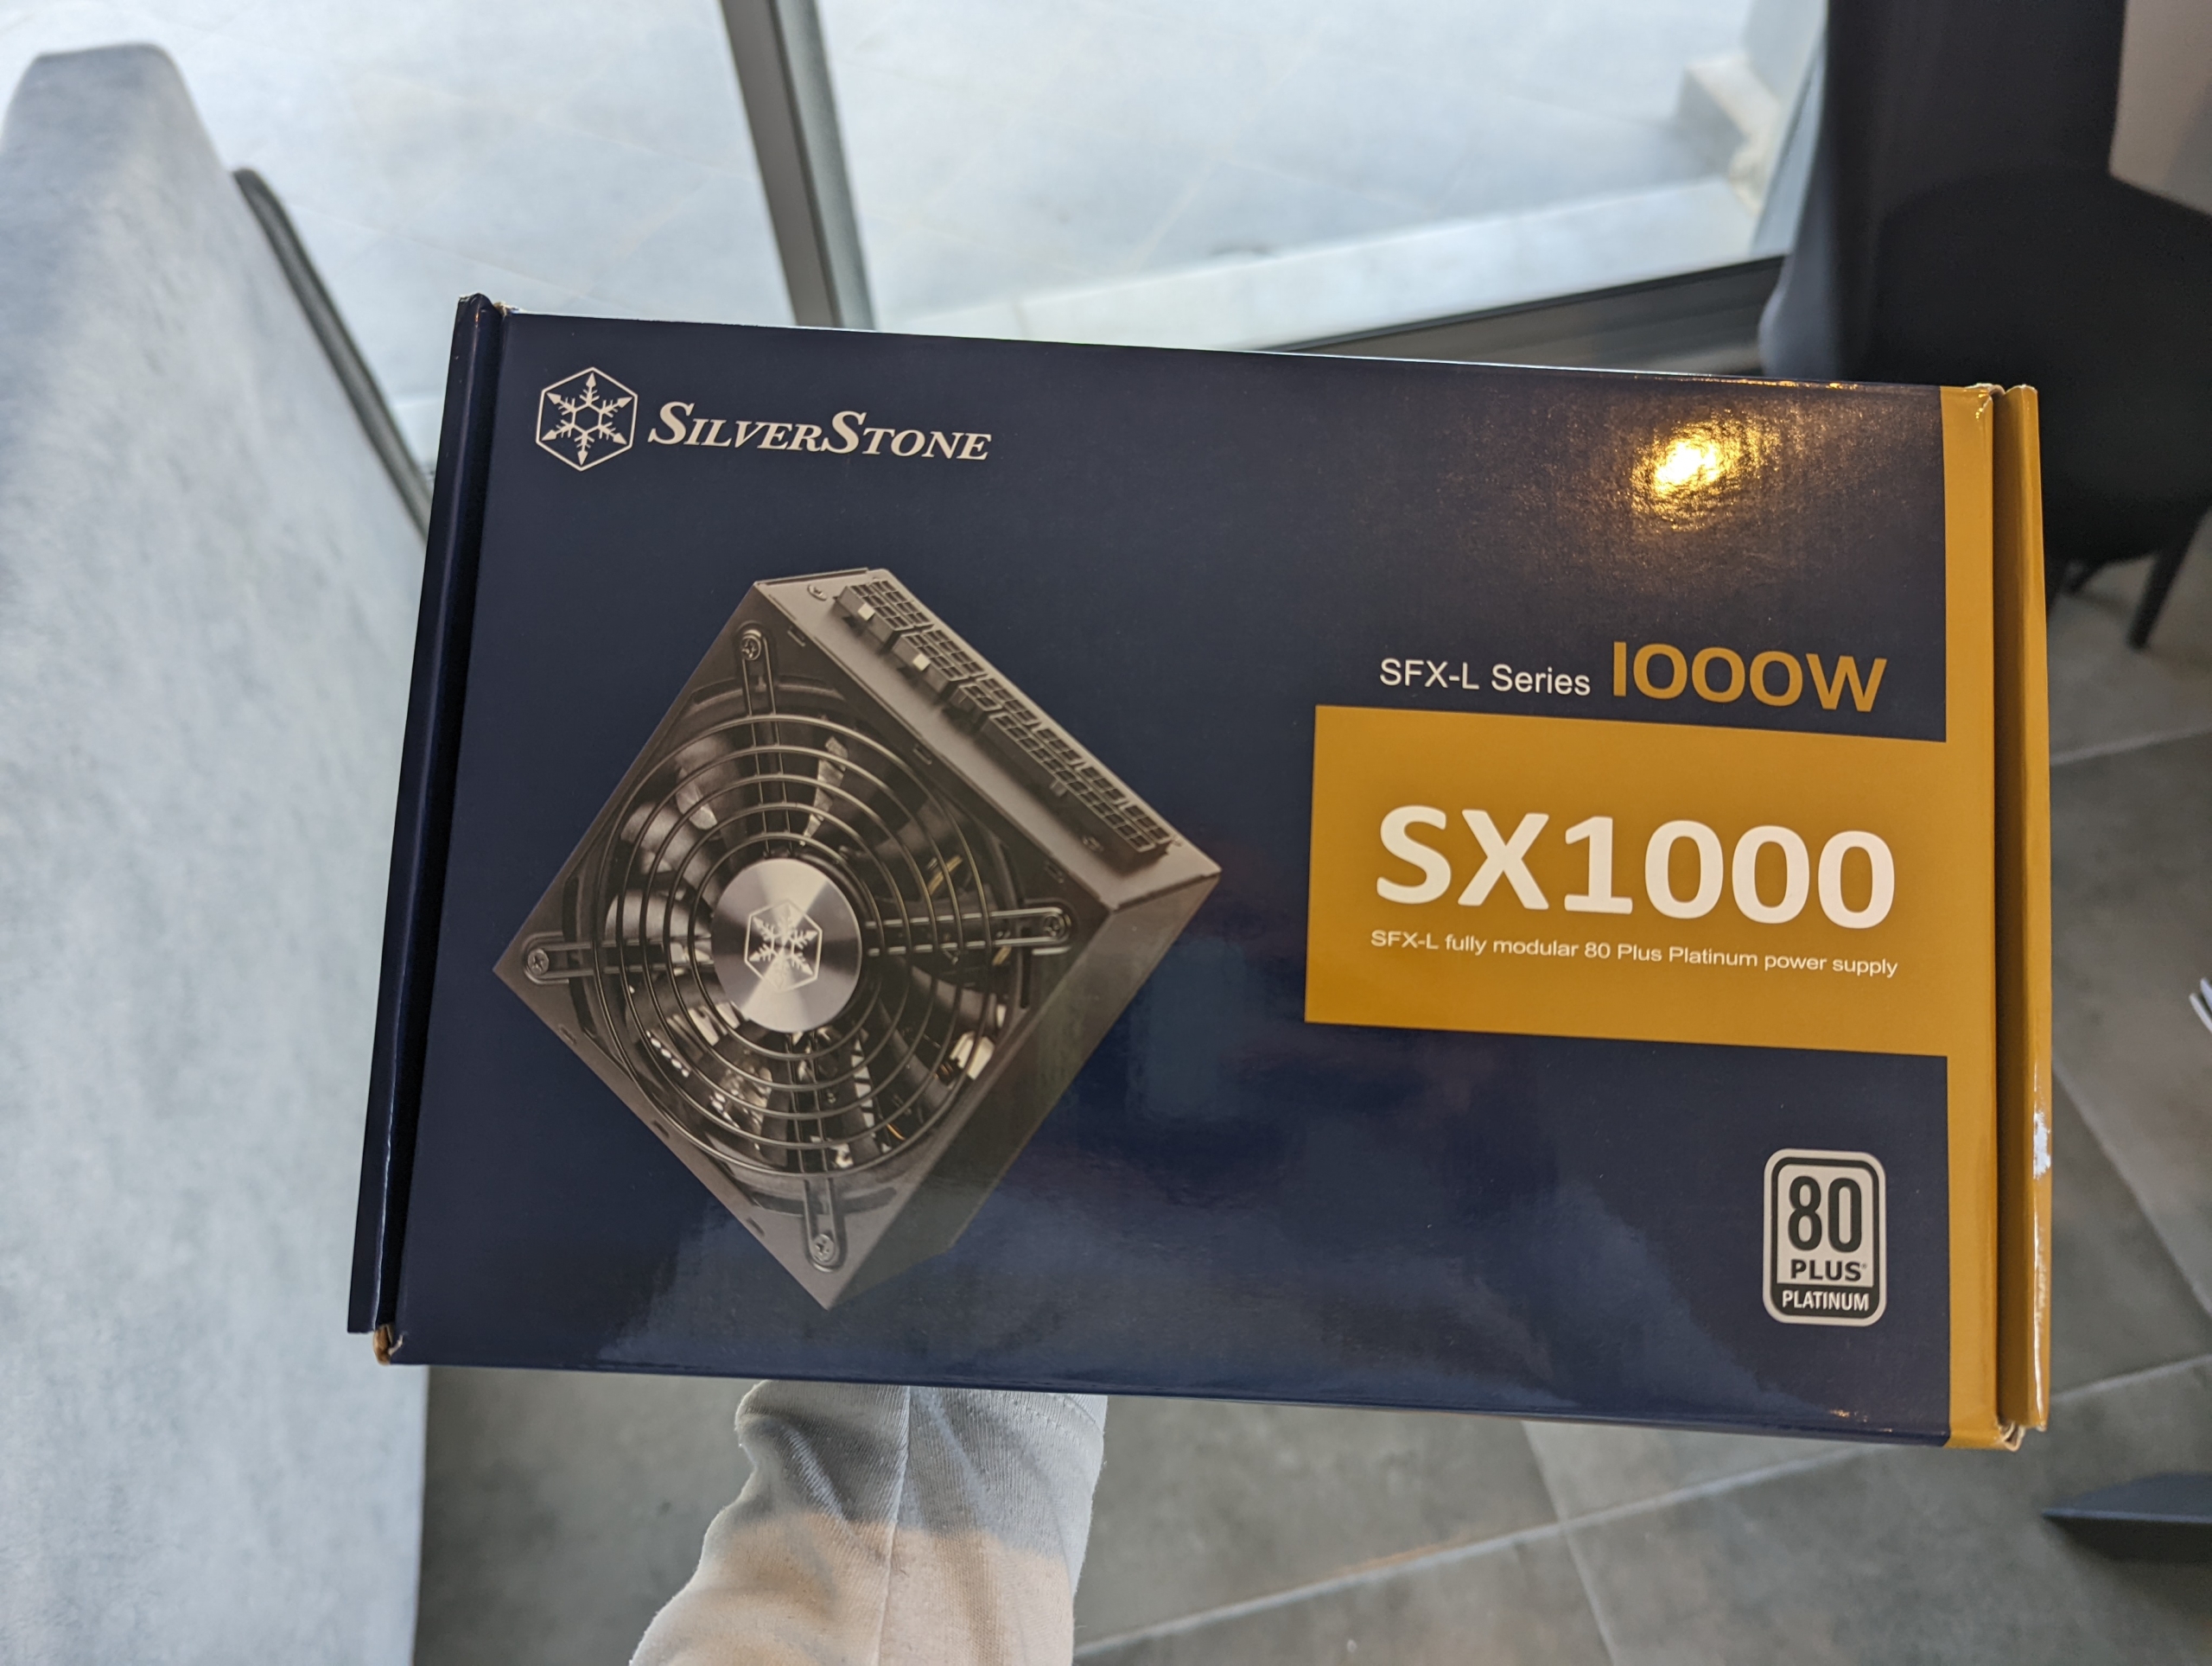
There’s no SFX / SFX-L PSU on the market that can deliver so much electricity. If I choose to add a beefy GPU to the equation, this PSU would have no problem handling it. In fact, the folks at TomsHardware managed to push it to 1480W, which is 48% more than advertised. Crazy.
Operating System (OS)
I had been using Windows for about 14 years, and then MacOS for 6 years. On this machine though, I chose to install GNU/Linux.
I’ve always found Windows way too intrusive. The constant harassment is overwhelming. I also found it buggy, and with too much messing with security patches, viruses, malware, and updates interrupting your work. Too many “Are you sure?” pop-up windows. Yes, I am sure.
Coming from Windows, MacOS felt like fresh air. I found it a lot more stable, secure, and clean. However, I absolutely hate Apple’s enforced bundling of software. There’s so much junk I can’t delete: PhotoBooth, Reminders, Messages, Mail, Music, TV, Voice Memos, Stocks, Automator, Books, Home, Siri, Chess, Stickies, Image Capture, Grapher, etc.
I don’t need it, and I don’t want to see it when navigating my computer. It sips away my energy and focus. It’s anti-productive. An OS that is constantly frustrating to use is not good. If you work from your computer, you are going to associate your work with frustration. And that is certainly not going to push you into being more productive.
So I was looking for something stable, secure, clean, intuitive, and free of the distractions that Windows or MacOS come bundled with.
Say hi to GNU/Linux Debian (Stable).
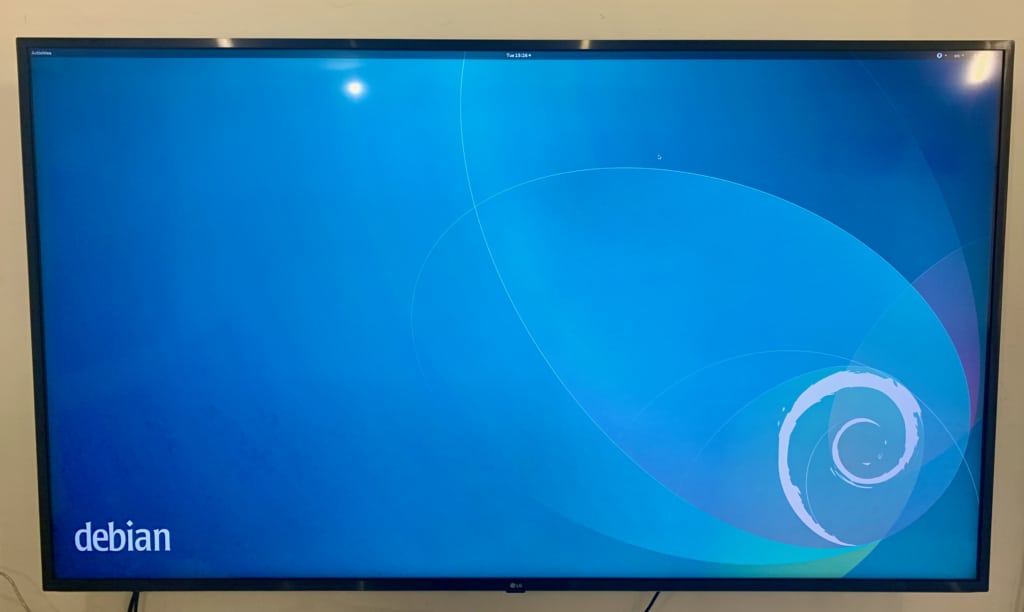
In GNU/Linux (or just Linux), you are free to customize everything. You can shave it off to your minimum needs, and get a truly clean, minimal OS. I love it. It’s an open-source OS that you control (since you can edit it however you want, even the underlying code), as opposed to the restrictions imposed by closed OS’s like Windows or MacOS.
As Richard Stallman wrote, it is demoralizing to live in a house that you cannot rearrange to suit your needs. GNU/Linux is the opposite. You will do better work when you like the environment that you work in.
I made my Debian installation very minimal. I don’t need much – just a browser, writing software, PDF reader, etc. Unlike on Windows or Mac, there’s not a lot now to get lost in or distract me from my work. I never truly realized how much time I spent navigating on Mac or Windows until I started using Linux. The abundance of steps needed to navigate the computer were truly astounding compared to what I now have.
Now that I made the switch to an open-source, free (as in freedom) OS like GNU/Linux Debian, I can’t see myself ever going back to a bloated OS like MacOS or Windows. I find the simplicity refreshing and liberating.
On one drive, I installed the Debian (Stable) distribution. I like it because it’s very stable, and stability is crucial for a production machine. On the other drive I installed Arch, which I’m toying with in order to learn it.
As for software, there’s pretty much everything you need.
For Scrivener-like writing, I downloaded Manuskript. I installed Xournal, which has the simple annotation tools I need to add dates, text, and signatures to PDFs. To quickly edit my images, I use Shotwell. Libre Office is replacing Microsoft Office. GIMP or Krita replaces Photoshop (I use GIMP). For managing passwords, I’m using KeePassXC.
And there’s a million other apps – all of them free.
Give GNU/Linux a try. I can’t see myself ever going back.
Working Environment
Having a clear, decluttered space helps you avoid decision fatigue. When you have a lot of clutter around your working space, your brain constantly reacts to that stimuli. You get tired. You are less productive.
When you have a lot of stuff lying around, you’re also going to constantly move and shuffle objects around, just like windows on a small screen. It will take you more time to find what you need. To increase your workflow, make sure your working space is as clean as possible.
If you use a monitor (and not a wall-mounted TV), I highly recommend a standing desk. Such a desk will help you cycle between sitting and standing throughout your workday, which is essential for both your comfort and health. Again, I use an Ergo Desktop Kangaroo:
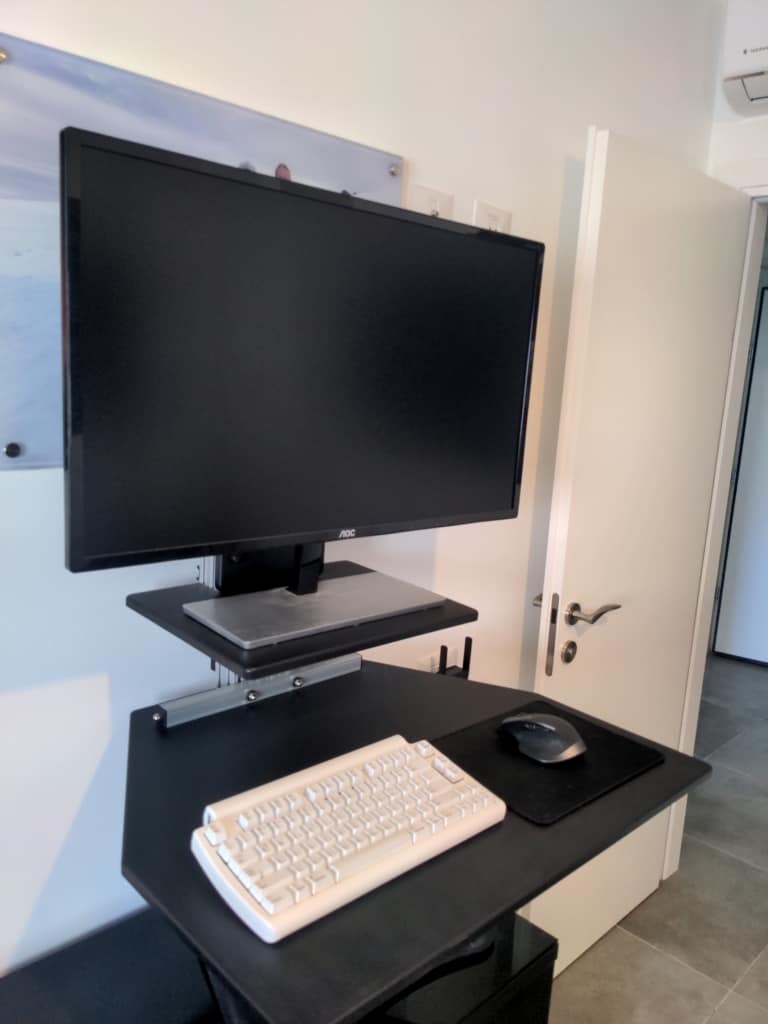
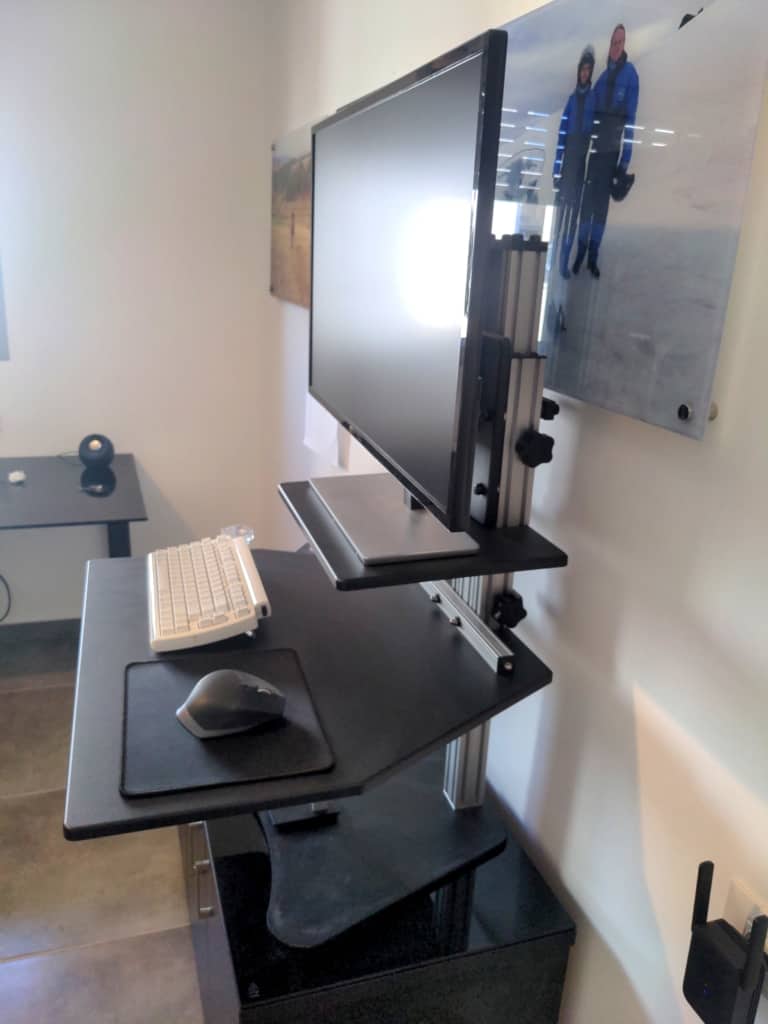
Research has associated prolonged sitting with a higher risk of a host of problems, including heart disease and diabetes, cancer, and premature death. Is it the sitting itself that’s dangerous, or the overall lifestyle associated with it? Well, why take the risk? If you’re concerned about being too sedentary, consider switching to a standing desk.
However, standing all day isn’t ideal either. That’s where an adjustable desk helps. It lets you raise or lower your desk to sitting or standing height. Researchers from the University of Waterloo who studied lower-back pain recommend a sit-to-stand ratio between 1:1 and 1:3. In other words, sit and stand for equal periods of time, or at the maximum – sit for 15 minutes and stand for 45 minutes within each hour.
The Kangaroo is an adjustable height desk with two surfaces, one for the monitor and one for the keyboard. You can adjust them both as you see fit. It has a stopping bolt, so that if you ever change anything you can raise it back to the exact same height. Unlike traditional standing desks, it sits on a a desk. It’s very stable, with a heavy, solid steel base. You can get one with a shelf for the monitor, or with a VESA mount(s).
Another related article you may want to read: Productivity and Ergonomics: The Best Way to Organize Your Desk.
I think we covered it all. Hopefully you now have a good grasp on how to build your own best computer for working from home. Only one thing is left now… actually being productive ;) Which is the hard part.